Category Archives: Soutien technique

Tacho Pro 2008 July PLUS Universal odometer correction on Ford Focus Step by Step

Tacho Pro 2008 July PLUS Universal odometer correction on Ford Focus Step by Step

Tacho Pro 2008 July PLUS Universal is one French favorite device to do mileage correction. It can do multi-brand cars than the other tool. See the procedure to do on Ford Focus bellow:

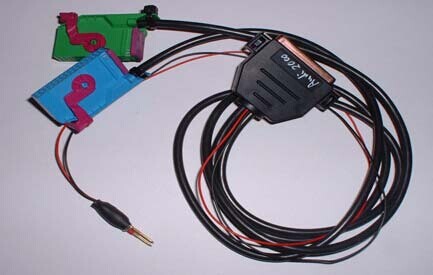
Use the Scorpio plug:
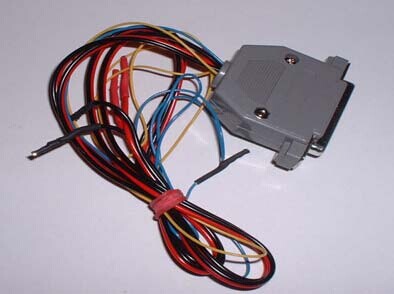
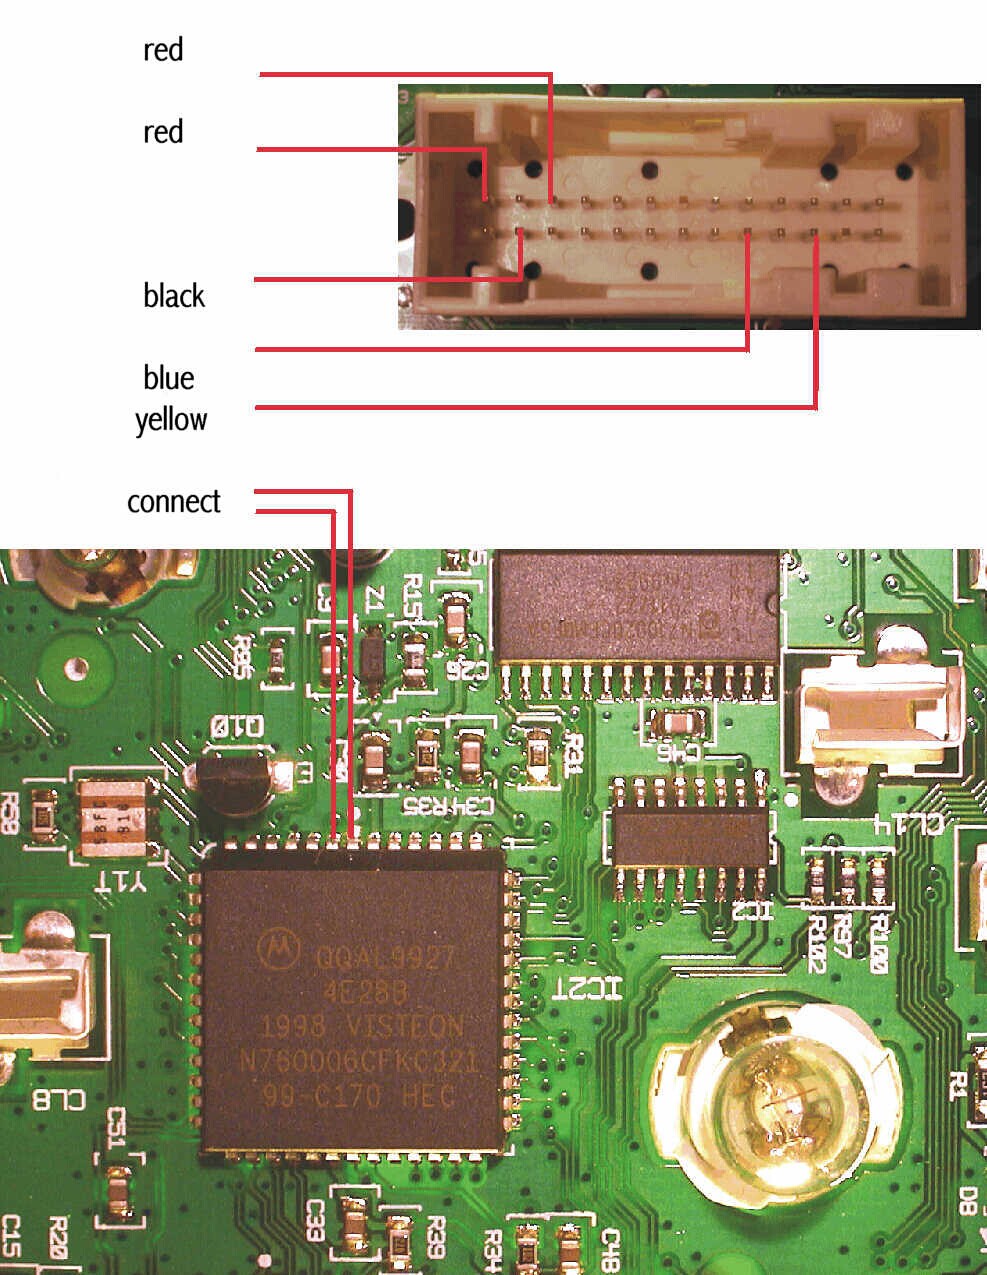
tacho-pro-2008-july-on-ford-focus-1

26pin white port
• Pin 2      GND(-)          black
• Pin 9      RX (Data)     blue
• Pin 11   TX (Data)     yellow
• Pin 14   12V (+)          red
• Pin 16   12V (+)         red

Processor version 1:
• Connect Pin 1 ( left side down) and pin 2 (right from pin 1), or connect black to test point 3 (TP3).

tacho-pro-2008-july-on-ford-focus-2tacho-pro-2008-july-on-ford-focus-3

Processor version 2:
• Connect pin 1 (middle upside) and pin 2 (left beside pin 1), or connect black to testpoint 46 (TP46).

tacho-pro-2008-july-on-ford-focus-4
• Remove the cluster and open it.
• Connect the cables as shown in the picture.
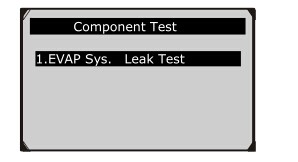
• Select the menu Ford-Focus
• The Tacho Pro 2008 July PLUS Universal shows you the old value.
• Enter the new value.
• Verify the new value with OK.

AUTEL MaxiSys Elite with J2534 ECU Preprogramming Box VCI Firmware Update

AUTEL MaxiSys Elite with J2534 ECU Preprogramming Box VCI Firmware Update

The Update section is applied for updating the VCI firmware via the Internet through the MaxiSys tablet connection. Before updating the VCI firmware, please make sure the MaxiSys tablet network connection is stable.

To update the VCI device software

1. Power on the MaxiSys display tablet.
2. Connect the VCI device to MaxiSys tablet via USB.
3. Tap the VCI Manager application on the MaxiSys Job Menu of the
display tablet.
4. Select Update from the connection mode list.
5. The current version number and the latest version number of the VCI software will be displayed after a few seconds, click Update. Now to update the VCI software if available.

How to do component test with Autel MOT Pro EU908?

How to do component test with Autel MOT Pro EU908?

The Component Test function allows initiating a leak test for the vehicle’s EVAP system. The scan tool itself does not perform
the leak test, but commands the vehicle’s on-board computer to start the test. Different vehicle manufacturers might have
different criteria and methods for stopping the test once it has been started. Before starting the Component Test, refer to the
vehicle service manual for instructions to stop the test. You can see the Autel MOT Pro EU908 component test operation from
bellow.

1) Use the UP/DOWN scroll button to select Component Test from Diagnostic Menu and press the OK button.
2) Wait for the scan tool to display the Component Test menu.

autel-mot-pro-eu908-component-test-1
3) If the test has been initiated by the vehicle, a confirmation message will be displayed on the screen.

autel-mot-pro-eu908-component-test-2
* Some vehicles do not allow scan tools to control vehicle systems or components. If the vehicle under test does not support the
EVAP Leak Test, an advisory message is displayed on the screen.

autel-mot-pro-eu908-component-test-3
4) Press any key to return to previous screen.

Autel MOT Pro EU908 Scanner: http://www.eobdii.fr/wholesale/autel-mot-pro-eu908-scanner.html.

Why to check the software driver after installation?

Why to check the software driver after installation?

Most of the customers may have the problem with the OBD2 device software installation. Once the problem showed, the first you need to check is the software driver. Why? Because the software driver is one kind of the mark to check if the software installation completed.

Today, we will show you where to check the I-2014 Multi-Diag Access J2534 Pass-Thru OBD2 driver.

Open the computer management. Then see if there is one driver like the picture showed. If it has, it means that your software installation is right and you can use the device.

driver

XTOOL X-100 PAD Tablet Key Programmer Activation

XTOOL X-100 PAD Tablet Key Programmer Activation

XTOOL X-100 PAD Tablet Key Programmer is the first tablet key programmer in the word! It not only provides customers with professional key programming, but also the most needed special functions for workshop such as odometer adjustment,oil reset/engine oil light reset,pin code reading and so on. But before using XTOOL X-100 PAD, you will need to activate. Check bellow:

1.1. Please activate X-100 PAD before you use it to test vehicles.

xtool-x-100-pad-activate

1.2. Input activation code, product serial number (each device will have a serial number and activation code), nickname (workshop’s
name or user’s nickname), login account (can be your email address or cell phone number) and password, the system will then save it. Activation is a one time process. The diagnostic application will start after activation.

BMW Multi Tool Plus BMW CAS4 Adapter EEPROM Function

BMW Multi Tool Plus BMW CAS4 Adapter EEPROM Function

EEPROM Function: Read EEPROM,Write EEPROM,Save File,Load File…

1.You should backup the CAS EEPROM before prepare dealer key. After succeed read EEPROM, please save it as back file. This step is very important. (For some part CAS system, Read EEPROM is not supported, you can go to Key Learn directly)l
2. Now can’t read the whole EEPROM for CAS3(0L15Y) system. But the main section is contained. It should be saved. When you read CAS EEPROM, it will give tips as follow(Press ok to continue):

bmw-multi-tool-plus-eeprom-1

3.After success read it, you will get:

bmw-multi-tool-plus-eeprom-2
4.Write EEPROM function is only support CAS1,CAS2,CAS3(0L01Y)system. Doesn’t support write to CAS3(0L15Y) system. (Write EEPROM to CAS2/CAS3(0L01Y) system need CAS PLUG).

About the BMW Multi Tool Plus manual, download from: http://www.eobdii.fr/wholesale/bmw-multi-tool-plus-bmw-cas4-adapter-2137.html.

Launch iCarScan Auto Diag Scanner Software Download Steps

Launch iCarScan Auto Diag Scanner Software Download Steps

Only after payment has been made successful for Launch iCarScan Auto Diag Scanner diagnostic software or software package, can the
software or software package be downloaded. You can follow the steps bellow to download the software. Learn how to buy the iCarScan software from: http://blog.eobdii.fr/how-to-purchase-the-diagnostic-software-for-launch-icarscan-auto-diag-scanner/.

1. Tap on GM logo, a screen similar to the following appears:

launch-icarscan-software-download-1
2. Tap on “Download Software”. Tap on  launch-icarscan-software-purchase-4 to start downloading.

launch-icarscan-software-download-2
3. Tap on to start downloading.

launch-icarscan-software-download-3
4. Once downloading finishes, tap on  launch-icarscan-software-download-4 to return to the main menu interface and the icon launch-icarscan-icon  of the GM logo disappears.

How to connect Lexia 3 V48 xs Evolution PP2000 to Citroen Cars?

How to connect Lexia 3 V48 xs Evolution PP2000 to Citroen Cars?

1. Look under the Citroen driver-side dashboard for the diagnostic trouble code (DTC) connection port. It is black, rectangular-shaped and roughly one inch wide by a 1/4-inch tall. It should have a small cap on it to prevent dirt from entering the connector. Quite often the cap will have the letters “DTC” embossed on it.

2. Remove the cover from the connection port and move the cover off to the side. Lexia-3 Lexia 3 V48 xs Evolution PP2000 should be attached to the port by a thin strand of plastic to prevent the cap from being lost. Plug in your Lexia 3 PP2000’s OBD-ii cable to the connection port.

3. Turn on your Lexia 3 PP2000 diagnostic toolWrite the codes down from the Lexia 3 PP2000 Peugeot Citroen Diagnostic tool, once you have them, as you will need to refer to them during the troubleshooting process that is easy to contact and use it.

lexia-3-diagnostic-pp2000-on-citroen-connect

LEXIA 3 PP2000 Works well on Citroen C5:

lexia-3-diagnostic-pp2000-on-citroen-1lexia-3-diagnostic-pp2000-on-citroen-2

2015 VVDI2 Commander Key Programmer Full “cabinet file” error solved!

2015 VVDI2 Commander Key Programmer Full “cabinet file” error solved!

Question:
Hi, Shelly. I followed the instruction to installl the VVDI2 Commander Key Programmer software. But the software installation failed. It prompted the error message as bellow: “The cabinet file “disk1.cab” required for this installation is corrupt and cannot be used. This could indicate a network error, an error reading from the CD.ROM, or a problem with this package. “. Please tell me what to do now.

vvdi

Answer: Please redownload the VVDI2 Commander software from: http://www.mediafire.com/download/m62v057w56686d9/vvdi2-commander-key-programmer-software-v1.0.8.rar. From the error message, the problem may caused by the anti-virus software or the internet. Before you install the software again, do not forget to uninstall the anti-virus software or close the anti-virus software. Any question, contact sales@eobdii.fr.

How to do Model Audi A3/S3 VDO model 2000 cluster plug with Tacho Pro 2008 July PLUS Universal?

How to do Model Audi A3/S3 VDO model 2000 cluster plug with Tacho Pro 2008 July PLUS Universal?

To recognize model 2000, take a look at the clock. If it is electronic, it is model 2000, if it is mechanic it is an older model.
Use this plug:

tacho-pro-2008-plug-for-audi-a3

Tacho Pro 2008 July PLUS Procedure:
1. Remove the cluster.
2. Connect the blue and the green plug to the instrument.
3. Select the menu Audi-A3-A3 2000-Diagnosis 2000.
4. The Tacho Pro 2008 July PLUS shows you the old value.
5. Enter the new value.
6. Verify the new value with OK.

Note:
If the displayed value is not correct, you can continue programming, most time it works anyway.
You cannot destroy anything. If you cannot change the value this way, you have to program by clip.