Category Archives: Outils De Diagnostic Appareils

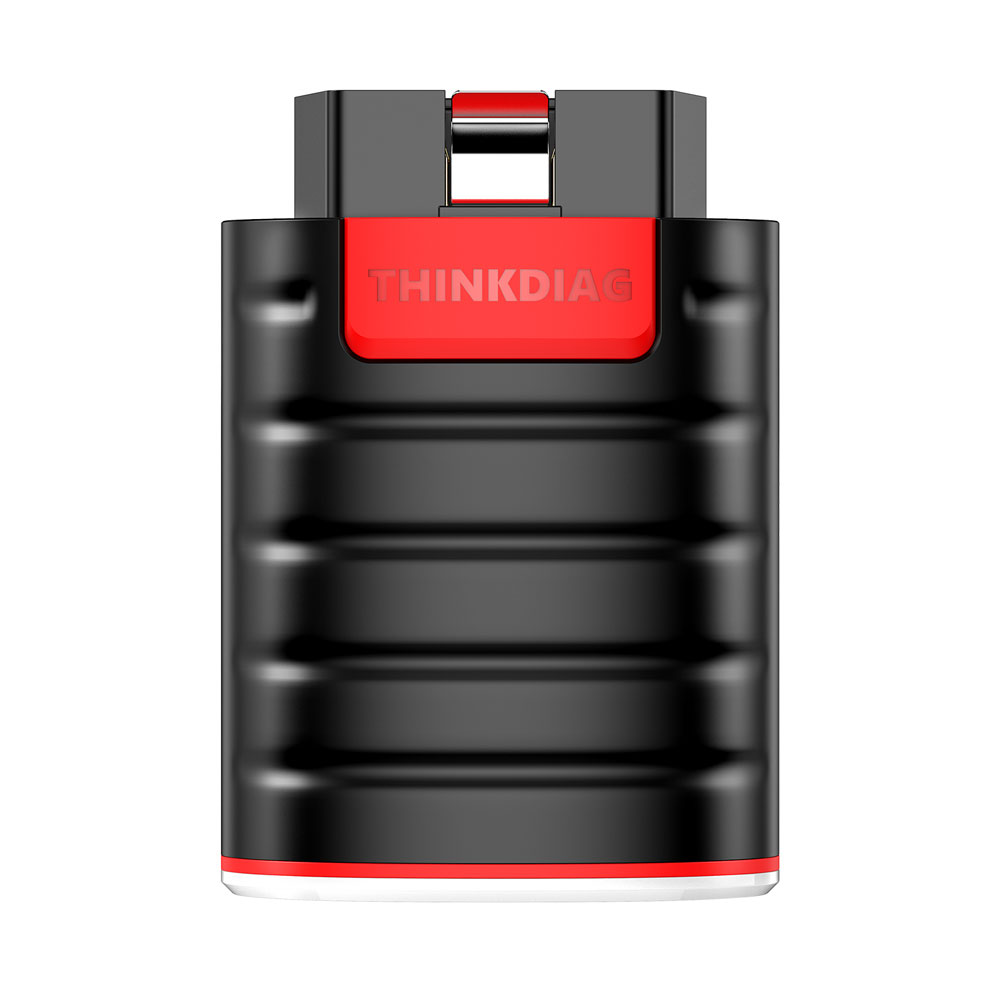
Configurer votre appareil THINKDIAG pour la première fois

Configurer votre appareil THINKDIAG pour la première fois

Ici, nous partageons quelques étapes sur la façon de le configurer

1. Téléchargez l’application ThinkDiag :
Recherchez « ThinkDiag » dans l’App Store ou Google Play. L’application ThinkDiag est GRATUITE à télécharger. (comme le montre la figure ci-dessous)

2. Connectez-vous ou inscrivez-vous :
Si vous avez déjà un compte Thinkcar Tech, veuillez vous connecter avec votre compte Thinkcar Tech ; Si vous n’en avez pas, veuillez créer un compte. Veuillez noter qu’un compte Thinkcar Tech est commun à tous les produits de la société Thinkcar Tech.

Comment créer un compte :

Ouvrez l’application ThinkDiag, cliquez sur « S’inscrire ». Saisissez votre nom d’utilisateur, votre e-mail et votre code de vérification (qui sera envoyé à l’e-mail que vous avez saisi), puis créez votre propre mot de passe. Cliquez sur « S’inscrire » et terminez.

3. Activez un périphérique ThinkDiag :
Après l’enregistrement, il y aura une notification de “Code d’activation”. Cliquez sur « OK » pour ouvrir la page d’activation, vous devez saisir le numéro de série et un code d’activation à 8 chiffres de votre appareil ThinkDiag.

4. Téléchargez le logiciel de diagnostic :
Après l’activation, accédez à « ThinkStore » pour télécharger le logiciel de diagnostic. Chaque appareil ThinkDiag est livré avec 1 logiciel de diagnostic GRATUIT pendant un an. Veuillez sélectionner le logiciel en fonction de vos véhicules et télécharger le logiciel correspondant.

5. Insérez le périphérique ThinkDiag dans le port OBDII de votre véhicule :
Habituellement, le port OBDII est situé sous le tableau de bord, au-dessus de la pédale côté conducteur. Voici les 5 positions communes du port OBDII (comme indiqué dans la figure ci-dessous). Insérez le périphérique ThinkDiag, il y aura un voyant vert qui indique que le périphérique est sous tension.

6. Connexion Bluetooth :
Ouvrez l’application ThinkDiag, elle recherchera automatiquement l’appareil activé et se connectera via Bluetooth dans l’application.

7. Commencez à utiliser votre appareil ThinkDiag :
Après la connexion Bluetooth, vous pouvez utiliser toutes les fonctions de votre appareil ThinkDiag telles que : tous les diagnostics des systèmes, les fonctions de maintenance et de service, les diagnostics OBD II, les diagnostics à distance Thinkcar.

Xtuner Testeur de circuit nouvellement publié PT101

Xtuner Testeur de circuit nouvellement publié PT101

PT101 Features:

Protection design for safety

Read results on the LCD screen

Read results on the LCD screen

Circuit tester with multi-function

Four diagnostic modes for 12v ・ 24v

Support multiple vehicles and after-sales warranty

Large and colorful LCD screen, easy to navigate the user menu

Supply power and ground for functional component test

AC-RMS, AC Peak to peak, frequency and pulse width for signal test

Digital voltmeter with min/max voltage capturing

Displays up to 60 volts and resolution of 0.01 volt

8 amp circuit breaker protection, automatically reset, no button to push

20 foot power lead and extra 20FT extension cable

Ergonomic housing design with rugged and water resistant specification

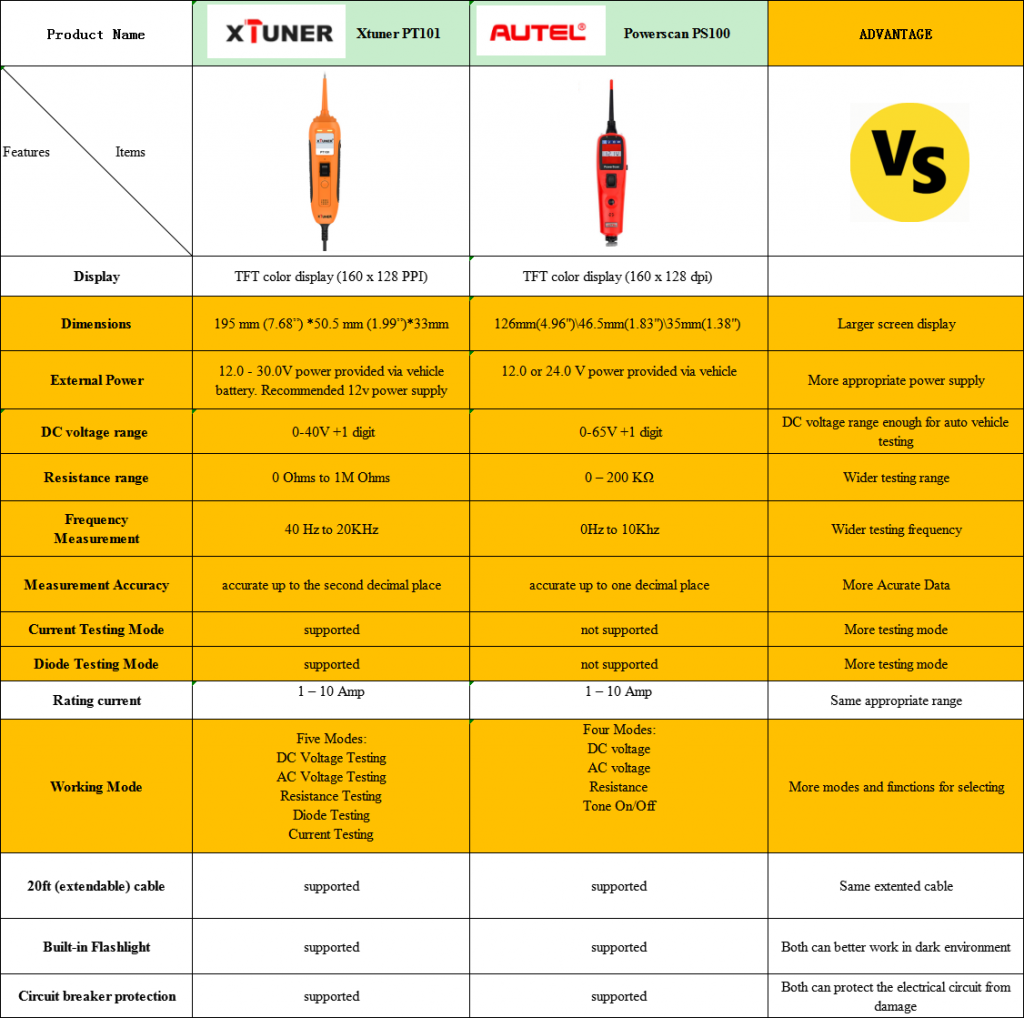
Some customers wants to know the difference between PT101 and Autel PS100

Here is the difference

HOW TO SOLVE RENAULT CLIP V184 V185 RLT2002 CONNECTION PROBLEM (ORI OR CLONE)

Hello
For those who have a connection problem with interface RLT2002 (ori or clone Renault CANCLIP interface)
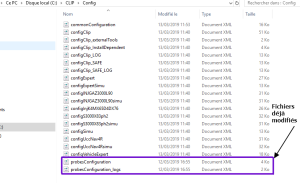
You must modify 2 files in version 185 (Computer >>> Disk C >>> Clip >>> Config):

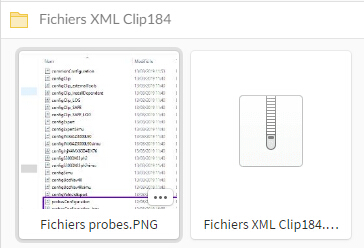
– probesConfiguration

and – probesConfiguration_logs (normally both at the bottom)

If you are in V184, recover these 2 files, install the V185 and modify the files

DO NOT REPLACE THE “VIMI” FILE …….

Small Reminder: If a Clip Version is already installed on your PC DO NOT REPEAT activation procedure

Files in pj (no pass, just a thank)

Good diags

Fichier XML Clip 184 download:

https://mega.nz/#F!dEpkTQKZ!LLcV-JFbZZnmNPYOyDddww

renault-canclip-184-download

Fichiers probes:

renault-can-clip-Fichiers-probes-300x183

Renault CAN CLIP 185 download: free but need luck

https://mega.nz/#!vJNG1CLD!dkOnUYrqT1sX_Oy_quwqURni9VjDRxCd9QizJazwD08

Renault CAN CLIP 184 download: free but need luck

https://mega.nz/#!zy4GkYjY!aFThOQLDNXOC44k-ARRego-R3RCKnAHt3EUBNzWxppY

Renault CAN CLIP 183 download: tested 100%, no issues

http://www.cardiagtool.co.uk/renault-can-clip-v127-cd-update-software-free-ship-2562.html

renault-can-clip1-300x188RENAULT-CAN-CLIP-2-300x188

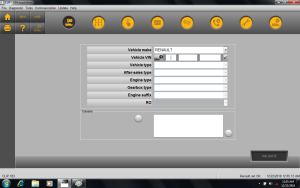
renault-can-clip-3-300x188

confirmed to work perfectly with Renault CAN CLIP china clone, including item no. sp19-asp19-c, sp19-d, sp19-e

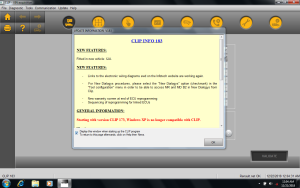
Renault CLIP 183 update info:

NEW FEATURES:

Fitted in new vehicle: XJA.

NEW FEATURES:

– Links to the electronic wiring diagrams ewd on the Infotech website are working again.

– For New Dialogys procedures, please select the “New Dialogys” option (checkmark) in the “Tool configuration” menu in order to be able to access MR and MD B2 in New Dialogys from Clip.

– New warranty screen at end of ECU reprogramming

– Sequencing of reprogramming for linked ECUs

GENERAL INFORMATION:

Starting with version CLIP 173, Windows XP is no longer compatible with CLIP.

Warning :

Maintenance of the PANASONIC CF19 MK3 ceased in March 2018 and they can no longer be registered.

Maintenance of the Tecra A11 and CF19 MK2 ceased in January 2017 and they can no longer be registered.

Starting with DVD CLIP 161, reprogramming with a battery tension lower than 13V is no longer possible.

You absolutely have to connect a battery charger to the vehicle.

Three charger are currently available:

– Ateq BC512 (with or without printer), link: https://www.renault-equipment.com/bc512-15a-automatic-charger.html

– Acctiva Fronius Professional Flash 50A, link: https://www.renault-equipment.com/fronius-automatic-battery-charger-approved-for-new-vehicles-preparation.html

– GYS Flash 50-12HF (rather favourable), link: https://www.renault-equipment.com/gysflash-50-12-hf.html

Please make sure you have this battery charger before starting any work.

Order via your retailer or via the catalogue for Garage equipement: www.infotech.renault.com or www.renault-equipment.com

HOW TO INSTALL VAS5054A ODIS WINDOWS 10 64BIT

Possible to install VAS5054A ODIS on Windows 10 64 bit system?

Replied by a fellow at the mhh forum:

i don´t know if ODIS works on win10 because i never test it, but i did test the VAS5054 64bit PASSTHRU
drivers on win10 PRO, and as the picture show, it is working and was detected by ForScan.

If ODIS install on Windows 10 than it will also work with the 5054 together with this drivers as a PassThru interface.

Some people report error installing this drivers on win10, for me they install and are working,
maybe different versions of win10 (or after updates) give that errors.

forscan-windows-10-64-bit-768x341

One more update, ODIS 5.0.3 on same Win10 64bit with Vas5054 as PassThru,
the 64bit drivers are the ones on this thread.

I try just to see if works, but i don´t advise as win10 give many error at start, and also
i have to make several attempts to finally see it open with no mistakes or error.

This way you can use 64bit Windows (Win 7 is the best) to install ODIS,
and still be able to use your old and “fantastic” Vas5054 interface as PassThru.

vas5054a-odis-windows-10-64-bit-768x480

Attach odis release notes:

odis_releases-768x354

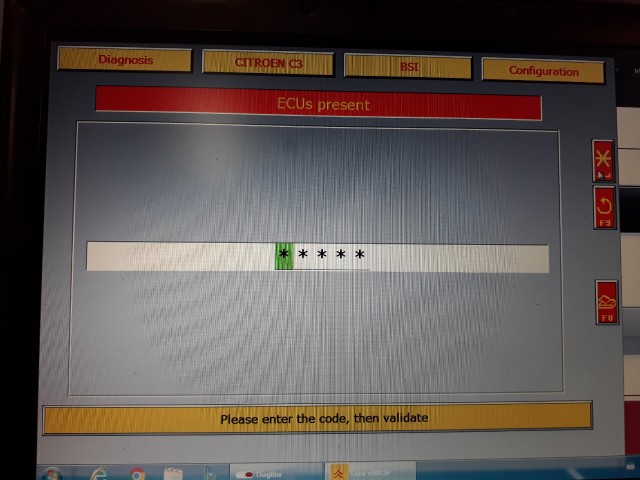
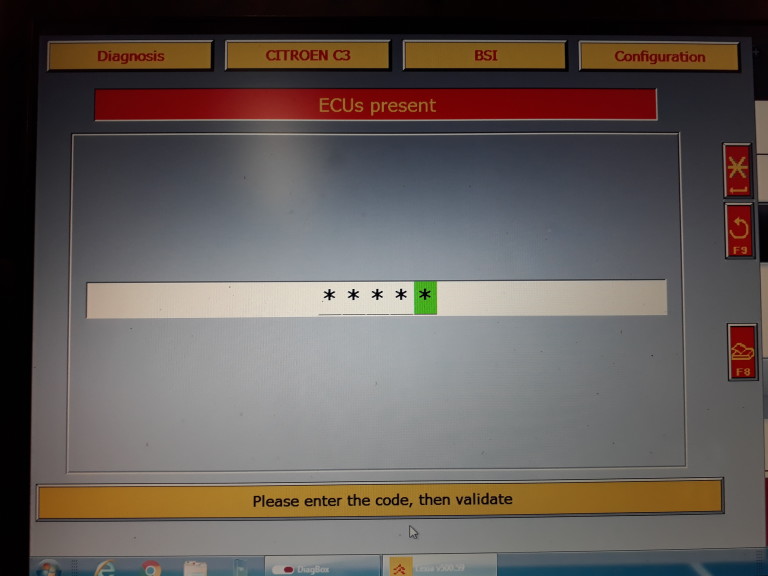
HOW TO DO DIAGBOX TELECODING ON CITROEN C3 2003

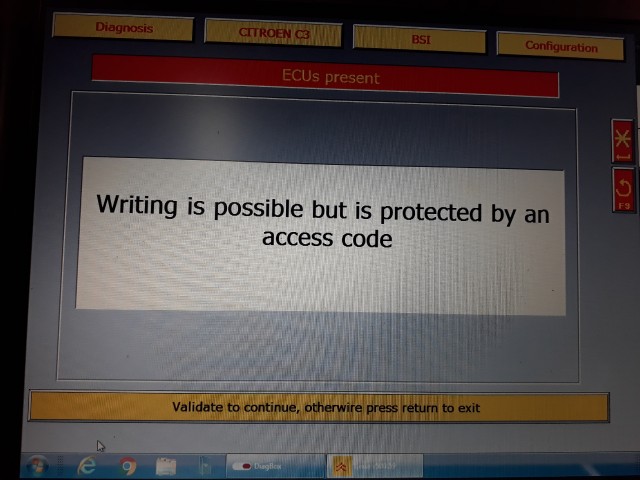
Success! Have done Diagbox telecoding on Citroen C3 2003.

car = Citroen C3 2003
ECU = Sagem S2PM-380
BSI = F02-00 Siemens Eeprom 95160
diagbox-telecoding-citroen-2

diagbox-telecoding-citroen-3

diagbox-telecoding-citroen-4

Telecode, Citroen

03114

DiagBox Telecoding tips and guides

Some people have complained about not being able to “Telecode” in newer versions of DiagBox (v7.63+), but they said that they were able to “Telecode” using (v7.62) and older.. Upon comparisons and helped by information released by others on various forums, the reasons seem to be in the Vehicle files (From A7 to Z9) in folders:
“C:\AWRoot\dtrd\tree\Vehicle\ ” and “C:\AWRoot\dtrd\tree\Vehicle\SUREQ\ ”

These files (that need to be edited for all PSA cars) are too many (hundreds according to some and thousands according to others), but they are TEXT editable, and if you look into them you will find few lines indicating their “Telecoding” function and saying something like:
——————————
<SubTree posc=3 posl=8 destc=3 destl=10 ident=19 FileName=”script_telexx_ManualTelecodingConnected.s” IsCritical=”NO”>
<FilePath path=”TeleXX_TPM”>
</FilePath>
</SubTree>

Note:

When you have this information “posc=3 posl=8 destc=3 destl=10”
it’s mean pos(col,line) = (3,8) , dest(col,line) = (3,10)
you can find also destyes(c,l) or destno(c,l)

so you if you have dest(c,l) = (3,10), you will find next action with pos(c,l) = (3,10)

In file, you start at “<Start dest(c,l)” and step by step you arrived to “<End pos(c,l)”
——————————
These (4) lines do NOT exist in DiagBox releases where you CAN perform Telecoding.. So, I am not sure if the best option is to remove/comment them or to change IsCritical=”NO” to IsCritical=”YES”..
Also, they are preceded or followed by a script starting like this:
<Act posc=a posl=b destc=x destl=y ident=z>
<MathAndLogic>
<Assignment>
<Source>
…….
…….
</Source>
</Assignment>
</MathAndLogic>
</Act>

If the 4 lines are removed from the script file, then the values of “destc=x” and “destl=y” in the “<Act ..” statement are replaced by the values in the “<SubTree ..” of the removed statement. I don’t know what does the value of “destc=..” represent, but “destl=..” seems to represent the number of characters between quotations in “FilePath path=” statement.

I have also noticed that few files have been removed from newer DiagBox releases and if you copy them from v7.62 and older to the same location in the newer DiagBox versions, they work. Examples:
“a08can_feux_brouillard_surequipement_install_desinstall.s” in “C:\AWRoot\dtrd\tree\Vehicle\SUREQ\A08CAN\BSI”
Or,
“tlcd_fullprocedure_PR00.s” and “tlcd_fullprocedure_PR01.s” in “C:\AWRoot\dtrd\tree\Vehicle\SUREQ\A9\BSI”

I understand that some people are working on this issue, but because the effort is so huge, I thought users may also take ownership and attempt to enable and test “Telecoding” on their own cars themselves, which is quite easy. This will help speed up creating a database of modified files sooner (if they report their modifications and share their experiences). But remember, before editing any file, it is wise to make a backup copy..

The problem is that the cars are not listed by name, but by code!!! So I have attached a “PSA_CAR_Codes” list. I cannot vouch for the accuracy or completeness of the list and members are invited to contribute, correct and/or improve it. For example:
T84 is Peugeot 3008 and X7 is Citroen C5 etc…

Hint
The name of the sub_folder indicates the “Telecoding” area in the car (like BSI) and the name of the function in the file indicates what does it do.

As always, I have posted this thread in line with my strong belief in the principle of “Sharing Knowledge and Empowering Users”.. After all, this is a “Forum” not a download site!!

Attachment: PSA car codes

Citronn vehicles Codes-Names

M33 C-Elysee II

B5 C4 I

B3 C-Quatre I Phase II

B618 C3 III

B71 C4 II

B75 DS 4

B753 DS 5LS

B754 DS 6

B73 C4L

B58 C4 Picasso I

C58 C4 Picasso I Phase II

CS15 Aircross Concept

B78 C4 Picasso II

E3 C4 Cactus

B81 DS 5

J4 C4 Aircross

X7 C5 II

X6 C6

G9 Jumpy II

K0 Jumpy III

2CV TPV

DS VGD

BX XB

AX S9

ZX N2

XM Y3

XM ph2 Y4

Xsara N6

Xsara ph2 N7

Xantia X1

Xantia ph2 X2

Saxo S8

Evasion/806 : U60

807/C8 V

C5I X3

C5I ph2 X4

_________________

==========================

Peugeot vehicles Names-Codes :

Peugeot 106

Phase 1 / 3 portes : S10

Phase 1 / 5 portes : S11

Phase 2 / 3 portes : S20

Phase 2 / 5 portes : S21

Peugeot 107

Toutes silhouettes : B0

Peugeot 108

3 portes : B30

5 portes : B31

Peugeot 1007

Berline : A08

Peugeot 205

Toutes silhouettes : M24

Peugeot 206

3 portes : T10

5 portes : T11

SW : T12

Sedan : T13

CC : T16

Peugeot 206+

3 portes : T30

5 portes : T31

Peugeot 207

3 portes : A70

5 portes : A71

SW : A72

CC : A76

Peugeot 208

3 portes : A90

5 portes : A91

Peugeot 2008

Crossover : A94

Peugeot 301

Berline : M33

Peugeot 306

Phase 1 / 3 portes : N30

Phase 1 / 5 portes : N31

Phase 1 / Sedan : N33

Phase 2 / 3 portes : N50

Phase 2 / 5 portes : N51

Phase 2 / Break : N52

Phase 2 / Sedan : N53

Peugeot 307

Phase 1 / 3 portes : T50

Phase 1 / 5 portes : T51

Phase 1 / SW : T52

Phase 1 / Sedan : T53

Phase 1 / CC : T56

Phase 2 / 3 portes : T60

Phase 2 / 5 portes : T61

Phase 2 / SW : T62

Phase 2 / Sedan : T63

Phase 2 / CC : T66

Peugeot 308 (2007 > 2013)

3 portes : T70

5 portes : T71

SW : T72

CC : T76

Peugeot 308 (2013 > �)

5 portes : T91

SW : T92

Peugeot 3008 (2009 > 2016)

Crossover : T84

Peugeot 3008 (2016 > �)

Crossover : P84

Peugeot 405

Phase 1 : D6

Phase 2 : D7

Peugeot 406

Phase 1 / Berline : D83

Phase 1 / Break : D82

Phase 1 / Coup� : D85

Phase 2 / Berline : D93

Phase 2 / Break : D92

Phase 2 / Coup� : D95

Peugeot 407

Berline : D23

SW : D22

Coup� : D25

Peugeot 408 (2010 > �)

Berline : T73

Peugeot 408 (2014 > �)

Berline : T93

Peugeot 4007

SUV : I3

Peugeot 4008

SUV : J3

Peugeot 508

Berline : W23

SW : W22

Peugeot 5008 (2009 > 2017)

Monospace : T87

Peugeot 5008 (2017 > �)

Monospace : P87

Peugeot 605

Phase 1 : Z6

Phase 2 : Z7

Peugeot 607

Phase 1 : Z8

Phase 2 : Z9

Peugeot 806

Monospace : U60

Peugeot 807

Multiplexage VAN : V2 VAN

Multiplexage CAN : V2 CAN

Peugeot iOn

5 portes : S3

Peugeot RCZ

Coup� : T75

Bipper

Utilitaire : MCVU

Tepee : MCVF

Partner (1996 > 2008)

Utilitaire : M49

Ludospace : M59

Partner (2008 > �)

Toutes silhouettes : B9

Expert (1995 > 2006)

Phase 1 : U64

Phase 2 : U65

Expert (2006 > 2016)

Toutes silhouettes : G9

Expert (2016 > �)

Toutes silhouettes + Traveller : K0

Boxer (1994 > 2002)

Toutes silhouettes : X23

Boxer (2002 > 2006)

Toutes silhouettes : U5

Boxer (2006 > �)

Toutes silhouettes : U9
WHERE TO BUY AUTO DIAGNOSTIC TOOLS WITH TAX FREE?

Auto scan tools with Tax or Duty FREE, where to:

http://www.eobdii.fr/producttags/ship-from-eu.html

Items here are shipped from the warehouse in UK.

Save a lot! You will pay for the items you want only, not for the consumption.

Fast delivery! The item is shipped from UK, benefiting a lot to you guys in Europe!

Tax-FREE items:

V178 Renault CAN Clip Diagnostic Interface

【Livraison UE sans taxe】Nouveau ACTIA Multi-Diag 2016 MULLER Multidiag ACCESS XS Valise Diagnostic No Need Activation

【Livraison UE sans taxe】Version Française Launch X431 V 8 inch Lenovo Tablet Wifi/Bluetooth Système Mise à Jour En Ligne 2 Ans

【Livraison UE sans taxe】Version française AUTEL MaxiDAS DS808 KIT Tablet Diagnostic Tool Full Set soutien mettre à jour

Customer can click the link for more informations


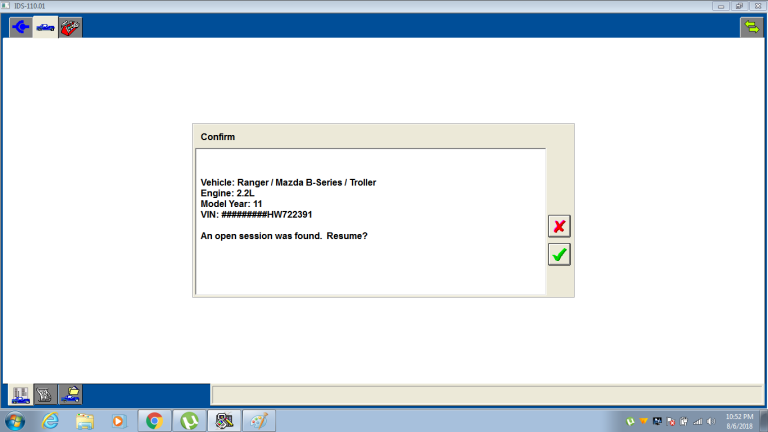
FORD IDS 110 REVIEW: 2011 RANGER/MAZDA B SERIES/TROLLER 2.2L – DIAGNOSIS ALL OK

Ford IDS 110 install – I see this solution on internet as attacked file. Everyone can try and confirm the result. Hope it can help someone! Here is the released web I found:

How to install Ford IDS 109 software:

1- Install the ids 86 before changing the date to 1 07 2015

(hold the date 1/7/2015 ,, until you finish step 5

every time you restart your computer, check the date, if it is on 1/7/2015)

2- Install patch ( choice option 2 )

3- Make a backup of your windows system (I recommend, this is optional)

4- Open the program with the interface connected ,,( choose NON DEALER,when open program for first time ) , keep vcm2 turn on,on the computer.

5 – Create a restore point,,,then turn off vcm of the computer

6 – Okay, now install the new version, v109.01, before installing, changing the date of your computer, to the current day

7- After installing, go back to the restore point, which you created in step 5, activate this restore point, and then open the program

8- Finally, install FordExtendProgram (click right mouse button click on, run as administrator)

I have tried IDS V110 on 2011 Ranger/Mazda B series/Troller 2.2L

Its diagnostic is all ok.

ford-ids-110-mazda-768x432

Mega link:

https://mega.nz/#!ZOYGiSxT!_M02WlSt48iCvZimlK2a-V50vsZa5schHq3V5Zrrlsg


How to install FVDI J2534 ?

FVDI J2534 is new released from Fly obd company and it can instead of Ford VCMII to do ford models diagnosis and so on

But how to install FVDI J2534 ? 

Here we share steps for our customers

I.Download and Install the IDS software
Download address

https://www.fordtechservice.dealerconnection.com/vdirs/wds/diagnosticsites/vcmdvd/mcs/idssoftware.asp

Step 1: Download the latest release IDS software and save it to local.

Step 2: Install the latest release IDS software

Double-click the “IDS-100.01_Full.exe” to start installation
Select language,and click “next” button. Clicking “yes” or “next” all the time until it will jump out a windows that let you reboot the computer.

II.Install the FVDI J2534 software

Get FVDI J2534 software and double-click the “”FVDI J2534 for Ford IDS Setup.exe”software
Select Setup Langeuage and Click “Ok”
It will install SVCI Based software list, Click “next”directly, and then Click “next” all the time untill it jump a window “Select Setup Language”, which is selected the device driver’s installtion language.
Install the device driver,and click “Next”all the time untill installShield wizard complete, and then click “finish”.
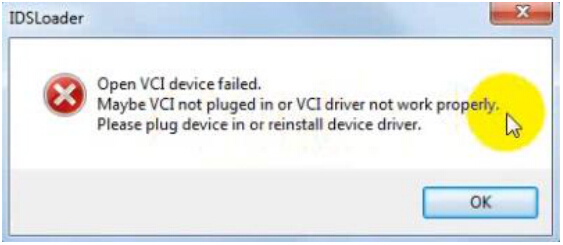
When you open FVDI J2534 for ford software after installtion, an error window will pop out. That means you have not connect your device with your computer, as show in the below.

fvdi-j2534-for-ford

Connect your device with computer,and the FVDI J2534 software will be opened normally.

Note:

Cannot open the IDS software on the desktop directly,it is recommmended to delete the IDS software shortcut on the desktop.
There is no sequence between IDS software installation and FVDI J2534 software installation

How to Get FVDI J2534 equipment software

How to Get FVDI J2534 equipment software

You can get the FVDI J24534 software in two ways,First,you can find these softwares in the CD when you receive the FVDI J2534 equipment.,Second,you can download these softwares by yourself throught the download link(http://flyobd.com/shop/download-center) in our official website .

Note:The software in the download link is always up to date.
3.1.1 Get FVDI J2534 equipment software from compact disc(CD)

Put the CD in the computer CD drive

Wait a while before opening the CD in the resource manager,you will see the equipment related software and resources.

1


3.1.2 Get FVDI J2534 equipment software from official website download link

Access to http://flyobd.com/download-center/

Please register and log in

Download FVDI-J2534-FM (FM,Short for Ford and Mazda)

Download IDSFord or IDSMazda

2
Download the latest release IDS software and save it to local.

3

3.2 Install IDS and FVDI J2534 software
3.2.1: Install the latest release IDS software

Double-click the “IDS-110.01_Full.exe” to start installation

Select language,and click “next” button

4

Wait a while,and the following windows will pop out,click “Yes”,then click “next”

5

Select “i accept the terms of the license agreement”, and then click “next”, and then click “next”, and then click “install”. The installation process will take some time,please wait patiently.

7

Reboot your computer after installation

8

3.2.2 Install the FVDI J2534 software

Open compact Disc and find FVDI-J2534 software and double-click the “FVDI_J2534_Ford_Setup.exe” software

9

Select Setup Langeuage and Click “Ok”

10

It will install SVCI Based software list, Click “next” directly, and then Click “next” all the time untill it jump a window “Select Setup Language”, which is selected the device driver’s installtion language.

11

Install the device driver,and click “Next” all the time untill install Shield wizard complete, and then click “finish”.

12

When you open FVDI J2534 for ford software after installtion, an error window will pop out. That means you have not connect FVDI J2534 equipment with your computer, as show in the below. connect your device with computer,and the FVDI J2534 software will be opened normally.

13

when you put FVDI J2534 equipment to connect the computer and open the software,

it will pop below error message, it means you do not connected vehicle ECU module and the ECU voltage can not less than 8 volts. After using the OBD interface of FVDI J2534 to connect the ECU,and the software can be opened normally and put into use

14

2018 Newest FVDI J2534 Diagnostic Tool for Ford Mazda better than VCMII

2018 Newest FVDI J2534 Diagnostic Tool for Ford Mazda better than VCMII

comparison between fvdi j2534 and others

FVDI J2534 Highlights:
a)High speed host communication. (3M bps)
b)Stable host communication. (with RTS/CTS flow control)
c)Automatically register software and no virtual machine needed.
d)Online software update and keep software latest always.
e)Online firmware update.
f)USB/802.11 selectable host communication.
g)Support ELM327 software by one device.
FVDI J2534 Comparison with other devices:
a) Ford/Mazda IDS
fvdi j2534 vs ford mazda

a) Toyota TIS

fvdi j2534 vs toyota tis

b) Honda HDS

fvdi j2534 vs honda

FVDI J2534 Technical Specifications:
a) Voltage & Current requirements
8~32VDC, 100 mA (max), 0.6 Watts @ 12 VDC Note: protected against reverse battery polarity
a) Vehicle Protocols ISO9141 ISO14230
J1850 VPW
J1850 PWM(Ford SCP) ISO11898 HS(500K BPS) ISO11898 MS(125K BPS) ISO15765 HS(500K BPS) ISO15765 MS(125K BPS)
FEPS(Flash EEPROM Program Signal) Honda SCS
Honda DIAGH KWP1281 J2819(TP2.0)
b) Supported software for J2534 Ford IDS V110
Mazda IDS V108 Toyota TIS V13.00 Honda HDS V3.102
Land Rover/Jaguar SDD2 V153
Nissan CONSULT III plus R2R V80.11
c) Supported software for ELM327 ELMconfig
Forscan FOCCCUS FF2
d) Vehicle Connection Molded DLC3(OBDII-16)
e) Dimensions
H:22mm (0.87in) W:54mm (2.13in) L:76mm (2.99in)
f) Weight
50g (1.76oz)
g) Environmental
Operating: -20ºC to 45ºC (-4ºF to 113ºF) at 15% to 85% RH non-condensing
1. Appearance details
fvdi j2534 interface appearance
LED:
Work normal: Green LED blinks continuously slowly Firmware updating: Red LED blinks continuously quickly
PS Push Switch:
Pressed: works as ELM327 mode Released: works as J2534 mode
Package includes:
1pc x FVDI J2534 Diagnostic Tool