Monthly Archives: June 2018

Comment faire un diagnostic en utilisant OBDSTAR X300 DP Plus

Comment faire un diagnostic en utilisant OBDSTAR X300 DP Plus

3 HOW TO DIAGNOSE
3.1 CONNECT VCI CONNECTOR

Procedure to connect VCI connector:

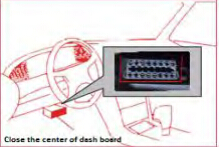
1.Locate vehicle’s DLC socket. The DLC (Data Link Connector or Diagnostic Link

Connector) is the standardized 16-pin connector where diagnostic code readers interface with the vehicle’s on-board computer. The DLC is usually located 12 inches from the center of the instrument panel (dash), under or around the driver’s side for most vehicles. If Data Link Connector is not located under dashboard, a label should be there telling location. For some Asian and European vehicles, the DLC is located behind the ashtray and the ashtray must be removed to access the connector. If theDLC cannot be found, refer to the vehicle’s service manual for the location.

1

2.Plug the diagnostic connector into the vehicle’s DLC socket (It is suggested to use the OBD 2 extension cable to connect VCI connector and DLC socket.). For non-16PIN DLC socket, please select the corresponding non-16 pin connector adapter, then plug the non-16pin end of the adapter into the DLC socket, and then connect the standard 16pinend VCI connector.

3.2 DIAGNOSIS FLOWCHAT

For new users, please follow the 3.1 to get familiar with and start using this device. connect the diagnostic connector –>user registration–>user login–>download or upgrade software–>select function or vehicle type–>proceed diagnosis

3.3 USER REGISTRATION &DIAGNOSTIC SOFTWARE DOWNLOADING

3 .3.1 User registration
Click to enter diagnostic software, select “the user information” in “Settings”

menu, then enter user registration window. As shown in following photo:

2

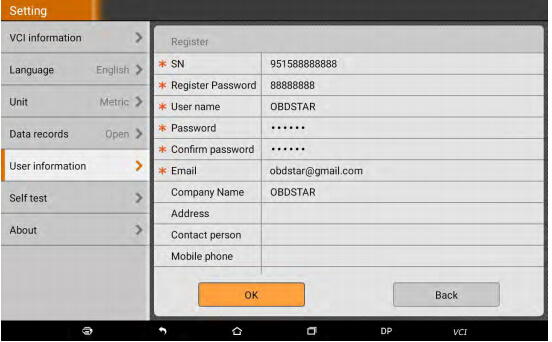
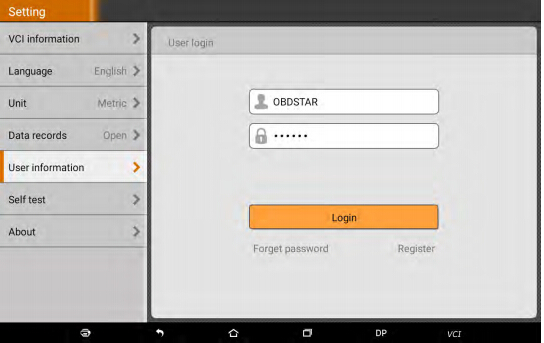
Fill in the information in each field (Items with * must be filled). After inputting, tap “OK” If you have registered to be a member, click “the user information” to enter user login page, as following picture shown:

3

3.3.2 Download diagnosis software

Tap “One Key Upgrade” to enter one key upgrade page, as following picture shown:

4

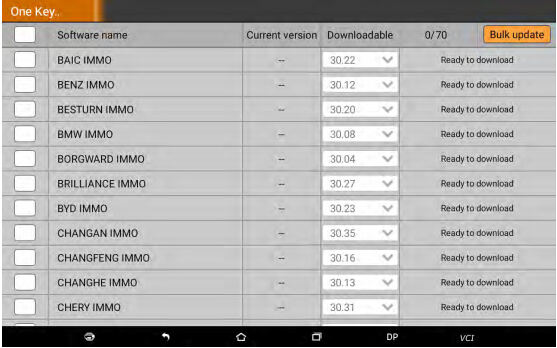
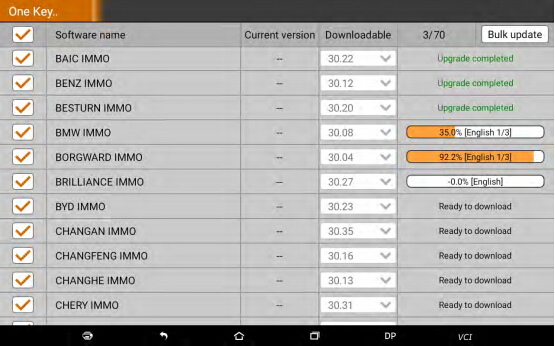
Tap “One Key Upgrade” to start downloading, enter main interface after finishing downloading. (Notes: Ensure internet connection is normal when updating. Besides, because of many software, it may take several minutes, please wait patiently) If need to cancel a software, just tap corresponding Check Box as following picture shown:

5

3.3.3 Diagnostic software main interface introduction

6

7
Function menu included as follows:
Diag Program: operate as a diagnostic tool.

Maintenance Database: Provides abundant automotive technology, handbook and repair case for your reference.

Video Center: to guide users by video.

One Key Upgrade: To download diagnostic software or upgrade diagnostic software to the latest version.

Settings: It includes VCI information, language, unit, data records, user information, help, about.

Remote assistance: Realize remote hosting operation.

Report Center: Record maintenance data and diagnostic report.

Inspection Camera: To do a complete detection via flexible tube with HD camera into the vehicles.

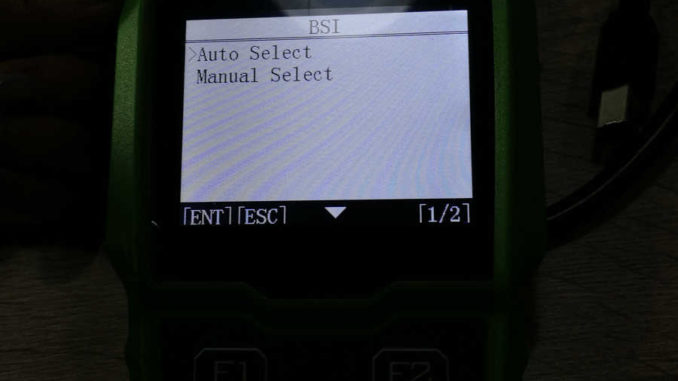
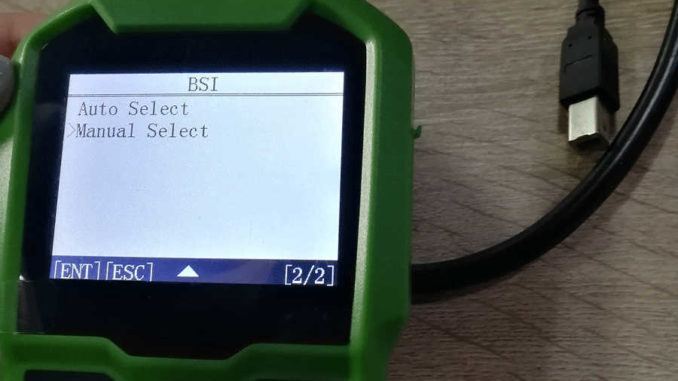
3.4 START DIAGNOSING
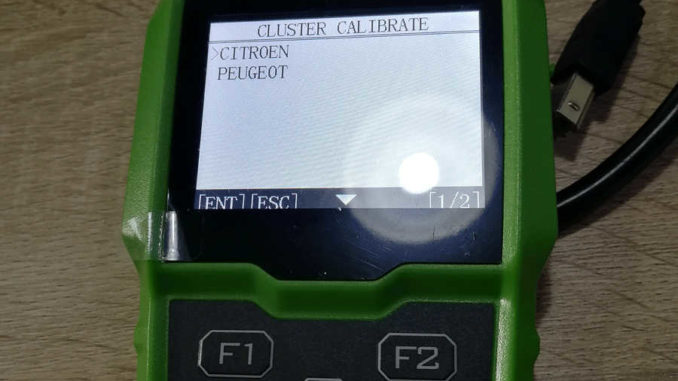
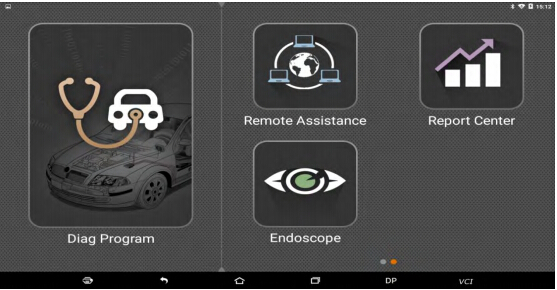
Tap on the main menu screen, and then choose “Diag Program” to enter the function selection and vehicle selection page. As following photo shown:

8

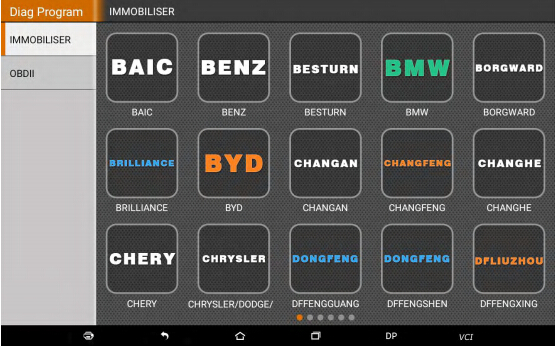
Hereinafter, take OBDII for example, to introduce how to start diagnosing.

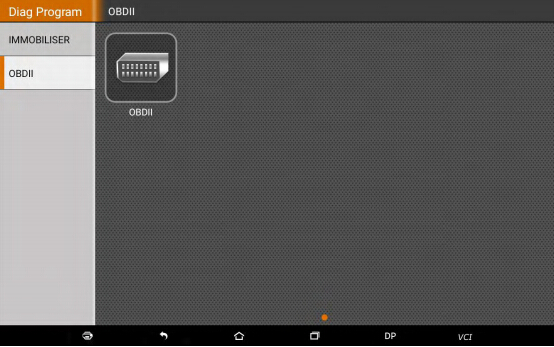
Tap “OBDII”, and tap “OBDII” icon. As following photo shown:

9
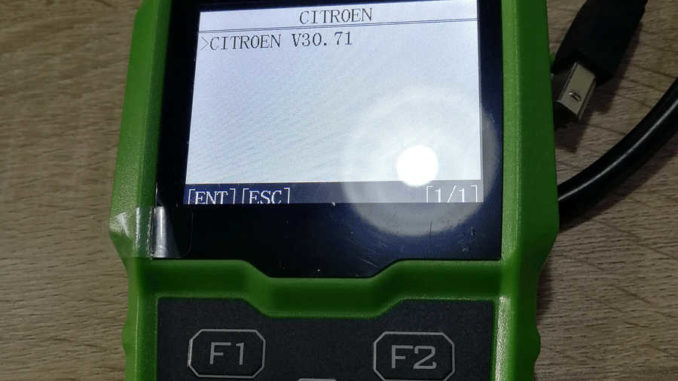
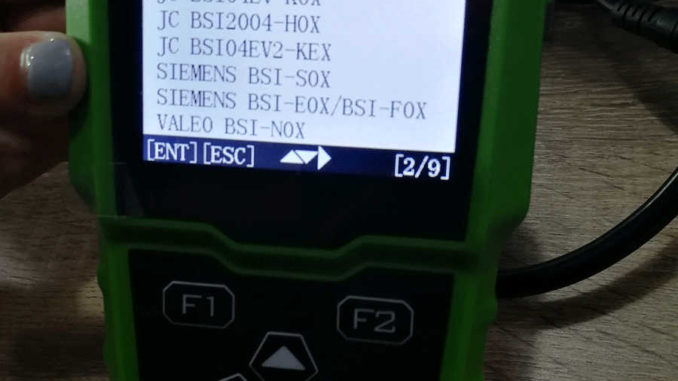
To select software version, as following photo shown:

10
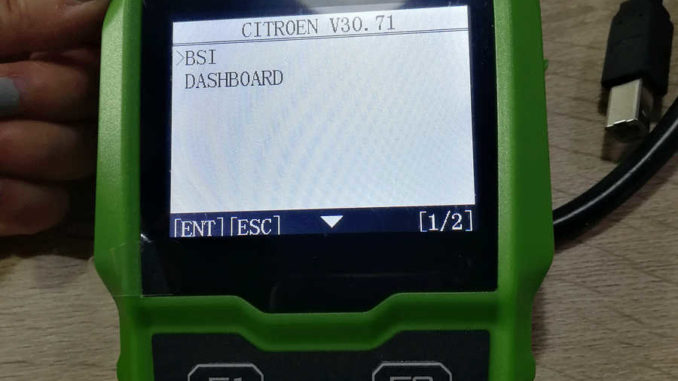
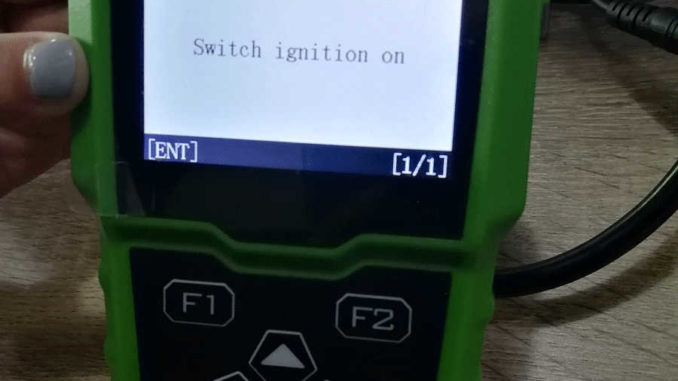
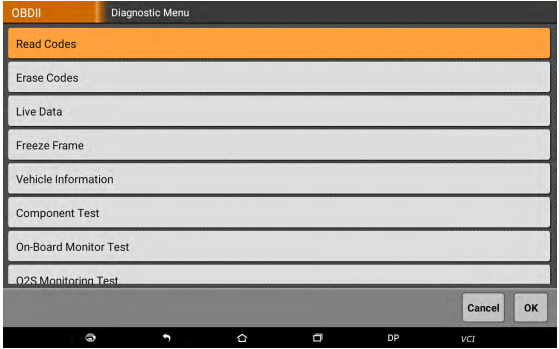
To enter diagnostic function menu, as following photo shown:

11
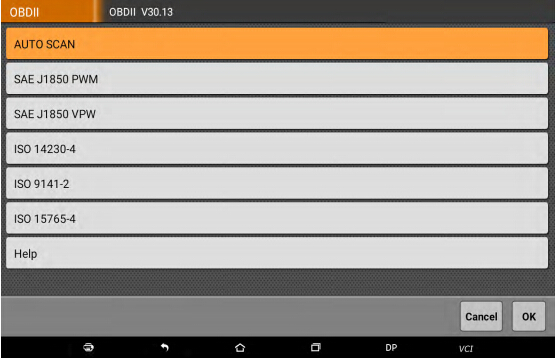
To select AUTO SCAN, as following photo shown:

12

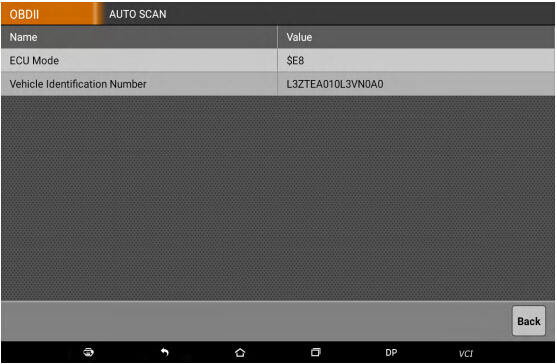
3.4.1 Read vehicle information

Tap “Read vehicle information”, as following photo shown:

13

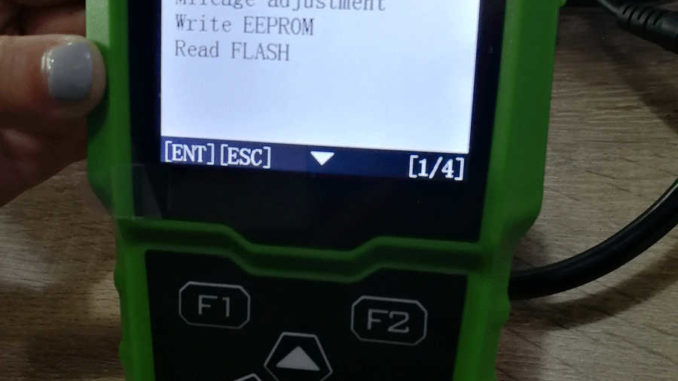
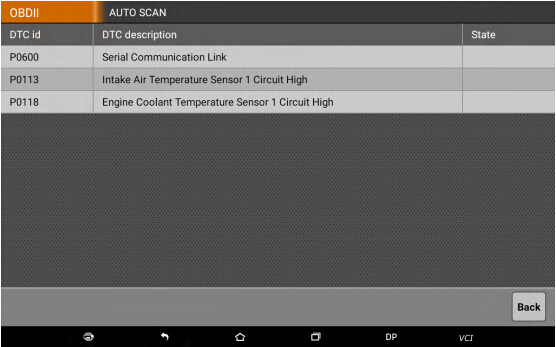
3.4.2 Read trouble code

Tap “Read trouble code”, as following photo shown:

14
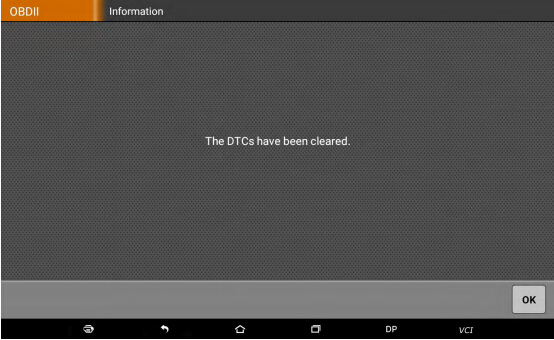
3.4.3 Clear trouble code

15

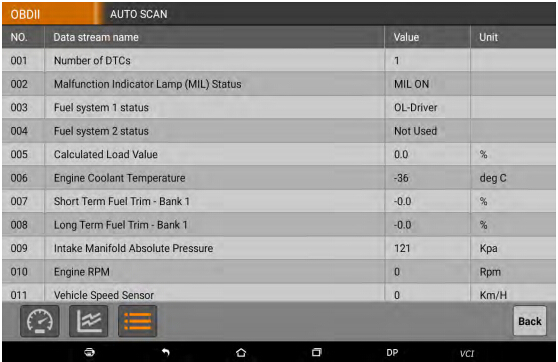
3.4.4 Read data stream

16

17

Comment tester la bobine d’induction clé pour X300 DP Plus

1.Functional Overview

Induction Coil is used to detect key induction coil failure of the vehicle.

2.Application Method

Attach the induction Coil to the key induction coil,and insert the key or turn ignition on,
while induction Coil red indicator lights up and goes out,indicating the key induction coil is
good;the indicator does not illuminate to indicate the key coil is damaged,please check and repair
or replace

x300-pad2-induction-coil

How to Use OBDSTAR H108 do Calibrate Citroen Cluster via OBD

Here are the posts we share how to use OBDSTAR H108 to do Citroen cluster calibration via OBD , it’s perfectly and very easy, let’s see together :

Please Connect OBDSTAR H108 to the Citroen BSI.

obdstar-h108-citroen-cluster-calibration-1-678x381

Select”Cluster Calibrate”.

obdstar-h108-citroen-cluster-calibration-2-678x381

Model Citroen

obdstar-h108-citroen-cluster-calibration-3-678x381

obdstar-h108-citroen-cluster-calibration-4-678x381


obdstar-h108-citroen-cluster-calibration-5-678x381

Select “BSI”.


obdstar-h108-citroen-cluster-calibration-6-678x381

Auto select

obdstar-h108-citroen-cluster-calibration-7-678x381

If auto select failed, select “manual select”.

obdstar-h108-citroen-cluster-calibration-8-678x381

Select “JC BSIO4EV-KOX”.

obdstar-h108-citroen-cluster-calibration-9-678x381

Switch ignition on

obdstar-h108-citroen-cluster-calibration-10-678x381

Select “Read EEPROM”.

obdstar-h108-citroen-cluster-calibration-11-678x381

obdstar-h108-citroen-cluster-calibration-12-678x381

obdstar-h108-citroen-cluster-calibration-13-678x381

Please enter a filename to save, press the “ENT” button.

obdstar-h108-citroen-cluster-calibration-14-678x381

Operation success

obdstar-h108-citroen-cluster-calibration-15-678x381

Press the “ENT”.

obdstar-h108-citroen-cluster-calibration-16-678x381

Read Flash…

obdstar-h108-citroen-cluster-calibration-17-678x381

Press the “ENT” button.

obdstar-h108-citroen-cluster-calibration-18-678x381

Read Flash success.

obdstar-h108-citroen-cluster-calibration-19-678x381

Press “ENT”.

obdstar-h108-citroen-cluster-calibration-20-678x381

Press “ENT”.

obdstar-h108-citroen-cluster-calibration-21-678x381

Press “ENT”.

obdstar-h108-citroen-cluster-calibration-22-678x381

Input a new mileage number

obdstar-h108-citroen-cluster-calibration-23-678x381

obdstar-h108-citroen-cluster-calibration-24-678x381

Success.

obdstar-h108-citroen-cluster-calibration-25-678x381

Done.

obdstar-h108-citroen-cluster-calibration-26-678x381

Perfectly, Very happy with this OBDSTAR H108, it doesn’t let me down.

I highly recommend it, where to buy the OBDSTAR H108 ? can buy direct from:

http://www.eobdii.fr/obdstar-h108-psa-programmer-support-all-key-lost.html

2018 Nouveau OBDSTAR X300 PAD2 X300 DP PLUS C Version Supporter Mileage Correction + Maintenance Match Avec Special Function

2018 Nouveau OBDSTAR X300 PAD2 X300 DP PLUS C Version Supporter Mileage Correction + Maintenance Match Avec Special Function
obdstar-x300-pad2-dp-plus-programmer-6
OBDSTAR X300 PAD2 is a new Android-based vehicle trouble diagnostic device developed for internet applications. It inherits from OBDSTAR advanced diagnosing technology and it is characterized by covering wide range of vehicles, featuring powerful function, and providing precise result. Through vehicle diagnostic OBD connector and variant mobile intelligent terminals, it achieves vehicle trouble diagnosis for full car model and full system vehicle.
Meanwhile, taking advantage of mobile internet, this device integrates more application and service, such as Maintenance Database, remote assistant, One Key Upgrade etc.
Diagnostic Function:
1. Diagnose the electronic control system of prevailing vehicle models covering Asian, European, American and Chinese. Diagnosis functions include: Read DTCS, Clear DTCS, Read data stream, Special functions etc.
2. Classify special function: ABS, EEPROM Adapter, Battery match, CVT learning, EPB, Gear learning, Immobilizer, TPMS (low tire) reset, Cluster calibrate, ECU programming, steering angle reset.
3. Specially designed for Android platform with clear and user-friendly interface;
Hardware Advantages:
1. Built-in VCI box, communication more stable
2. 8-inch touchscreen, more intuitionistic
3. Can be charged directly via OBD interface
4. Practical and high-end gift box
5. Industrial design with silicone case
6. Back bracket design:Can prop on the steering wheel or stand on the table, easier to operate
7. With 4 Toyota simulation keys (the fifth is coming soon)
8. 3 in 1, P001 programmer: combined with EEPROM adapter + RFID adapter+ Key Renew adapter
9. Add the clip of reading SOP 8PIN EEPROM
10. Add wiring harness of ECU reading by OBD (for ECU cloning and switch activation)
Software Advantages:
I ECU Clone
1. ECU Clone, means ECU duplication.
The device copies all the data from the original vehicle ECU, and then writes all data copied into ECU with the same hardware to realize the same ECU function with the original vehicle.
2. Clone directly when replacing a new or a used ECU!
Without online matching in 4S store or removal of ECU bonding wire for reading and writing! Directly write without dismantling OBD!
3. Three features for ECU Clone:
A. Free of 4S online:
 break monopoly from 4S, benefiting automobile maintenance industry
B. Simplified operation procedures: realize foolproof operation
C. Non-dismantling with zero risks: read and write data without dismantling ECU
II: Switch activation function
(Today many instruments or audio of vehicles activate secondary power supply to go into power-on status by relevant module CAN communication on the vehicle, but sometimes an instrument or an audio is separated from vehicle CANBUS network, causing startup failure when it needs to be repaired by an auto technician. This function can simulate CAN communication to activate secondary power supply, so the instrument or the audio enters into power-on status. In this way, it not only can test and verify the instrument or the audio, but also save an enormous cost for an auto technician to purchase a large number of startup platforms of various vehicles and wiring harnesses!)
III: Add “Help” Functions
including built-in testable vehicle models, upgrade announcement, features, help notes and wiring diagrams, etc.
IV: Carlist: can directly get on the device
V:  Upgrade Announcement: all details are available on the device
VI: Customers can look up the features or uniquely support functions on the device
VII: Help notes: built-in help notes for each model or function
VIII: Wiring diagrams: built-in ECU wiring diagrams, more intuitionistic and convenient
How to use OBDSTAR X300 DP Plus Induction Coil?
I. Functional Overview:
Induction Coil is used to detect the key induction coil failure of the vehicle.
II. Application Method:
Attach the Induction Coil to the key induction coil, and insert the key or turn ignition on, while Induction Coil red indicator lights up and goes out, indicating the key induction coil is good;the indicator does not illuminate to indicate the key coil is damaged, please check and repair or replace.
obdstar x300 dp plus coil
X300 DP PLUS TECHNICAL PARAMETER
● Operation system: Android 5.1.1
● CPU: Exynos4418  Dual Core ARM Cortex A9 1.4GHz
● Battery: 3700mA, rechargeable polymer lithium battery
● Extension memory card: 32G Micro SD (TF) card supported
● Memory capacity:1GB
● Storage capacity: 32GB
● LCD: 8.0 inch
● LCD resolution: 1280*800
● Touch screen: Capacitive touch screen
● Camera: 5 mega rear view camera
● Wi-Fi: supported
● Working temperature: -10℃  ~  55℃(14℉  ~  131℉ )
● Storage temperature: -20℃  ~  70℃(-4℉  ~ 158℉ )
● Weight: about 1.0 Kg
● Dimension: 254mm*174*mm*35mm
OTHER CONFIGURATIONS:
A Package: 
Immobilizer+Special function(EEPROM+Key Renewing)Adapter(P001 programmer+C001circuit board+C002 circuit board+W001 cable+W002 data cable+W003 data cable+Toyota smart key Emulator)+others(Ignition coil+Remote tester)
B Package: 
Immobilizer+Special function(EEPROM+Key Renewing)+Mileage correction+Adapter(P001 programmer+C001 circuit board+C002  circuit board+W001 data cable+W002 data cable+W003 data cable+Toyota smarkt key Emulator)+others(Ignition coil+Remote tester)

X300 DP Plus C Package: 
Immobilizer+Mileage correction+Diagnosis+Special function (Oil rest +ABS+Battery matching+ECU programming+EPB+Throttle programming+Airbag rest+TPMS+Steering angle rest+OBDII+DPF+Injector code+Supension matching+Gear learning+CVT learning+EEPROM+Key renewing+ECU cloning)Adapter(P001 programmer+C001 circuit board+C002 circuit board+W001 data cable+W002 data cable+W003 data cable+Toyota smarkt key Emulator)+others(Ignition coil+Remote tester.
Packing List
1set X OBDSTAR X300 DP Plus 8 Inch Tablet Key Programmer

CG Pro nouvellement mis à jour soutien Porsche Key Match

CG Pro nouvellement mis à jour soutien Porsche Key Match

1.Added Porsche Key Write Function

cgdi-pro-write-porsche-key-01

Choose “Model Type:______Porsche______Chip Type

cgdi-pro-write-porsche-key-02

2、NEC Type
D70F3548
D70F3558
D70F3585
D70F3385
D70F3469
D70F3628

cgdi-pro-write-porsche-key-03

3、Motorola -9S12
9S12HA32-0M34S
9S12HY32-0M34S
9S12HA48-0M34S
9S12HY48-0M34S
9S12HA64-0M34S
9S12HY64-0M34S
9S12XHY128-0M23Y
9S12XHY256-0M23Y
9S12HZ128-3L16Y
9S12HZ256-3L16Y
9S12XEP768-4M48H

cgdi-pro-write-porsche-key-04

4、Choose”Model Type”→IMMO→Jaguar&RangeRover
BCM-XEP768
BCM-XEP100

cgdi-pro-write-porsche-key-05


Avis de KTMflash avant ou pendant l’utilisation

Avis de KTMflash avant ou pendant l’utilisation
1.Just use our software, no others
2.Please make sure there is no other ECU flash software or the device will be locked.No internet also
3.There is a software and instruction in the CD, also attached with operation video to follow
4.KTMflash is mainly on reading Infineon ECU and Gearbox [Transmission]ecu.
5.Before reading Infineon or ECU,please read unlock file.If the software shows”turn off power for 2 seconds”
make sure the power is turn off for over 2 seconds,if not, the message will show again till the time is enough
Pour plus d’informations, veuillez suivre la vidéo
https://youtu.be/AAqkZFgowPQ

Comment résoudre le problème d’inscription pour wiTech MicroPod 2

Comment résoudre le problème d’inscription pour wiTech MicroPod 2

1

Ici, nous listons les étapes pour aider à résoudre

1.Open the software Catalogue and find the original file

2

and then enter the software

2.Edit “APP-config” file

3

3.Use a new number to instead of the NO.6 and then “Save” it and Exsit

4


4.If encounter the following error, just ignore it

5

6

Finally, everthing is ok now

For more steps, you can visit the following Youtube Video

2018 Nouvelle arrivée VXDIAG VCX DoIP Jaguar Land Rover Diagnostic Tool

VXDIAG VCX DoIP Jaguar Land Rover Diagnostic Tool
vxdiag-vcx-doip-jaguar-land-rover-diagnostic-tool-7
VXDIAG VCX DoIP supports all Jaguar & Land Rover car models and year.
VXDIAG VCX DoIP Diagnostic function:
Read and clear fault codes
Read data stream
Reset maintenance service
Test parts function
Program new keys
Change a car’s configuration CCF
Program a new module
VXDIAG VCX DoIP SDD Supported model:
Land Rover 2005-2017
L538C, L319, L494, L550, L320, L322, L538JV, L359, L405, L316
Jaguar 1999-2017
X260, X150, X250, X350, X152, X351, X760, X100, X761, X400, X202
New VCX DoIP diagnostic tool is compatible with SDD to maintain and diagnose Jaguar & Land Rover; also compatible with Pathfinder to maintain and diagnose the following models:
Land Rover Range Rover L405 2017 year
Land Rover Range Rover Sport Edition L494 2017 year
Land Rover New Discovery L462 2017 year
Jaguar F-TYPE X152 2018 year
Jaguar F-PACE X761 2018 year
Jaguar XE X760 2018 year
Jaguar XE X260 2018 year
Note: Diagnostic software Pathfinder is developed for the above car models and the only
Real test Pathfinde + VCX DoIP, ECU diagnosis
vxdiag vcx doip software display 1
Real test Pathfinde + VCX DoIP , CCF function. 
vxdiag vcx doip software display 2
Real test Pathfinde + VCX DoIP, change the tire size.

KTM FLASH KTMflash ECU Programmeur Supporte V-A-G DQ200 DQ250 Infineon Bosch Pre-Order

KTM Flash ECU Programmer & transmission Powerful Upgrade Tool 
Read the chip data, change the computer, read transmission data etc, the speed is very fast.
 Highlights of KTMflash Programmer
1.Workable Transmission Model
2.Read Chinese car via OBD
3.Read BOOT mode according to the chip model
4.Read the encrypted ECU password (Read the password of encrypted ECU first, then read data)
Support Chinese car ME17 TC1728/1767 data reading & writing and password reading
Workable Transmission Model:
V-A-G: DQ200 (0AM)
V-A-G: DQ200MQB/G2 (0CW)
V-A-G: DQ250C (02E) K-Line
V-A-G: DQ250E/F (02E)
V-A-G: DQ250MQB (0D9)
V-A-G: VL300/V30 (01J/0AN) K-Line
V-A-G: VL300/V30 (01J/0AN)
V-A-G: VL381 (0AW)
V-A-G: DQ500 (0BH/0BT)
V-A-G: DL501/G2 (0B5)
V-A-G: DQ200/MQB Boot (MICRO)
V-A-G: DQ200/MQB Boot (EEPROM)
V-A-G: DQ200G2 Boot (MICRO)
V-A-G: DQ200G2 Boot (EEPROM)
V-A-G: DQ250E/F/MQB Boot (MICRO)
V-A-G: DQ250E/F/MQB Boot (EEPROM)
V-A-G: VL300/V30 BSL (FLASH)
V-A-G: VL300/V30 BSL (EEPROM)
V-A-G: VL381 Boot (MICRO)
V-A-G: VL381 Boot (EEPROM)
V-A-G: DL501 Boot (MICRO)
V-A-G: DL501 Boot (EEPROM)
V-A-G: DL501G2 Boot (MICRO)
V-A-G: DL501G2 Boot (EEPROM)
Read Chinese car via OBD:
China: Chery, Great Wall, Lifan, SAIC ME17 (ME17.8.8)
China: Chery, Great Wall, Lifan MT80 K-Line Calibration (Delphi MT80)
China: Chery, Great Wall, Lifan MT80 CAN-bus (Delphi MT80)
Read BOOT Mode According to the chip model:
Infineon: TC1762/TC1766 MICRO (1504KB)
Infineon: TC1762/TC1766 EEPROM (32KB)
Infineon: TC1792/TC1796 MICRO (2048KB)
Infineon: TC1796 MICRO+EXT (4096KB/6144KB)
Infineon: TC1796 EXT (2048KB/4096KB)
Infineon: TC1796 EEPROM (128KB)
Infineon: TC1792 EEPROM (64KB)
Infineon: TC1738/TC1767 MICRO (2048KB)
Infineon: TC1738/TC1767 EEPROM (64KB)
Infineon: TC1797 MICRO (4096KB)
Infineon: TC1797 MICRO+EXT (6144KB/8192KB)
Infineon: TC1797 EXT (2048KB/4096KB)
Infineon: TC1797 EEPROM (64KB)
Infineon: TC1724/TC1728 MICRO (1536KB)
Infineon: TC1724/TC1728 EEPROM (64KB)
Infineon: TC1782/TC1784 MICRO (2560KB)
Infineon: TC1782/TC1784 EEPROM (128KB)
Infineon: TC1793/TC1798 MICRO (4096KB)
Infineon: TC1793/TC1798 MICRO+EXT (6144KB/8192KB)
Infineon: TC1793/TC1798 EXT (2048KB/4096KB)
Infineon: TC1793/TC1798 EEPROM (192KB)
Read the encrypted ECU password (Read the password of encrypted ECU first, then read data):
Bosch: Support Chinese car ME17 TC1728/1767 data reading & writing and password reading
Bosch: BMW/MB/V-A-G GPT
Bosch: Ford/Opel/Volvo GPT
Bosch: BMW TPROT8+
Bosch: V-A-G TPROT8+
Bosch: Kia/Hyundai/Honda TPROT8+
Bosch: Chrysler/Jeep/Dodge/Fiat TPROT8+ [Test]
Bosch: VAZ/UAZ ME17.9.71
Continental: Kia/Hyundai/SsangYong SIM2K-24X/C201
Continental: Ford EMS2204
Continental: Ford EMS2207
Continental: Ford EMS2211
Continental: Ford SID208
Continental: Ford SID209
Continental: Ford Mondeo 4 SID807EVO
Continental: Ford Focus 3/Transit Connect SID807EVO
Continental: Citroen/Peugeot SID208
Kia/Hyundai: Delphi MT86 EEPROM (16KB)
Mercedes-Benz: Delphi CRD3.1 EEPROM (32KB)

How to use KTM FlASH ECU programmer Switch board? 
1. The switch board is designed to work with J2534, this device uses the Ktag cables so the user can refer to the Ktag wiring diagram.
2. Advise you use Open Port2.0 as the protocol conversion equipment and work with PC.
3. There are 3 types of Bosch Infineon ECU :
 1) The Infineon ECU before TPROT8.
 2) TPROT8-10
 3) The Infineon ECU after TPROT10 which is what we call GPT encrypted.
4. The Infineon ECU before TPROT8 is not encrypted, you directly uses the BOOT point
grounding, then follow the Ktag user manual to wire the cable and read the data.
5.For TPROT8-10,the Bosch Company set the anti-debugging mode, reading EEPROM needs no password and reading Flash needs password.
 Therefore, during the reading process, there is an extra CNF1, Boot outputs low level and CNF1 outputs high level. When reading, Boot needs to add one small resistor and ground it. CNF1 to connect one 470ohm-2K resistance, then connect 3.3V, it’s very important, otherwise the ECU will be burnout.
2 tips on reading the data:
 1) BOOT and CNF1 must be connected when reading data.
 2) Only connect BOOT not CNF1 When reading the password, otherwise the password can’t be read out. Also you can follow the Ktag wiring diagram because Ktag controls the CNF1 turn on and off, so it can’t be disconnected. When reading the password, you turn the two switches to the automatic mode, and to the On mode when reading the data, when the software prompts, you choose ” Manually” then follow the message to turn on or off.
6. For GPT encrypted ECU, the S1, S2 and Boot cable are needed to connected when reading password, and the S1, S2 don’t need to be connected when reading data