Monthly Archives: May 2018

Obdstar Outils pour Ford IMMO & Dash: Oui ou Non?

Ford and Obdstar Tools(F100,H100,X300 DP,X300 Pro3,X300M): Wich is the best
for odometer correction and which is for key programming ?

Tech support from eobdii.fr
Part1:Obdstar tools and Ford key add

Part2:Obdstar tools and Ford mileage change

Part1:Obdstar tools and Ford key programming :

Can your Obdstar H100 works for my Ford transit the year post-2014? i would programm new keys
and all key lost ?

Sorry H100 can not work on it

Obdstar X100 Pro can programm For 80 bit keys. The car is Ford F350 2008-2016

Sorry, it doesnt work.For programming Ford keys, you’d better have X300 Pro3 or X300 DP

My car is 2016 Ford Mustang GT and all keys are lost

If i buy a key fob,can H100 helps start the car with the key fob?

Yes

2007 model Australian ML Triton and a 2006 model Ford Focus

X300 Pro3 can program keys to them ?

Sorry, Obdstar has not tested on Australian models
F100 Obdstar for Ford Focus-2 prescribes the keys ? It’s the year 2005 or 2006?

NO.

Ford F150 2000 lost all keys.Any suggestions ?

Sorry, your model is too old
X300 DP pad Full: Can i read eeprom with X300 DP pad for Ford escort 1994.the car is not OBD2
Hello X300 DP works for cars via OBD

Which Obdstar tool for 2016 ford mustgang gt all keys lost ? It’s a smart key

H100,X300 Pro3 and X300 DP all work

I wanna program new keys with F100.my car is Ford Focus 2011.Can i ?
Yes,F100 supports Focus to the year 2013

Obdstar H100 supports programming remote key for Ford cmax 2015 from USA?

Yes H100 works

F-100 can program new keys to my 2001 X model(all key lost)?

Your model is old, but you can have a try via PCM menu

Can i have a Obdstar F100 for Focus 2006 and 2013 to program a new key ?
Yes
All keys are lost

Ford Fiesta 2015,Ford Mustang 2016,Transit custom 2016

Any tool can i use for adding a new key?

Yep,Obdstar H100 works
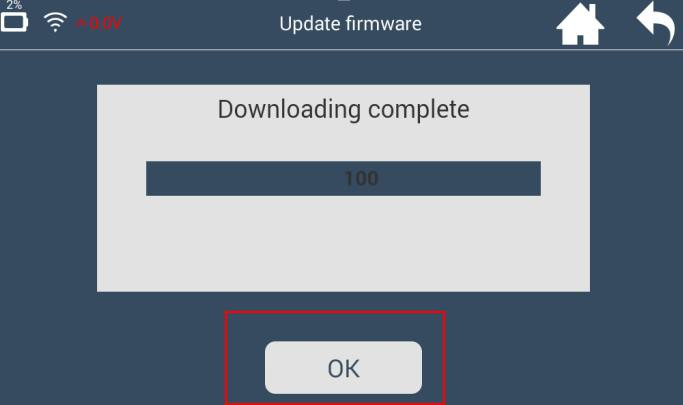
X300 DP full configuration: i tried to upload immo programm from dp300 to vci,but ford-lincoln
v32.12 fail,v32.13 fail

X300 DP on Ford transit 2013,Tab remote key,then the error pops up:

Disclaimer,user shall assume all consequences when violating the law by using the device or information
OBDSTAR will not undertake any legal responsibility

This product has certain reliability,but could not avoid possible loss and damage,and we do not
assume any responsibility

What should i do ?

Hello Professional is online to help .Remote help via Teamviewer
Obdstar X300 dp:

Subaru outbak 2008 diagnostic :failed

Volkswagen jetta 2006 srs:not connected to the dashboard

Ford Fusion change KM: failed

Please feedback with Log files.And Pros at eobdii.fr will help you out

Does X300 DP immobilizer function and remote function work for Holden and Ford Australian models

X300 DP supports Falcon only

I have 2017 Ford Ranger and 2013 Dacia Sandero

X300 DP supports both ?

X300 DP supports 2017 Ford Ranger even when all keys are lost,while 2013 Dacia Sandero is not supported

Does H100 support Ford C Max energi 2015 Sel? Try to program a new key and all keys lost ?

Yes, Obdstar H100 is able to do it
In conclusion,Obdstar X300 DP is an universal auto key programmer for not only Ford but also
many and Obdstar H100(F100) is a key tool designed for Ford Only. So X300 DP is for car repair shop
and usually H100 is for personally use

Processus de mise à niveau pour le noyau de l’adaptateur K518

Processus de mise à niveau pour le noyau de l’adaptateur K518

Après la mise à niveau de l’APK du périphérique K518 vers la version V1.6.0, l’adaptateur doit préalablement installer le nouveau noyau. S’il vous plaît se référer aux opérations ci-dessous.

Étape 1: Connectez l’appareil à l’adaptateur spécifié et branchez l’alimentation 12V, comme indiqué ci-dessous.

step1

Étape 2: Démarrez l’appareil et entrez le mot de passe pour accéder à l’écran d’accueil. Cliquez sur le bouton “Mettre à jour le firmware” dans la case rouge ci-dessous.

step2

Étape 3: L’interface suivante apparaît, cliquez sur “Install Adapter” dans la zone rouge ci-dessous.

step3

Étape 4: Il saute à l’interface ci-dessous, cliquez sur “OK” pour continuer.

step4

Étape 5: Il passe à l’interface ci-dessous. Vous verrez l’indicateur de progression se déplacer vers la droite. Lorsque le téléchargement est terminé, cliquez sur OK “et quittez. Le noyau de l’adaptateur est installé avec succès.

step5

Faits saillants de l’original Yanhua Mini ACDP-Programmation Master

Faits saillants de l’original Yanhua Mini ACDP-Programmation Master

Yanhua Mini ACDP Programming Tool is designed for module programming on BMW, MB, Audi, etc. Programming can be done without soldering but with security.

1.No need to remove chip!

2.No need to cut the line!

3.No need soldering!

4.No need to lift the pin!

5.Selftest function for adapter connection.If dont connected well,the software can not be
continued and avoid the data lost because of the touch problem.

6.Lowest risk and high protection

7.Data repair for FEM adapter

8.Every product is with soldering video to help

Here we share some pictures of Yanhua MINI Acdp

QQ图片20180528154733

If you dont know how to connect , you can click the “Help” icon, there is a video to show how to connect

QQ图片20180528154743

QQ图片20180528154749

When the connection is well, you can use ACDP  to do a selftest to check if all connection is well or not

Once one is not well, the software will not continue and the original date will be saved and not be lost

If you want more informations,please visit the following link

http://www.eobdii.fr/original-yanhua-acdp-programming-master-for-bmw-cas4-fem-bdc-160dowt-no-need-soldering.html


Comment utiliser CarProg pour Audi A3, TT, R8 tableau de bord 2010+

Comment utiliser CarProg pour Audi A3, TT, R8 tableau de bord 2010+

Here, i’d like to share a tutorial released by codecard.eu. It’s for the educational purpose only.

Car: Audi A3, TT, R8 2010+

Purpose: read/write EEPROM, change odometer, read/write immo data for key programming or dashboard cloning

Optional tools: Carprog copy version or genuine, or VVDI2 Xhorse

Tutorial:How to get CarProg to work for Audi A3, TT, R8 (2010+):
CarProg changes mileage in the car by OBDII:
Connect CarProg with A1 adapter to car OBDII.

Load A3/TT 2009-2011 OBDII software. Switch ignition ON.

Push “Prepare Unlock Dump” – odometer will be reseted to 0km.

Push “Change KM”

CarProg will show 0km

Enter new odometer value and push “OK”

Odometer correction is complete!

CarProg adds new key (if one working key exists):
connect CarProg with A1 adapter to car OBDII.

Load A3/TT 2009-2011 OBDII software.

Switch ignition ON.

Note original odometer value. Push “Prepare Unlock Dump”.

Odometer will be changed to 0km.

Swich ignition OFF.

Remove dash from car and read EEPROM 24C32 manualy (using CarProg EEPROM software);
2. Save this EEPROM dump;
3. Put dash back to car and connect via OBDII again;
4. Press button “Load unlock dump” and load saved eeprom file.
5. Now you can read IMMO file with button “Read immo”
6. Save this immo file;
7. Load VAG KEY software;
8. Open immo file, put transponder to the Carprog A3 antena and press write button;
9. Choose new key possition and save new immo file;
10. Load A3/TT 2009-2011 OBDII software;
11. Press button “Load unlock dump” and load saved EEPROM file again. Load new immo file with “Open” button.
12. Write immo file with “Write immo” button. Write old odometer with “Change KM” button
CarProg programs new keys when all keys are lost (IMMO IS ACTIVE):
Remove dash from car and read eeprom 24C32 manualy (using CarProg EEPROM software);
2. Save this EEPROM dump to have backup;
3. Fill EEPROM dump range 0×812 – 0×9BF in hex editor with FF FF … ;
4. Write this damaged dump to EEPROM;
5. Put dash back to car and connect via OBDII again; Cluster display will show “Error”;
6. Push “Prepare Unlock Dump”; Odometer will reset to 0km;
7. Remove dash from car and read EEPROM again 24C32 manualy (using CarProg EEPROM software)
8. Save this eeprom dump (THIS ONE WILL BE UNLOCK DUMP FILE);
9. Put dash back to car and connect via DIAG now( Load A3/TT 2009-2011 OBDII software);
10. Press button “Load unlock dump” and load saved UNLOCK DUMP file;
11. Load your saved backup (original eeprom) and press write;
12. Now you can read IMMO file with button “Read immo”;
13. Save this immo file;
14. Load VAG KEY software;
15. Open immo file, put transponder to the Carprog A3 antena and press write button;
16. Choose new key possition and save new immo file;
17. Load A3/TT 2009-2011 OBDII software;
18. Press button “Load unlock dump” and load UNLOCK DUMP file again. Load new immo file with “Open” button.
19. Write immo file with “Write immo” button. Write old odometer with “Change KM” button
1

NOTE: you could change km and program new keys with CarProg original. With CarProg HQ china clone, you can change km but need luck with key programming.

For VAG immo, Xhorse VVDI2 is the best option.

VVDI2 VAG 5.3.0 supports Audi A3, TT, R8 dashboard Micronas CDC3217/3297+24C32

2

Launch X431 EasyDiag 3.0 Plus – Comment télécharger, enregistrer et mettre à jour

Most people prefer EasyDiag 3.0 Plus to a one-to-one kit is because when they change their car in the future, all they need to do is to buy the software for their next car instead of buying a brand new diagnostic kit.

Compared with LAUNCH Easydiag 2.0 Plus, Easydiag 3.0 Plus is better in the following aspects.

LAUNCH Easydiag 3.0 Plus includes 2 free vehicles’ software + DEMO + EOBD

LAUNCH Easydiag 3.0 includes hardware+ EOBD+ DEMO

LAUNCH Easydiag 2.0 Plus VS LAUNCH Easydiag 2.0:

LAUNCH Easydiag 2.0 Plus includes 2 free vehicles’ software + DEMO + EOBD

LAUNCH Easydiag 2.0 includes hardware+ EOBD+ DEMO

Notice: Demo and EOBD also belong to one of the car model. if you downloaded Demo and EOBD first, then you cannot download other car brand software for free, we suggest you download the car software you need first, then download Demo and EOBD for free.

This is an informative post on how to use original Launch easydiag 3.0 for IOS / Android incl. Android / IOS app download, registration, activation, login, buy the car brand software, download car brand software, diagnostic, update etc.

How to Use Launch X431 Easydiag 3.0?
Main procedure:

1.Download App

2.Register

3.Activate

4.Login

5.Buy car software

6.Download car software

7.Diagnose

Here we go one by one.

Download easydiag APP
IOS: In the app store, search “EasyDiag” .

Android: In the google play, search “Easydiag”

Step 1: Turn on your Smart Device.

Step 2: Go into the Google or Android Play Store:

Google Play can be found in the following url as well: http://play.google.com/store

Step: 3: Input the keyword “Easy Diag” in the search bar and then click the Easy Diag software icon to download.

p 1


2

Register -> Active -> Login

3

4

Buy the car software what you want
Menu:

1) One brand car software price: 50USD

2)3 brand cars software price:99.95USD

3)5 brand cars software price: 149.95USD

New user get free EOBD software.

After the free-update expire, the update fee is 29.95USD

5

6

7

8


Download the car software and update
After pay the car brand software successfully, you can download them.

Update method:

On the home page, click on the “Software upgrade” to update all the car brands you paid.
To update one single car brand, please go to the specific page and quickly enter the “Software upgrade” page.
9

10

Diagnostics

1) Accessible systems: Engine, ABS, SRS, Transmission and more

2) Diagnostic Functions: Read and clear codes and view enhanced live data etc.

3) Diagnostics Feedback:

If you met any question on the diagnostic, please provide the dealer with the Launch Easydiag 3.0 serial number, car brand, model & year.

11

FAQ

1 .Communications error with vehicle ECU?

Please kindly check:

1 Whether the dongle is properly connected.

2 Whether the vehicle ignition switch is on.

3 If all checks are normal, send vehicle year, make , model and VIN number to us using Diagnostic Feedback feature.

2.Failed to enter vehicle ECU system?

Please confirm:

1 Whether the vehicle is equipped with the system.

2 Whether the tested system is electronic control system.

3 Whether the dongle is correctly connected.

4 Whether the vehicle ignition switch is on If all checks are normal, send vehicle year, make , model and VIN number to us using Diagnostic Feedback feature.

3.The diagnostic application is failing?

1 Press the Home key to navigate to the home screen.

2 Select “Settings”->“Apps”.

3 Select the application name from the APP list.

4 Select “Force Stop”,and then tap “OK” to confirm.

5 Select “Clear Date”, and then tap “OK” to confirm.

Precautions on using easydiag 3.0

1. This device is a precision electronic instrument. Handle it with care,Avoid dropping.

2. This device only operates on the 12V passenger vehicles equipped with OBD II management system.

3. To avoid damage to this device due to frequent use, you are recommended to use the included extension cable to connect it to vehicle’s DLC.

4. Turn off the ignition switch while plugging/unplugging the device.

5. Be sure to always remove the device once testing and /or diagnosis is complete,Failure to do so may result in a drained or weakened battery.

VVDI2 et VVDI Key Tool copie transpondeur VW 48 96bit

If you have VV-04 activation (Clone 48 96bit) for VVDI2, you can combine VVDI2 with vvdi key tool and use Copy 48 on Keytool

1) Register Keytool apps on your smartphone:

and connect Keytool via Bluetooth

2) Connect VVDI2 to your PC and go to Transponder Programmer

3) Go to SYSTEMS POINTS

combine-vvdi2-and-vvdi-key-tool-1

4) Connect Keytool to your PC with a USB cable,VVDI2 still connected with a USB cable

combine-vvdi2-and-vvdi-key-tool-2

5) Select BIND VVDI2 and Keytool and press BIND VVDI will display information to connect Keytool to a PC

combine-vvdi2-and-vvdi-key-tool-3

6) Then read the information

combine-vvdi2-and-vvdi-key-tool-4

7) you will be redirected to the login page, enter the same login information you entered when logging in to Keytool on android

combine-vvdi2-and-vvdi-key-tool-5

combine-vvdi2-and-vvdi-key-tool-6

combine-vvdi2-and-vvdi-key-tool-7

8) After logging in you will see the state of VVDI2 and Keytool

9) if you want to transfer points from Keytool to VVDI2 , press OK

10 ) Moved points

combine-vvdi2-and-vvdi-key-tool-8

combine-vvdi2-and-vvdi-key-tool-9

11) VVDI Key Tool for 4896bit count will display the status of points from both devices

combine-vvdi2-and-vvdi-key-tool-10

VW ODIS 4.3.3 LOGICIEL NE PEUT PAS TRAVAILLER AVEC VAS 5054A RESOLU

VW ODIS 4.3.3 LOGICIEL NE PEUT PAS TRAVAILLER AVEC VAS 5054A RESOLU

VAS PC VAS 5054A is the proffesional diagnostic tool for audi/vw/skoda/seat. VAS 5054A software had newly update to ODIS VW 4.3.3. But some customers said latest odis vw odis 4.3.3 cannot work well with their VAS 5054A.Bellow, OBD2repair.com share you one customers solution of VAS 5054A cannot work well with ODIS VW ODIS 4.3.3.

Bad clones of VAS 5054A not gonna work with this version 4.3.3.
Even those that works with ODIS 4.2.3.
It mean, VAS5054a clones work on 4.3.3 with PDU 041 only. But not working with PDU 042
For bad clones just need to downgrade PDU from 042 to 041
Remove EDIC 1.20.42 from PC

Then install this older EDIC attached:
https://mega.nz/#!URV1nLwa!mn6xoEUmQeyCwhes1tDB6qvp20trgDUYy6BVNxRnLUk
If you should check post install (before you plug in your device) in Add/Remove programs you should see Softing D-PDU API V1.20.042 EDIC_D_PDU_API_OE/OS
Remove these from PC and reboot (just in case)
Install the EDIC provided above with version 041
Then plug in your device and test
I myself have not tested the above, but I think I works
But if you want use ODIS easily for VAS 5054A clone head, choose ODIS 4.2.3. It’s a tested version, confirmed to work no issues

COMMENT METTRE A JOUR L’OUTIL DE PROGRAMMATION XPROG M XPRONG ECU POUR XPROG 5.74

COMMENT METTRE A JOUR L’OUTIL DE PROGRAMMATION XPROG M XPRONG ECU POUR XPROG 5.74

As we all known , Xprog M 5.74 is the latest the xprog programming tool.
Some customers ask whether they can update their xprog m 5.0 to xprog m 5.74.
Here we share detail steps about how to update xprog m ecu programming tool to xprog m 5.74 ecu remapping tool.

Eobdii.fr Xprog Update Notice:

You are at your risk.

For Newer Xprog M 5.74 ,pls connect

20180329174525

You also need: ATMEGA64 Repair Chip update XPROG-M

20180329175213

Free download XPROG Box V5.7.4 software:

https://mega.nz/#!PQUzGAKI!LuBfkREVI9vnjPtPKlhdjbv6welC8GkHoZM4Bm9wois

Free download XPROG M V5.7.4 setup exe:

https://mega.nz/#!vUknWAaZ!VwXXnaREXg4oRFRUYkvmPpkdEyj6ILX4hiEL3obYhMg

How to update XPROGM V5.0 software to XPROG M V5.74:

Unzip the XPROG 5.7.4.zip contents to a folder on your desktop.

Open the folder AVRDUDESS and run avrdudess.exe program.

The following procedure will flash the version 5.0 firmware on your XPROG device.

Select your programmer.

Click on “Detect” at the top right corner. It will detect ATMEGA64.

Select your flash file which is in the Firmware folder.

Select your EEPROM file which is in the Firmware folder.

Enable the “Erase flash and EEPROM (-e)” option.

Set the following in the “Fuses & lock bits”

L: 0x2F

H: 0xCA

E: 0xFF

LB: 0x3C

And enable the “Set fuses” and “Set lock” options.

Finally click on “Program” and wait till it finishes and verify all the data are flashed correctly.

If not then try again.

Now that the Xprog has version 5.0 firmware, go to the “XprogDesktop” folder and run “XprogDesktop.exe” file.

Click on “Help->Hardware info…” and once it opens it will ask to upgrade the firmware.

If not, then click on the “Upgrade” button. Once this procedure is finished you can try and read a processor. It will ask for a certificate. If it fails try again.

When it is finished the XPROG will run the latest firmware and you will be able to work with the latest Xprog 5.74 software!

Again note that this is not a 100% successful guide, some work and some may not.

20180329174509

Comment puis-je utiliser OBDSTAR X300 DP sur BMW CAS2 CAS3 CAS4 via OBD

Comment puis-je utiliser OBDSTAR X300 DP sur BMW CAS2 CAS3 CAS4 via OBD

Is it possible to add one key to BMW CAS2/CAS3/CAS4,using OBDSTAR X300 DPpad yellow version

On cas 2,3 we used tools like usually VVDI2,CGDI BMW.

On cas3+ with working key!!If it is AKL(all key lost),you need to pull ISN code on dde or dme!!! for registry a key you need downgrade the cas,register key and after backup.
On cas4 Obdstar x300 dp is not working on obd!! Just to Block or active key !!!!

Disable and Enable keys:
CAS3(CAN)
Enable keys
Disable keys
CAS4(CAN)
Read keys information
Keys ID
Keys status
Current ignition key No.
Enable keys
Disable keys
K Line
Read version information
Read keys information
Keys ID
Keys status
Remote battery status
Current ignition key NO.
Enable keys
Disable keys

11

4
FEM/BDC:
Key programming
Key information
Key programming processing
Key adding
Key detect
Function introduction
Operation guide
Other functions :BMW FEM/BDC Smart Key Programming Procedure

obdstar-x300-dp-bmw-fem-bdc-smart-key-programming

Keep updating soon….

How Yanhua Mini ACDP connect to BMW CAS4 without soldering

How Yanhua Mini ACDP connect to BMW CAS4 without soldering

bmw-cas4-fem-adapter-1
This post will tell how to use Yanhua Mini ACDP Programming Master connect
to BMW CAS4 without soldering
CAS4 Wholeset Schemeatic Diagram

1
CAS4 probes location schematic diagram

2

The procedure as shown below:

Step 1,Install copper pillar,use M2.5*12+6 specified copper pillar to install support frame

3
Step 2,Install the CAS4 interface board

Tip:Aim at the points D1/D2/D3/D4 accurately and press them, then lock the two copper pillars

4

Step 3,Connect BDM Adapter,then plug the BDM Adapter into the CAS4 specified interface board

5

Step 4,Connect the ACDP with OBP+ICP adapter, then finished