Monthly Archives: February 2016

Xhorse VVDI Benz VVDI MB TOOL Benz V2.0.7 Updated!

Xhorse VVDI Benz VVDI MB TOOL Benz V2.0.7 Updated!

This Benz V2.0.7 software of the Xhorse VVDI MB TOOL requires firmware V2.0.7.

2016-02-26 VVDI MB Tool Newest Update
===== BENZ V2.0.7 =====
1. Attention: All user update device to firmware v2.0.7, software v2.0.7, the lower version dont support password calculation
2. User manual v1.2 released, overview v1.3 released
3. Add support for renew ECU/Gearbox/ISM etc
4. Fix diable key in K-Line protocol
5. Fix clear TP in K-Line protocol
6. Fix read key bug in password calculation
7. Bugfix

Learn how to update the VVDI MB TOOL: http://www.eobdii.fr/upload/pro/201512/xhorse-vvdi-benz-vvdi-mb-tool-key-programming-user-manual.pdf.

How to program Peugeot 307 key with Lexia 3?

How to program Peugeot 307 key with Lexia 3?

Prepared tool you will need:

1.Lexia-3 lexia3 V48 Citroen/Peugeot Diagnostic PP2000 V25 with Diagbox V7.53 Software
2.All the vehicles keys.
3.A laptop that contains Lexia3/ PP2000 software.
4.Confidential code

Procedure of how to program Peugeot 307 key:

Step 1. Open up Peugeot PP2000 Diagbox software, select vehicle model “307” and click “OK” button at the bottom right. The PP2000 diagnostic software will start searching for the 307 car.

Step 2. Hook up Lexia3 PP2000 interface to the laptop and the OBD port of the car. Turn on the ignition. PP2000 will build connection with the car within a few seconds.

Step 3. Confirm vehicle information, including its VIN code, motor, chassis number and body. If the vehicle info is right, click “OK” to continue.

Step 4. Select application as “Peugeot Planet 2000”.

lexia3-pp2000-peugeot-307-key-1

Step 5. Select “Test by ECU”.

Step 6. Select “Built-in systems interface”.

Step 7. Select “Learning” to get car key information.

Step 8. Select “Programming of keys”.

lexia3-pp2000-peugeot-307-key-2

Step 9. Follow the prompts in picture below.

lexia3-pp2000-peugeot-307-key-3

Step 10. A few seconds later you will get this window. Enter the Confidential code located on your confidential card. Verification of the confidential code will then start. If the confidential code is correct, the built-in system interface will ready for programming the key

Step 11. Enter the number of keys that you want to learn. At most 5 keys can be programmed. Here I will replace only one key.

Step 12. Switch off the ignition.
Step 13. Use the blank key to switch on the ignition positive
Step 14. You will get a message “Key programmed. Switch off the ignition and take out the key” when a new key is successfully programmed.

lexia3-pp2000-peugeot-307-key-4

MINI VCI FOR Toyota TIS Techstream V10.30.029 Installation!

MINI VCI FOR Toyota TIS Techstream V10.30.029 Installation!

Techstream cable: The software interface supports Techstream (Mangoose VCI, MINI VCI with 16 pin cable, Mini VCI 22-PIN, Xhorse MVCI etc) for Toyota, Scion and Lexus makes.
Language: Chinese/English/French/German/Indian/Japanese/Spanish
Software Version: V10.30.029

1)Intall Tecshtream Setup

Open software CD or download Toyota Techstream software
Open and install Toyota Techstream 10.30.029 setup

mini-vci-for-toyota-tis-software-installation-1
Select software setup language,click Next

mini-vci-for-toyota-tis-software-installation-2
Click Next
Accept license agreement
Click Next
Enter User Name and Company Name,click Next

mini-vci-for-toyota-tis-software-installation-3
Click Install
Click Finish when installshiled wizard complete

2) Install software driver

Open software folder
Install MVCI Driver for TOYOTA

mini-vci-for-toyota-tis-software-installation-4
Click Next
Click Finish when complete the MVCI for Toyota TIS Setup
Copy MainMenu Application on software folder
Right click Techstream software on desktop
Click Find Target, paste and replace the MainMenu Application file on the bin folder

mini-vci-for-toyota-tis-software-installation-5
Connect the Toyota Techstream cable to the vehicle and then install device driver
Open Tecshtream software on desktop
Click No
Launch software
Click Setup tab->Techstream Configuration
Select Area

mini-vci-for-toyota-tis-software-installation-6
Select software language

mini-vci-for-toyota-tis-software-installation-7

3) Register/Activate TIS Techstream

Click Connect to Vehicle function button on the left, the system will require to enter registration key
Open “serie” Notepad on software folder

mini-vci-for-toyota-tis-software-installation-8
Copy and paste the key to New key column

mini-vci-for-toyota-tis-software-installation-9
Click OK
Initializing USB Communication
Select vehicle information

mini-vci-for-toyota-tis-software-installation-10
Select engine module and the function you want to carry out

mini-vci-for-toyota-tis-software-installation-11mini-vci-for-toyota-tis-software-installation-12

SuperOBD SKP-900 V4.0 is Coming Soon!

SuperOBD SKP-900 V4.0 is Coming Soon!

SuperOBD SKP-900 V4.0 Update Plan:

1. Cadillac ATS-L smart key program 2015-
2. Cadillac SRX smart key program 2015-
3. Cadillac XTS smart key program 2015-
4. Mitsubishi V93 key program 2015-
5. JEEP Grand Cherokee smart key program 2014-
6. Cadillac SLS smart key program 2007-2009
7. Hyundai smart key program 2015-
8. Buick Excelle smart key program 2015-
9. Fix some BUGs
10. CHINA MODEL:
FAW XENIA S80 key program
FAW N5 key program
FAW V5 key program
FAW V7 key program
FAW D60 key program
Chery E5 remote program
Great Wall H2 smart key program
ZhongHua key program free pincode
MG GS Smart key program

More for the update: http://www.eobdii.fr/wholesale/superobd-skp-900-hand-held-obd2-auto-key-programmer.html.

VDM UCANDAS WIFI Full System Automotive Diagnostic Tool tested on BMW X5 E53

VDM UCANDAS WIFI Full System Automotive Diagnostic Tool tested on BMW X5 E53

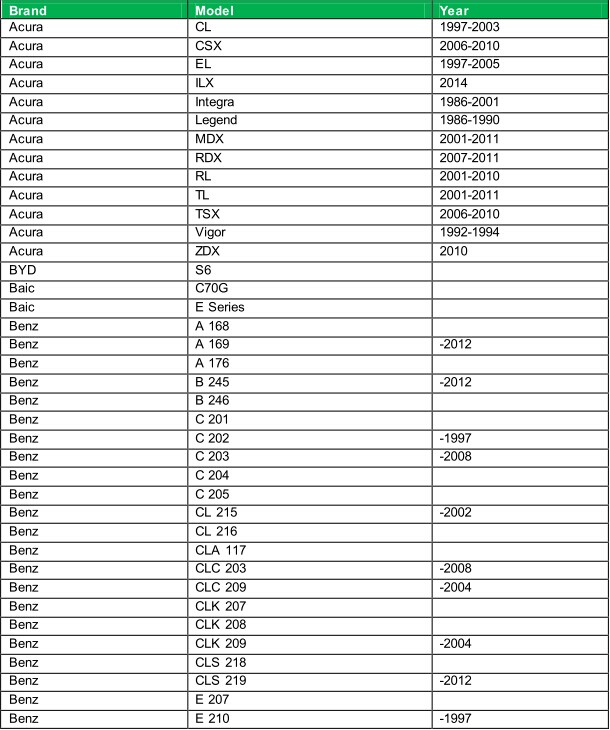
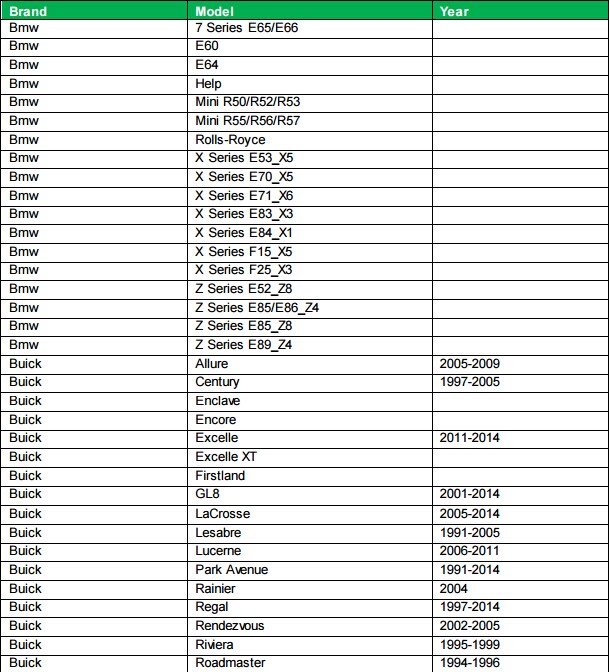
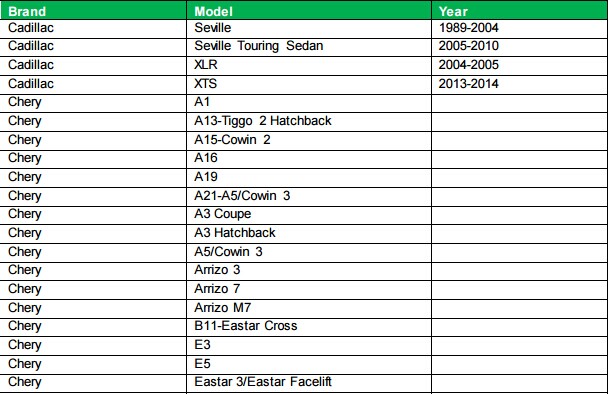
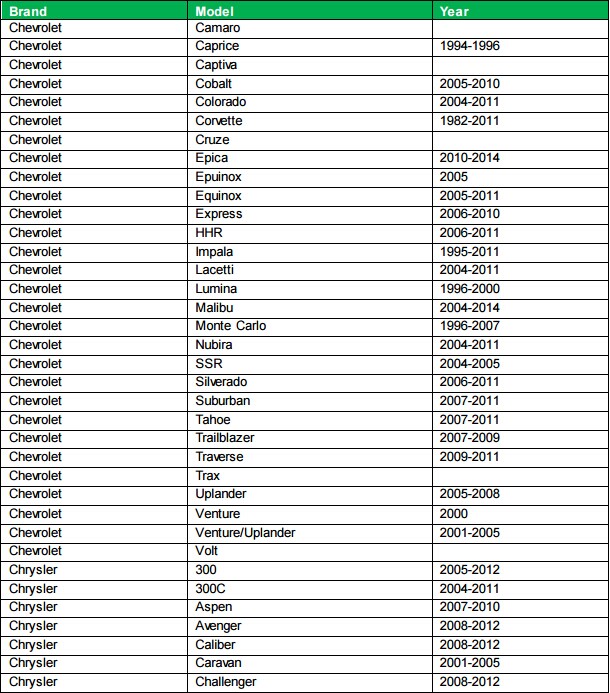
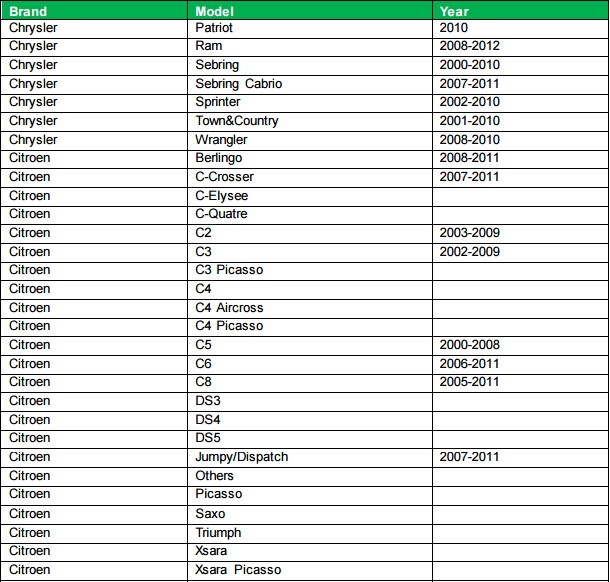
VDM UCANDAS Covers 47 Car Models:
European Car Models: Audi, Benz, BMW, Citroen, Fiat, Ford EU, Jaguar, Lancia, LandRover,
MINI, Opel, Peugeot, Porsche, Renault, Saab, Seat, Skoda, Smart, Vauxhall, Volvo, VW.
Asia Car Models: Acura, Honda, Hyundai, Infiniti, Isuzu, Kia, Lexus, Mazda, Mitsubishi, Nissan,
Perodua, Proton, Subaru, Suzuki, Toyota
Asutralia Car Models: Ford AU, Holden
USA Car Models: Chrysler, Ford, GM.
China Car Models: Chery, Geely, GWM

Diagnostic Kit: VDM Ucandas WIFI interface
Tested windows system: Win 7 64 bit
Tested vehicle model: BMW X5 E53

Starting:
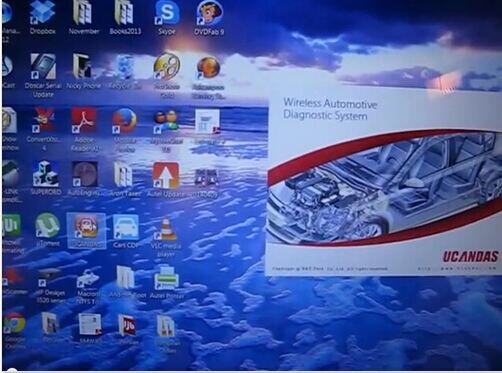
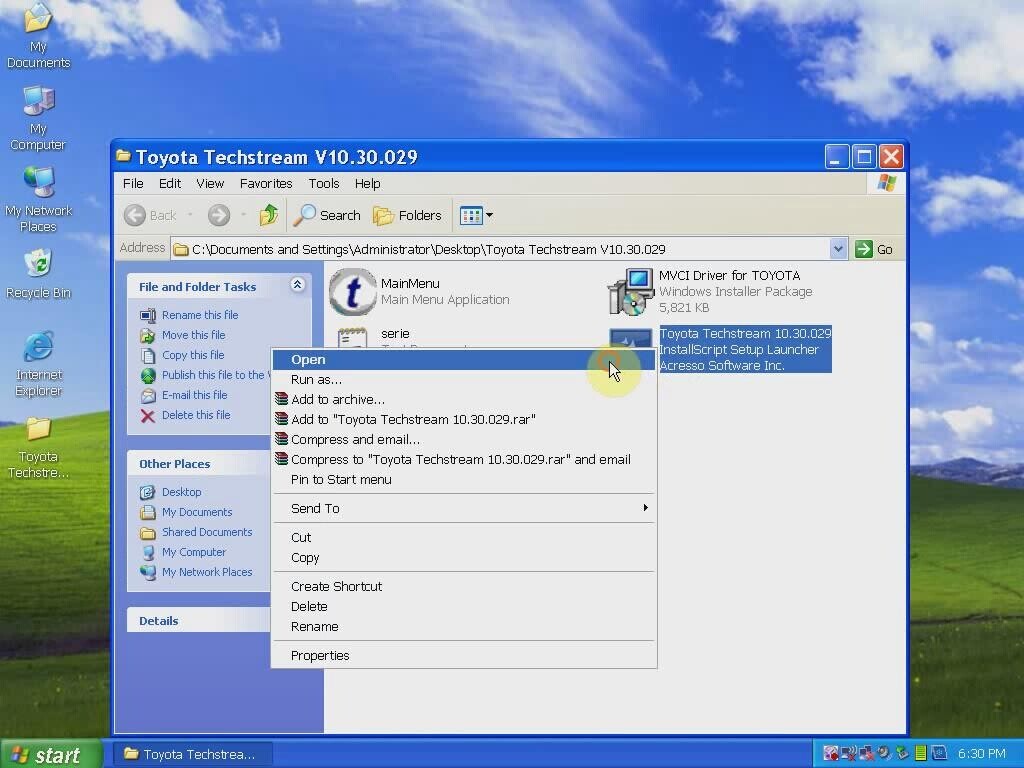
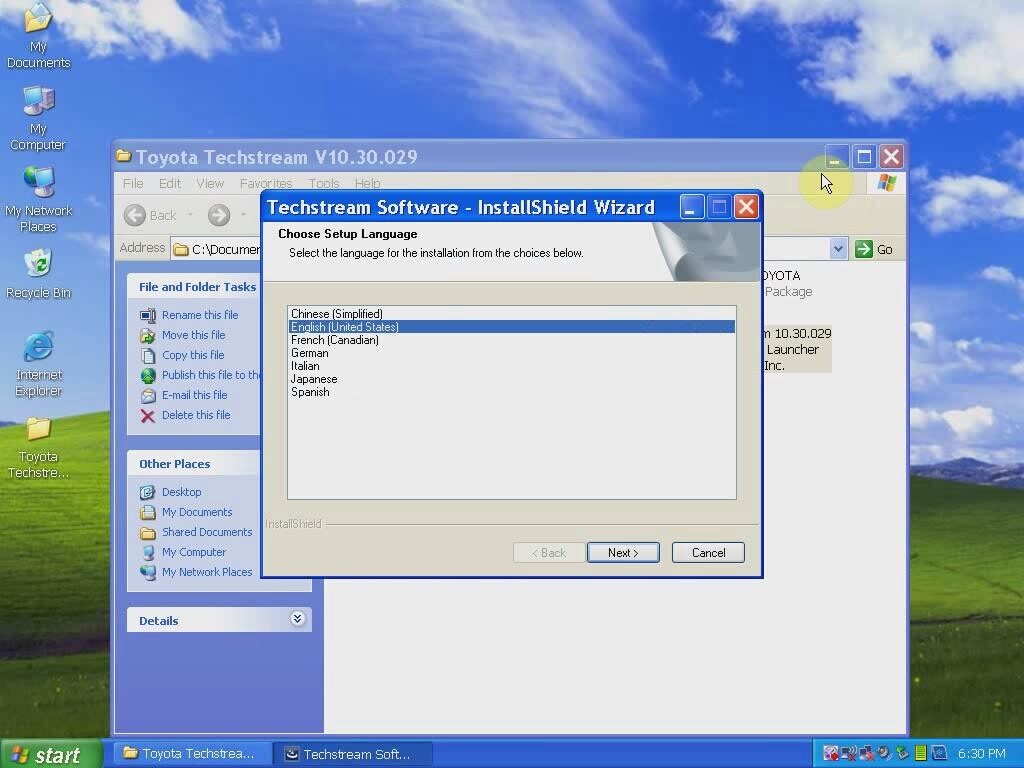
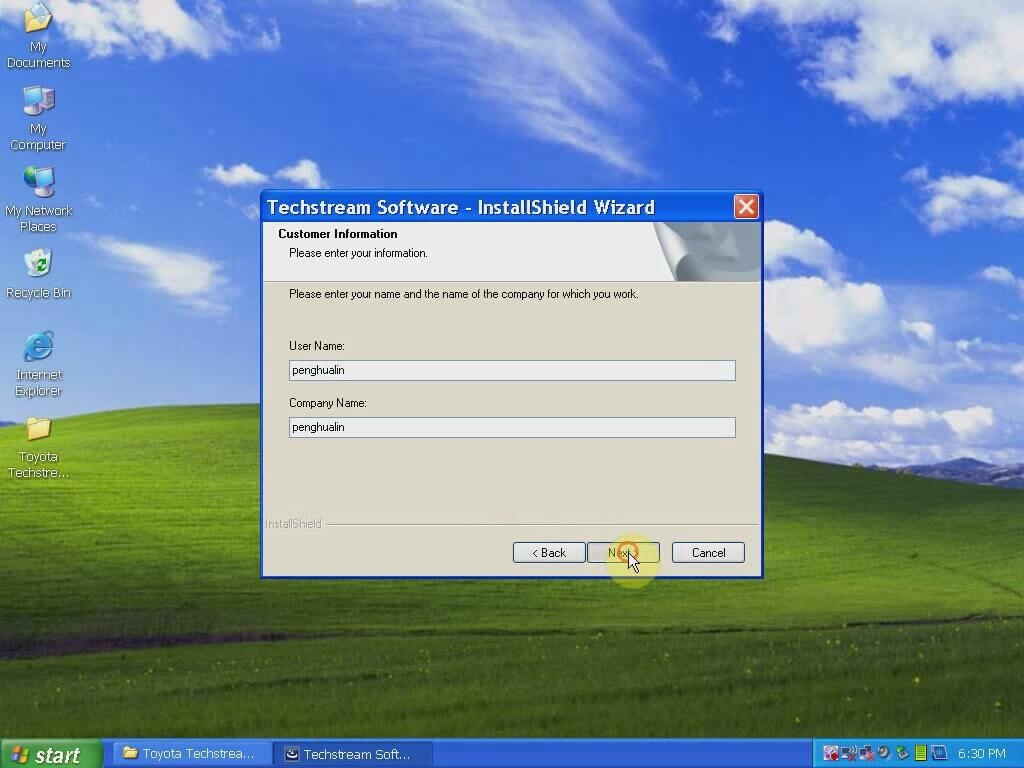
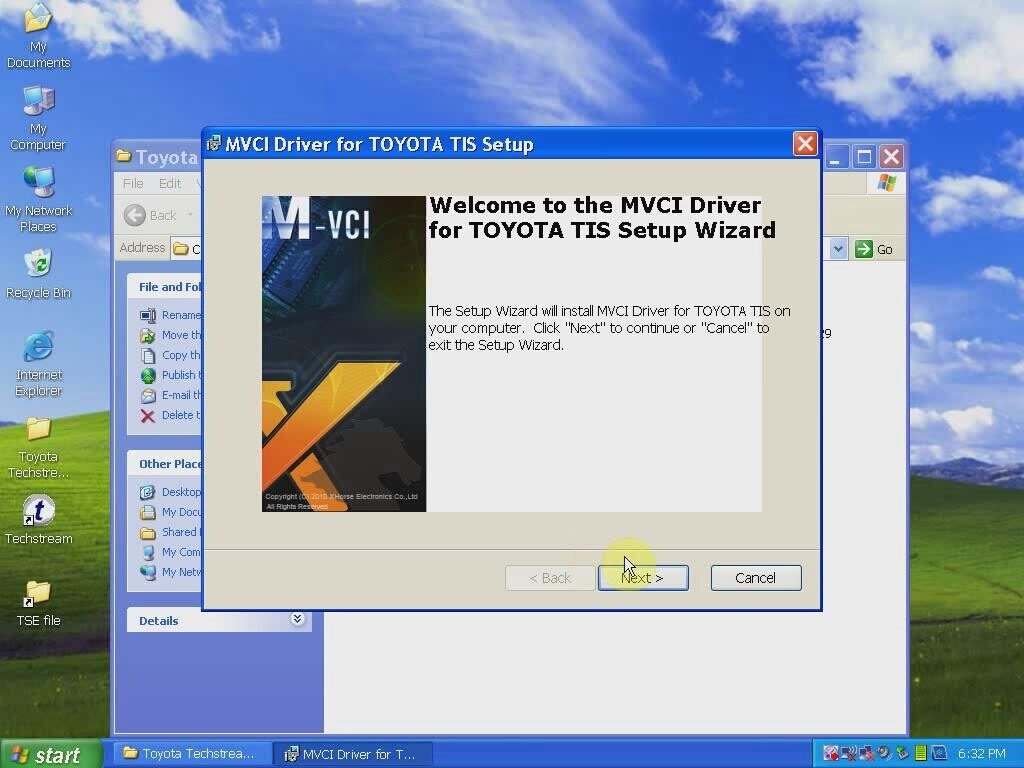
First of all, well load VDM UCANDAS software on laptop.

VDM interface allows us to connect via both USB and WIFI. Here we directly connect the interface with vehicle via OBD2 socket using USB main test cable. The interface indicator light turn green means well communication is built between the vehicle and the diagnostic system.

vdm-ucandas-bmw-x5-1

Go to the computer. Mount “UCANDAS” software icon on the desktop and run software.

vdm-ucandas-bmw-x5-2

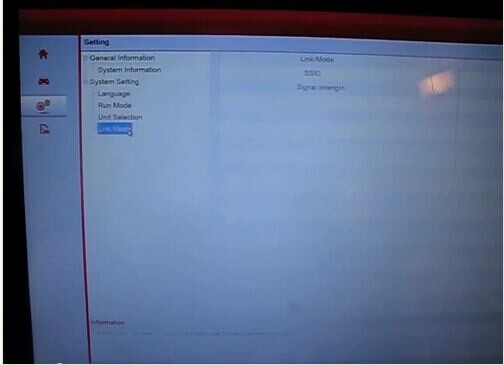
Go to “Settings” and click on “Link Mode” to check the connection, we are allowed modify the SSID (blue shadow area) and click on the “Connect” button on the right bottom to set a new SSID.

vdm-ucandas-bmw-x5-3

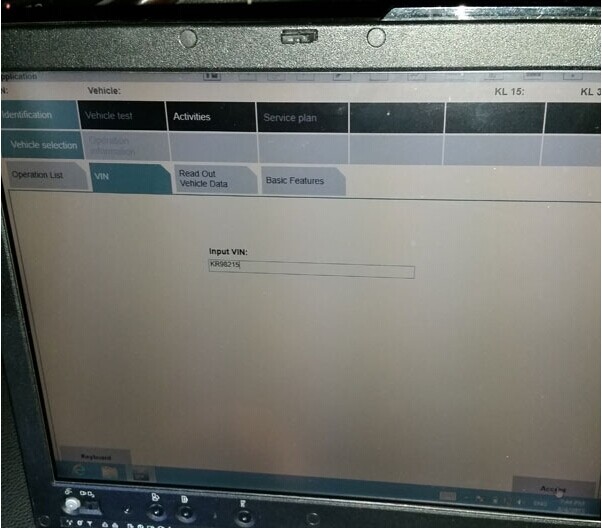
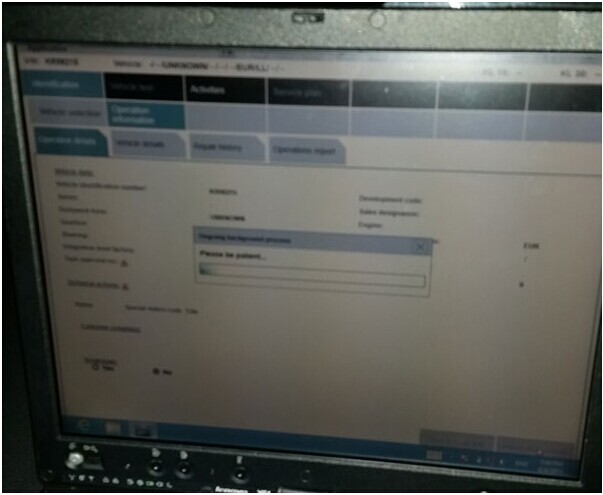
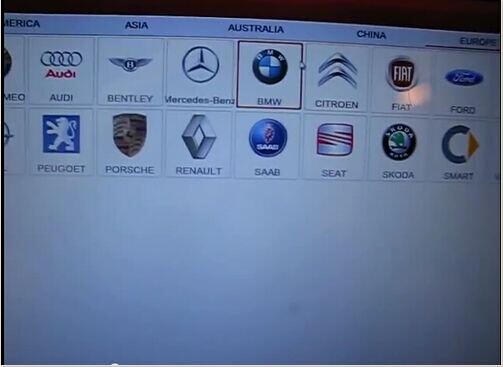
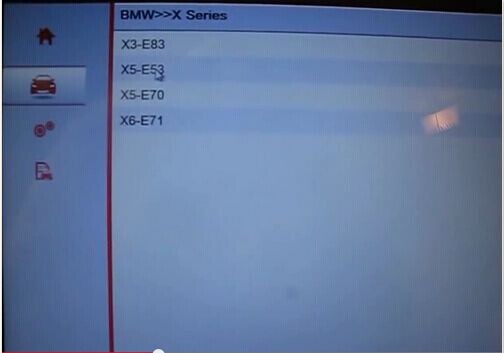
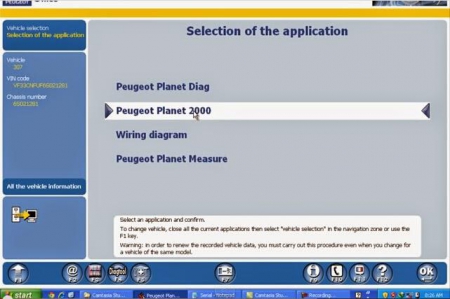
Select vehicle region, make, model etc, here follow this way: EUROPEAN-> vehicle make: BMW->X Series->X5 E53

vdm-ucandas-bmw-x5-4vdm-ucandas-bmw-x5-5vdm-ucandas-bmw-x5-6

Come to Main function menu. Select certain control unit, e.g. Drive.

vdm-ucandas-bmw-x5-7

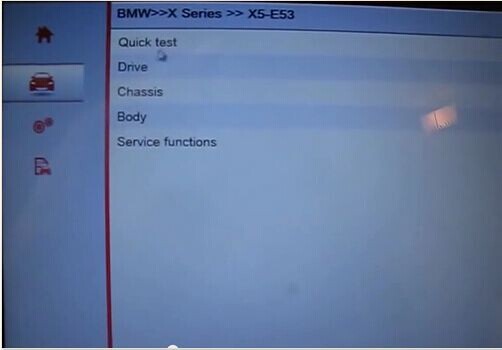
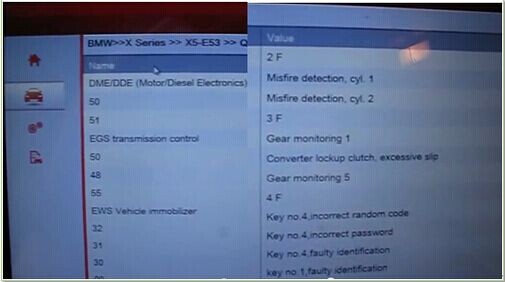
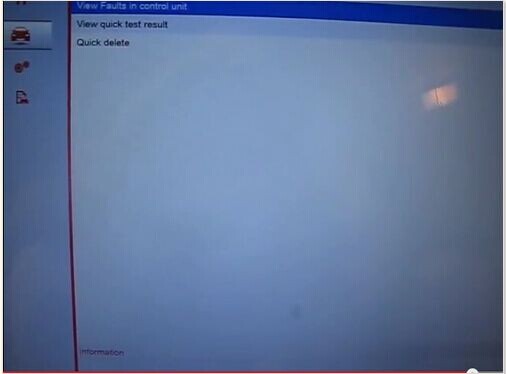
Run a Quick test and check all stored fault codes in control units.
In the left program we will be able to view some control modules, DME, EGS, EWS immo etc, and value /short description to the fault code on the right.

vdm-ucandas-bmw-x5-8

There is a “Quick delete” button which allow to erase fault codes by a quickly press.

vdm-ucandas-bmw-x5-9

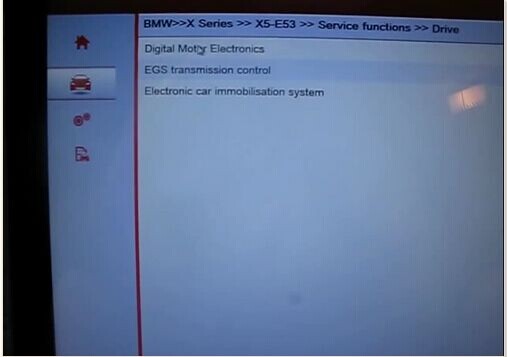
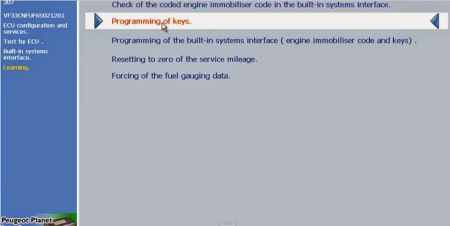
Go for some Special function test, different models may have different special function options, here is the X5 E53 special functions list.

vdm-ucandas-bmw-x5-10

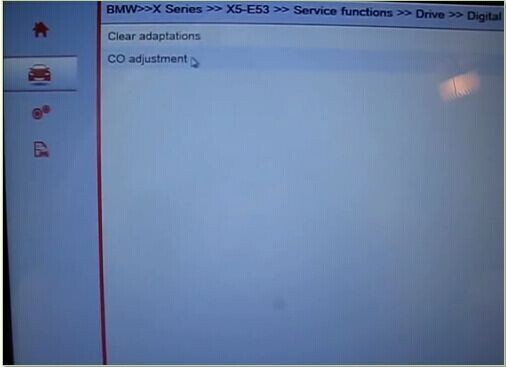
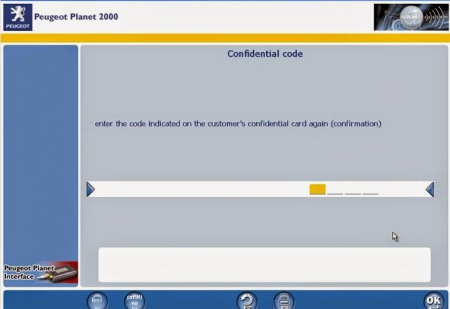
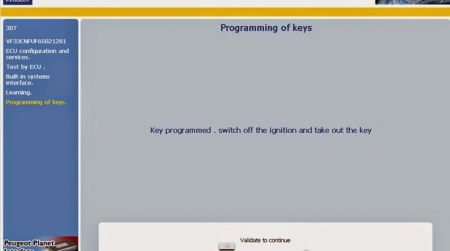
For example, two special functions: Clear adaptations and CO adjustment offered under Digital Mortify Electronics module. Select specific one and follow the UCANDAS prompt.

vdm-ucandas-bmw-x5-11

Find the VDM UCANDAS from: http://www.eobdii.fr/wholesale/ucandas-wireless-automotive-diagnosis-system.html.

VAS 5054A ODIS Updated to V3.0.1

Best VAS 5054A ODIS V3.0.1 Bluetooth Support UDS Protocol With OKI Chip Multi-languages

VAS 5054A ODIS V3.0.1 Computer Windows System Requirements:
Windows System Language: American English
Win 7 Professional version
System C:// have to be NTFS format
C:// need to have at least 40GB space for installing VAS 5054A

FAQ:

Q:How to select language when use ODIS V3.0.1?
A:There are two ways to select language.One is automatically identified by system, if your system language is English,then your ODIS software language is also English
The other way is you select language when you install the software,but it must be the same in these two places.

Language Select Display 1

Language Select Display 2

Which is better? AUTEL MaxiSYS MS906 Scanner VS Autel MaxiDAS DS708 Scanner

AUTEL MaxiSYS MS906 Scanner VS Autel MaxiDAS DS708 Scanner

AUTEL MaxiSYS MS906 Scanner is a new tool developed by Autel company. This one is better to use than the Autel MaxiDAS DS708 series. Check the differences list from:

Item Name AUTEL MaxiSYS MS906 Scanner Autel MaxiDAS DS708
Appearance
Brand Autel Autel
Language English,Spanish,French,German,
Japanese,Portuguese
One device can only support English plus another one language( French,German,Portuguese,Spanish and so on.)
Update Online Update Free for 1 Year Online Update Free for 1 Year
Need PC NO NO
OS Android 4.0 Operating System Windows CE operating system
Support Cars Most of the European, Asian, Amercian cars Most of the European, Asian, Amercian cars
Programming No No
ECU coding No No
Memory Memory 2GB RAM & 32GB On-board Memory Max. 4 Gigabyte SD card
Attention: 1. Autel MS906 work function better than DS708 with fast run speed.2. The AUTEL MaxiSYS Pro MS908P can support the online ECU coding and online programming.  (Compatiable online programming for part of the original software)

VPECKER Easydiag V6.8 Version Updated Newer Oilreset Car Model

VPECKER Easydiag V6.8 Version Updated Newer Oilreset Car Model

As is known to all, the VPECKER Easydiag Wireless OBDII Full Diagnostic Tool can not only do the diagnose function, but also the oilreset. The Newest version V6.8 for the VPECKER Easydiag updated the more support car model for the oilreset function. Check the part of the list now:

vpecker-easydiag-oilreset-1

vpecker-easydiag-oilreset-2vpecker-easydiag-oilreset-3vpecker-easydiag-oilreset-4vpecker-easydiag-oilreset-5

See the whole car model list for oilreset from: http://www.eobdii.fr/upload/pro/201602/vpecker-easydiag-diagnostic-tool-updated-oilreset-model-list.pdf.

How to solve the BMW ICOM A2+B+C Diagnostic Tool software not compatible with the firmware problem?

How to solve the BMW ICOM A2+B+C Diagnostic Tool software not compatible with the firmware problem?

Why my newest BMW ICOM software can not work with my BMW ICOM A2+B+C Diagnostic Tool interface?  My BMW ICOM software is V2015.12.
There are many error showed after I inserted the software HDD. Please check the picture bellow.

bmw-icom-a2-b-c-firmware-error-1

bmw-icom-a2-b-c-firmware-error-2

bmw-icom-a2-b-c-firmware-error-3

For new software, when you run the software, software will recognize the firmware automatically. If your firmware is too old, then it will not be compatible with latest software. You can learn how to update the BMW ICOM A2+B+C firmware from: http://blog.eobdii.fr/bmw-icom-a1-or-a2-v01-40-05-firmware-update-steps/.

VVDI Prog Programmer V4.3.1 Updated On EOBDII.FR

VVDI Prog Programmer V4.3.1 Updated(2016-01-27)

* This version DON’t need update
firmware
+ Add MC9S12GN16_UNSECURED,
MC9S12GNA16_UNSECURED,
MC9S12GN32_UNSECURED,
MC9S12GNA32_UNSECURED,
MC9S12G48_UNSECURED,
MC9S12GA48_UNSECURED,
MC9S12GN48_UNSECURED,
MC9S12G64_UNSECURED,
MC9S12GA64_UNSECURED,
MC9S12G96_UNSECURED,
MC9S12GA96_UNSECURED,
MC9S12G128_UNSECURED,
MC9S12GA128_UNSECURED,
MC9S12G192_UNSECURED,
MC9S12GA192_UNSECURED,
MC9S12G240_UNSECURED,
MC9S12GA240_UNSECURED options
Mask:(0N95B,0N51A,0N75C,1N75C,
0N48A,1N48A)
MC9S12HA32_UNSECURED,
MC9S12HA48_UNSECURED,
MC9S12HA64_UNSECURED,
MC9S12HY32_UNSECURED,
MC9S12HY48_UNSECURED,
MC9S12HY64_UNSECURED options
Mask:(0M34S)
MC9S12P32_UNSECURED,
MC9S12P64_UNSECURED,
MC9S12P96_UNSECURED,
MC9S12P128_UNSECURED options
Mask:(0M01N)
MC9S12XEA128_UNSECURED,
MC9S12XEG128_UNSECURED,
MC9S12XEA128_SECURED,
MC9S12XEG128_SECURED options
Mask:(1M53J,2M53J,0N36H,1N36H)
MC9S12XHY128_UNSECURED,
MC9S12XHY256_UNSECURED options
Mask:(0M23Y)
MC9S12XS64_UNSECURED,
MC9S12XS128_UNSECURED,
MC9S12XS256_UNSECURED options
Mask:(0M04M,1M04M,0M05M)
in <2-MCU>-><MOTOROLA>
+ Add MC9S12XE_UNLOCK option
in <2-MCU>-><MOTOROLA>
(Backup all data before use it)
+ Add ME20U2-XET256-BACKUP,
ME20U2-XET512-BACKUP,
MT22-XEP768-BACKUP,
MT60-XEP768-BACKUP options
in <3-ECU>-><DELPHI>
+ Add the 12V power adaptor status
in information dialog

VVDI Proghttp://www.eobdii.fr/wholesale/vvdi-prog-programmer.html