Monthly Archives: January 2016

Genius and Flash Point ECU Chip Tuning Tool TF Card Reset Procedure

Genius and Flash Point ECU Chip Tuning Tool TF Card Reset Procedure

Sometimes, you may find that the file side the Genius and Flash Point ECU Chip Tuning Tool TF Card ruined. Then you will need to fix the file of the TF card. This video is to fix the TF card file for the Genius & Flash K-touch ECU Tool.

Tips1: You only can use the TF card from a complete set of the Genius. Do not use the TF card bought from the local market.
Tips2: Before fixing, you need to format the TF card.
Tips3: The k-touch.img fixing file must be in disk D or disk E. Do not put the k-touch.img in the file of the disk D or disk E.

VVDI MB TOOL latest version V2.0.6 Update (2016-01-16)

VVDI MB TOOL latest version V2.0.6 Update (2016-01-16)

Require firmware version to be V2.0.6.

BENZ V2.0.6
1. Attention: All user update VVDI MB TOOL device to firmware v2.0.6, software v2.0.6, the lower version dont support password calculation
2. User manual v1.1 released, overview v1.2 released
3. Add support for disable key
4. Fix bug for test W164, W221 EIS status
5. Fix bug for write EIS data
6. Bugfix

Tips for VVDI2 Commander Key Programmer Full Version

Tips for VVDI2 Commander Key Programmer Full Version

VVDI 2 includes all the VVDI functions, the function of Tango. And this one is the newest hotsellers of the Xhorse company. When the software showed that “Remaining Synchronization Time:1 days”. You just need to ingnore this. Because it does not affect the usage of the VVDI2 Commander Key Programmer functions.

xhorse-vvdi2

Tacho Pro 2008 July PLUS Universal Mileage Change on Audi Model A4 Bosch model 2001 clip

Tacho Pro 2008 July PLUS Universal Mileage Change on Audi Model A4 Bosch model 2001 clip

tacho-pro-a4-bosch-model-2000-1

Use this board and clip:tacho-pro-a4-bosch-model-2000-2

Prepare this Tacho Pro:
Tacho Pro 2008 July PLUS Universal

• Remove the cluster and open it.

tacho-pro-a4-bosch-model-2000-3
• Pull off the needles for speed and rpm

tacho-pro-a4-bosch-model-2000-4
• Look for the 8 pin chip 24C08.

tacho-pro-a4-bosch-model-2000-5
• Connect the clip to Port 3.
• Put the clip on the chip 24C08 (red on pin 1).
• Select the menu Audi-A4-A4 24C08
• The Tacho Universal shows you the old value.
• Select the menu Adjust KM.
• Enter the new value.
• Verify the new value with OK.

How to solve the Multi-Diag Access J2534 Pass-Thru Software expired problem?

How to solve the Multi-Diag Access J2534 Pass-Thru Software expired problem?

Customers: Hi, Shelly. I installed the Multi-Diag Access J2534 software as the video showed. But the software showed software expired. Do I need to update the software?

multidiag-j2534-software-expired

Solution:
1. Uninstall the Multi-Diag Access J2534 software on your PC.
2. Download this file on your PC from: http://www.mediafire.com/download/vdyx4l9wbnwk9dz/Desactivation+MAJ+MD.exe.
3. Install the software by the steps by following the description part: http://www.eobdii.fr/wholesale/i-2014-multi-diag-access-j2534-pass-thru-obd2-device.html.

multidiag-j2534-software-installation-step
More help needed, contact sales@eobdii.fr.

VPC-100 Hand-Held Vehicle PinCode Calculator Register And Activate Instructions

VPC-100 Hand-Held Vehicle PinCode Calculator Register And Activate Instructions

Why need to register and activate VPC-100?
You can calculate pincode in web mode and download the update only when your machine is registered and activated. When you get VPC-100 machine, the first thing you should do is to activate it.

1. Go to www.vpc100.com, click Register:

vpc-100-hand-held-1
2. Enter the register information:

vpc-100-hand-held-2
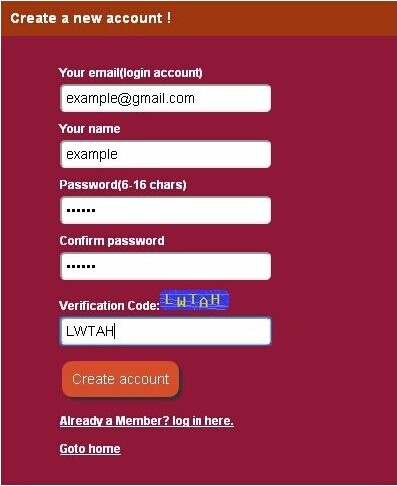
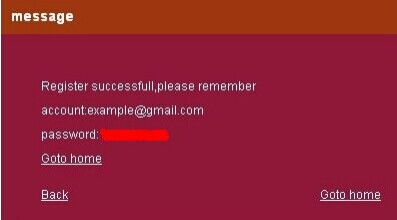
3. Remember your user name and password after registeration.

vpc-100-hand-held-3
4. Click Login:

vpc-100-hand-held-4
5. Enter your user name and password:

vpc-100-hand-held-5
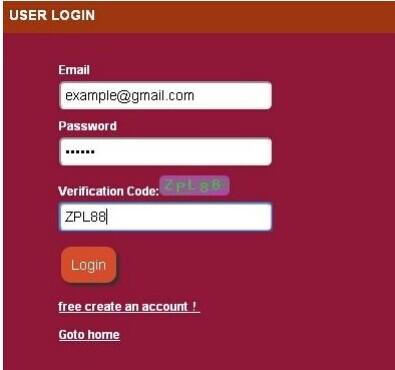
6. After login, click goto home to go back to the Home page:

vpc-100-hand-held-6
7. Then start VPC-100. For how to start VPC-100, please read the VPC-100 machine operation instructions.

vpc-100-hand-held-7
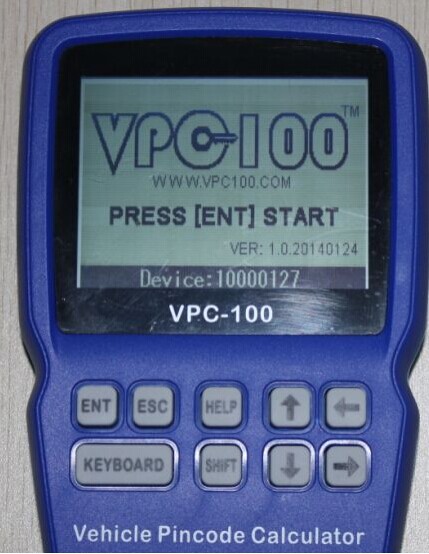
8. Press “ENT” button, you need to enter the machine starting password.

vpc-100-hand-held-8
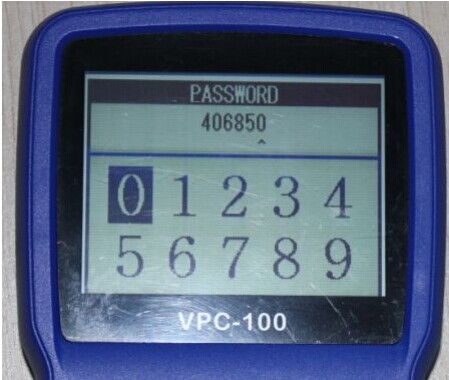
9. Enter the 6 digits password, and press “ENT”:

vpc-100-hand-held-9
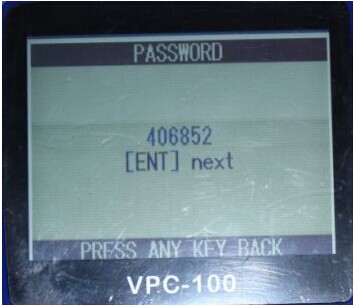
10. The screen display the machine main menu:

vpc-100-hand-held-10
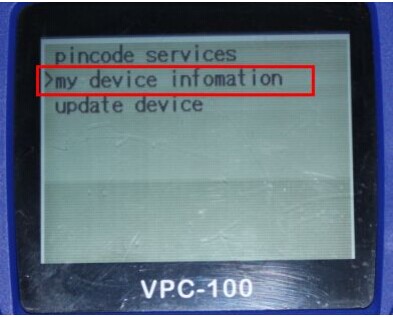
11. Select “My device information” and press “ENT”, the screen display the machine information :

vpc-100-hand-held-11
12. The webkey is the password for activation for your VPC-100 in www.vpc100.com .
13. On the vpc100.com website, click ACTIVATION VPC-100:

vpc-100-hand-held-12
14. Fill out the machine activation information:

vpc-100-hand-held-13
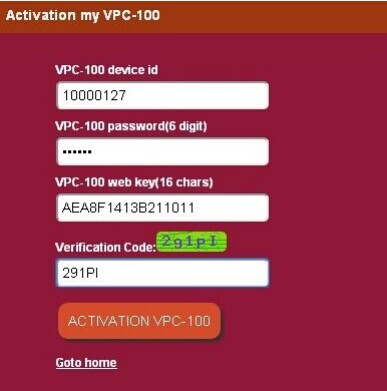
15. The following message is diaplayed after activation successed:

vpc-100-hand-held-14
16. After activation, you can check the update list.

vpc-100-hand-held-15

vpc-100-hand-held-16
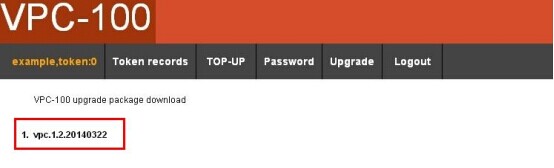
17. Download the update file to your computer. For update procedures, please see the VPC-100 update demo video.

Audi-VW-SKODA-SEAT ELSAWIN 4.0 Software Installation

Audi-VW-SKODA-SEAT ELSAWIN 4.0 Software Installation

ELSAWin 4.0 works under anyone WINDOWS NT (SP6a), WINDOWS 2000 SP2 or WindowsXP. The program is completely established on a hard disk (full installation Audi + VW + Nutzfahrzeuge with all accessible languages borrows more than 15 Gb).

Note: Install Elsa need 30GB or Hihger Free harddisk , Best use NTFS 
1. insert Elsa Install Disc, run Elsa 3.6/setup.exe, start install, select English, SN:123-38679-36-0002088570-00031, select“Repair opterations List+Service Package Quotation System+editing System”& “APOS”, select Data Language, until install completed
2. Run elsa 3.7/setup.exe, start Install 3.7. same with step 1
3. Run elsa 3.81/setup.exe, start Install 3.81. same with step 1
4. Run elsa 3.90/setup.exe, start Install 3.9. same with step 1
5. Email the Provisional Code to us, we will send back Final Code to you for active.

Next, start Install Brand DATA:
A. AUDI Data: Insert AUDI_Data 1 disc, run setup.exe, start install, when prompt insert audi_data 2 disc, insert audi_data 2 disc, until install completed
B. VW Data: create a new folder in harddisk (like VW) , Copy VW_data 1 & Vw_data 2 ,VW_data 3 & Vw_data 4 all files to harddisk folder , unzip , then run setup.exe
C. SKODA Data: Insert Skoda Data Disc, run setup.exe
D. SEAT Data: Insert Seat Data Disc , run setup.exe

2015 VVDI2 Commander Key Programmer Full Customer Feedback

2015 VVDI2 Commander Key Programmer Full Customer Feedback

Q: I do have BMW X5 from 2013+ , it’s F15 with CAS4+ I guess and 5M48H, it has all keys lost. What equipment I should buy from you to make a new key?
A: 1) For 5M48H, you need to use XPROG or VVDI pro to read the data.
2) Use BMW MULTI TOOL or VVDI 2 do CAS4+, and use the data you read out to generate the key data to match programming and simultaneous car
For second steps. If you choose BMW MULTI TOOL, you still need to buy the CAS4 adapter. If you choose VVDI2, then no need to buy others.

Q: I want to open component security function. what should i do?
A: For this function. If you want to use, you need to open pin,mac reading,CS authorization then can use. If you have bought the condor key cutting machine. Then this authorization is free to open. Please give us your name/country/EmailVVDI SN/ VVDI2 SN / CONDOR SN. If you do not bought CONDOR key cutting machine, then cannot open this authorization.

Q: Hello. I purchased this product and it says at the top… re synchronization in 23 days.. How do you re synchronization the device…Thank you.
A: This is normal. Once the day become 1, you just need to connect internet. Then it will be back to 30 days again. This is setted by Xhorse company to avoid others crack their software.

L’arrivée de nouveaux VXDIAG VCX NANO pour TOYOTA

VXDIAG VCX NANO pour TOYOTA
Caractéristiques:
1. Version du logiciel: 10.1V
2. Système d’exploitation supportés: Win XP, Win7
3. Langues supportées: chinois, anglais, français, italien, espagnol, allemand
4. Couverture Véhicules: Principalement pour les modèles Toyota 2015 inclus.
5. Fonctions prises en charge: les tests de diagnostic, de programmation Matching, des fonctions personnalisées, l’appariement clé, etc.
Notez: ne peut pas soutenir les véhicules Honda.
Présentation du produit:
VCX est une interface de réseau de voitures haute performance compatible avec une variété de protocoles, et il peut être très facile de connecter différents bus de l’automobile à un PC. VCX est conçu sur la base des dernières normes internationales de l’automobile de sorte qu’il peut supporter de nombreuses applications de diagnostic automobile professionnels, y compris les parties initiales et troisième.
VCX Caractéristiques matérielles:
1. le matériel de diagnostic utilise un processeur dual-core est de niveau automobile spécifique, compatible avec tous les protocoles de véhicules.
2. MUX diagnostic peut répondre aux normes internationales, peut être configuré de manière flexible port de communication, moins connecteurs, compatible avec la plupart des véhicules de la prise de diagnostic.
3. Connecteurs et câbles de raccordement sont plus fiable et pratique pour la conception autodétermination.
4. Compatible avec 12V et 24V communication, soutenir camions lourds et d’essai des modèles diesel.
5. Le matériel répond CE européenne et les normes de la FCC américaine.
6. Le firmware peut être mis à jour, pour une amélioration continue.

How to change the language of the Autoboss V30?

How to change the language of the Autoboss V30?

Step1: After get the Autoboss V30, send us the interface series number to open the authorization for you to change language. The series number is like: 1697500025

autoboss-v30-language-change-1
Step2: You need to wait for 1 or 2 working days for the authorization.
Step3: After the authorization, open the official website:
http://www.autoboss.net/en/index.asp
Step4: You need to insert the SD card into your computer to log in.
Log in with the user name and the password.
The user name is the interface series number.
The password is in the setting part of the Autoboss V30. You need to start it to find the password.

autoboss-v30-language-change-2
Step5: Choose Download after log in.

autoboss-v30-language-change-3
Step6: Download the software as the arrow showed on the picture.

autoboss-v30-language-change-4
Step7: Install the newest software after download.
Step8: Check the language setting part after the software well installed. Then you can choose the language you want.