Monthly Archives: November 2018

HOW TO DO DIAGBOX TELECODING ON CITROEN C3 2003

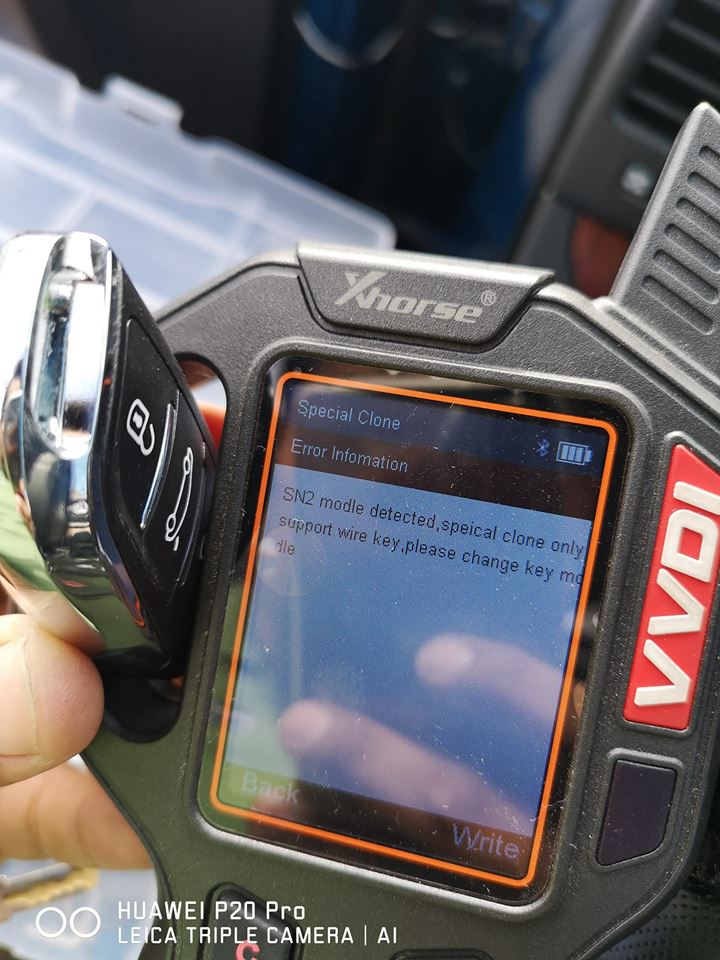
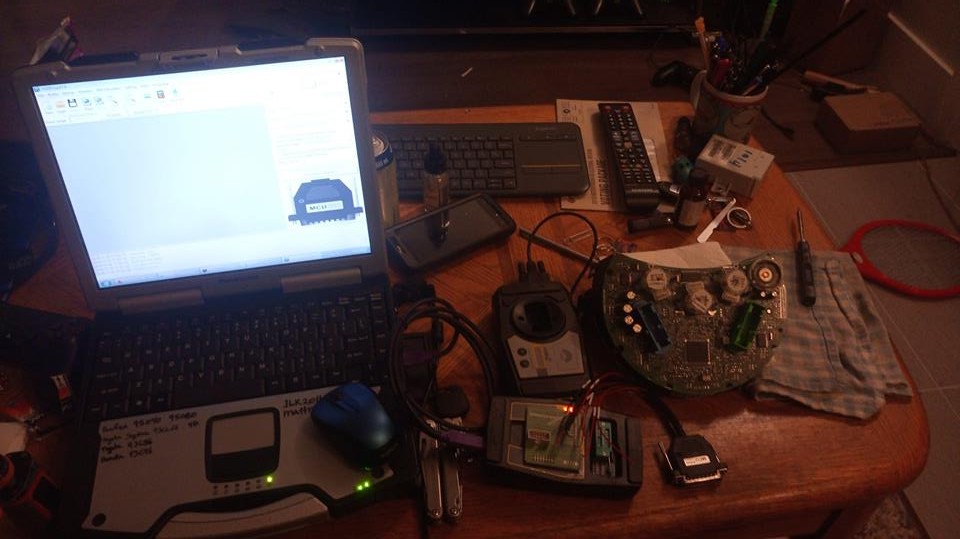
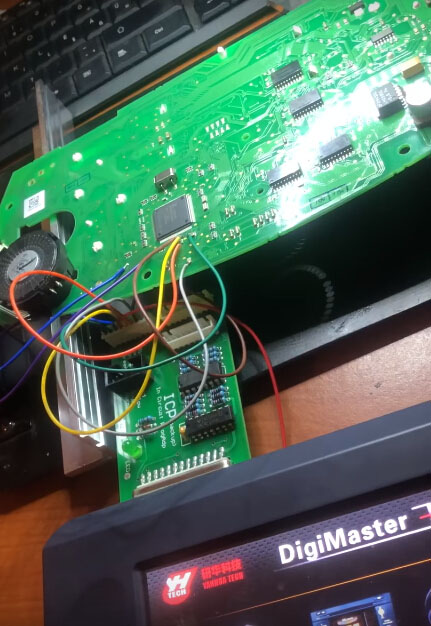
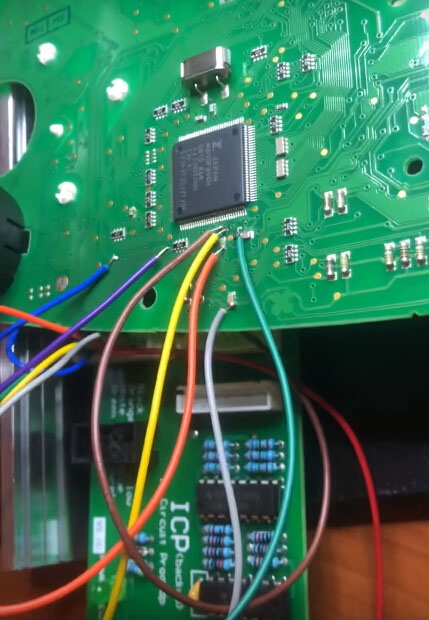
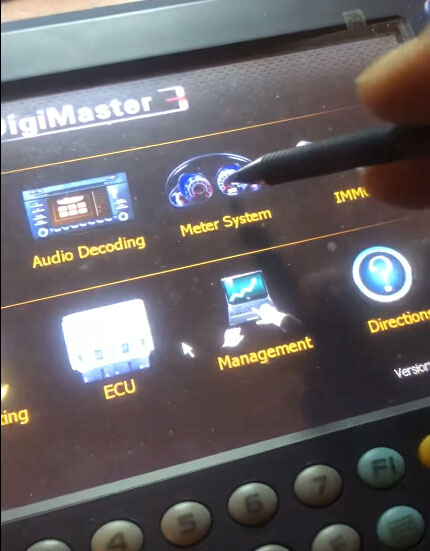
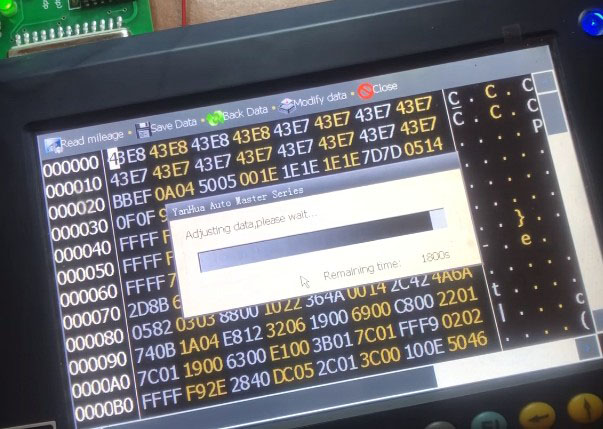
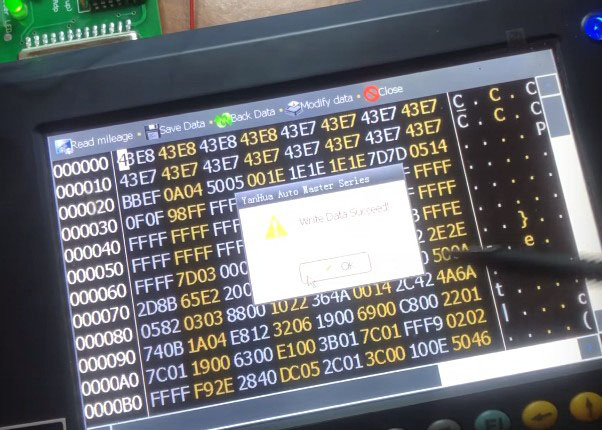
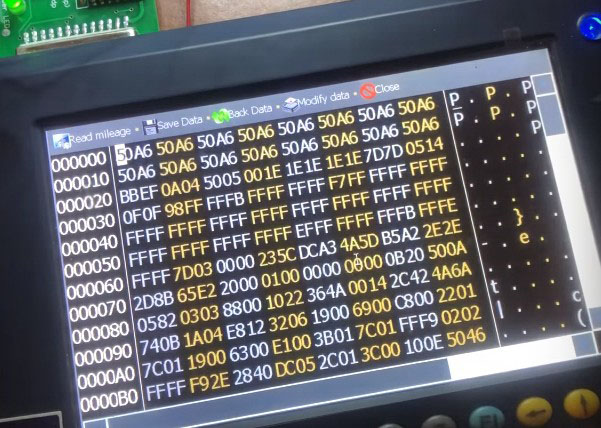
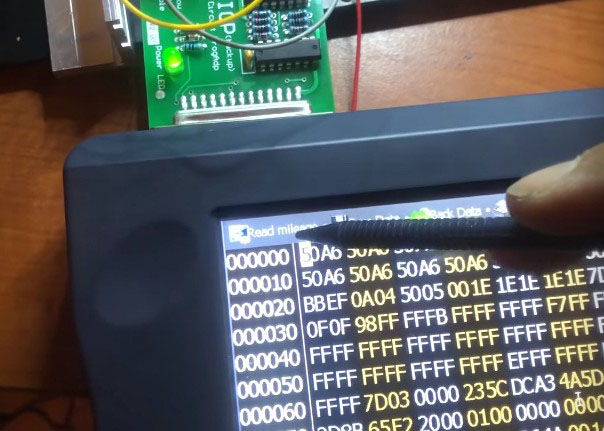
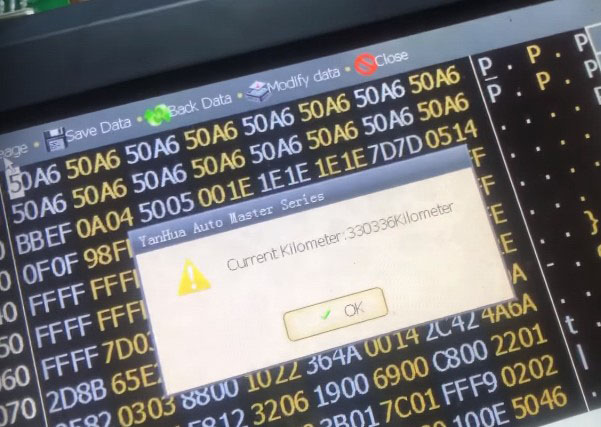
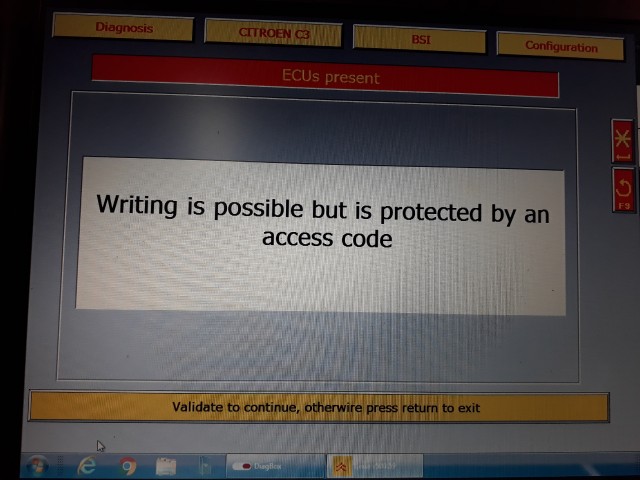
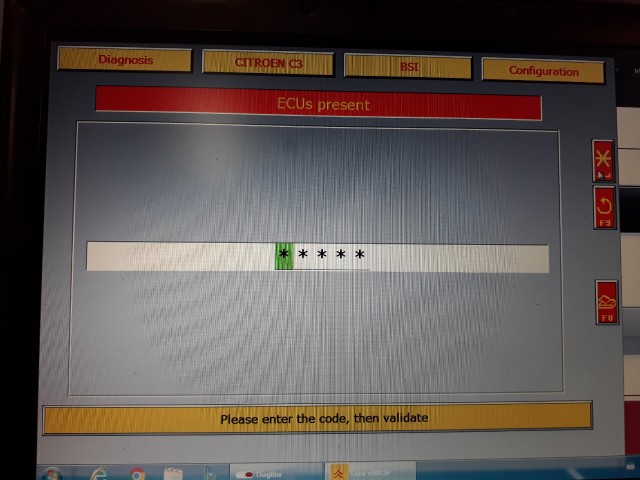
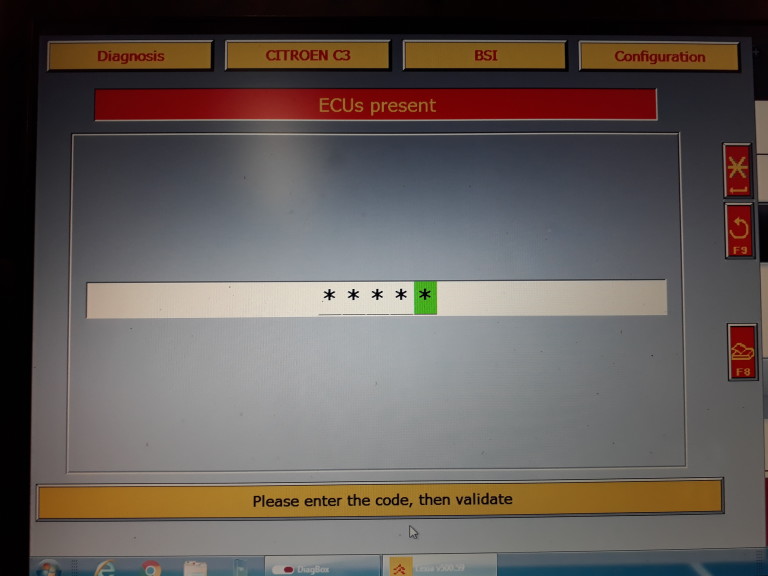
Success! Have done Diagbox telecoding on Citroen C3 2003.

car = Citroen C3 2003
ECU = Sagem S2PM-380
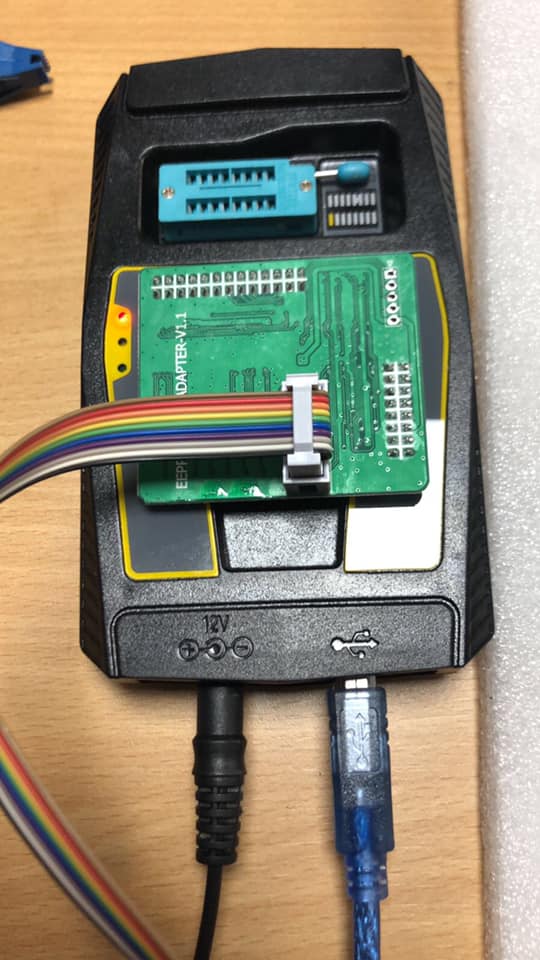
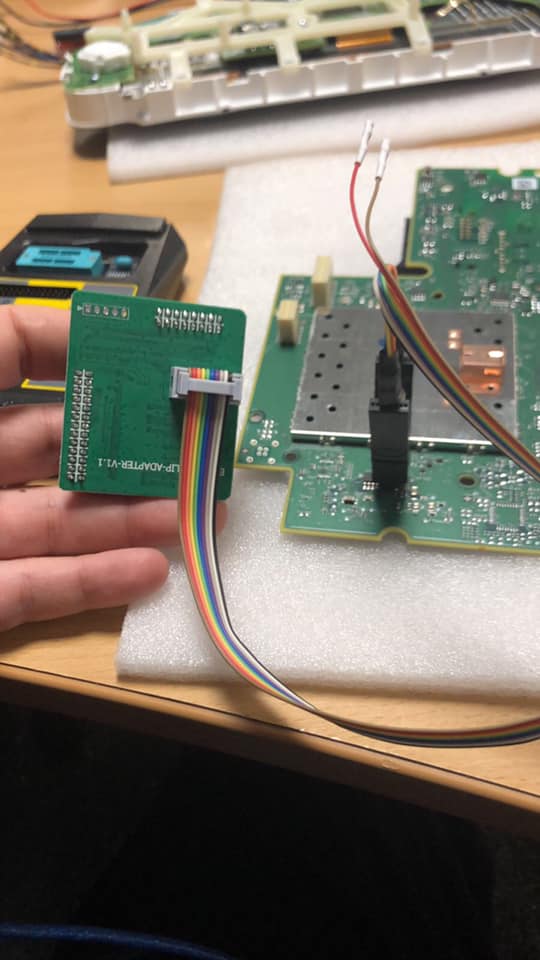
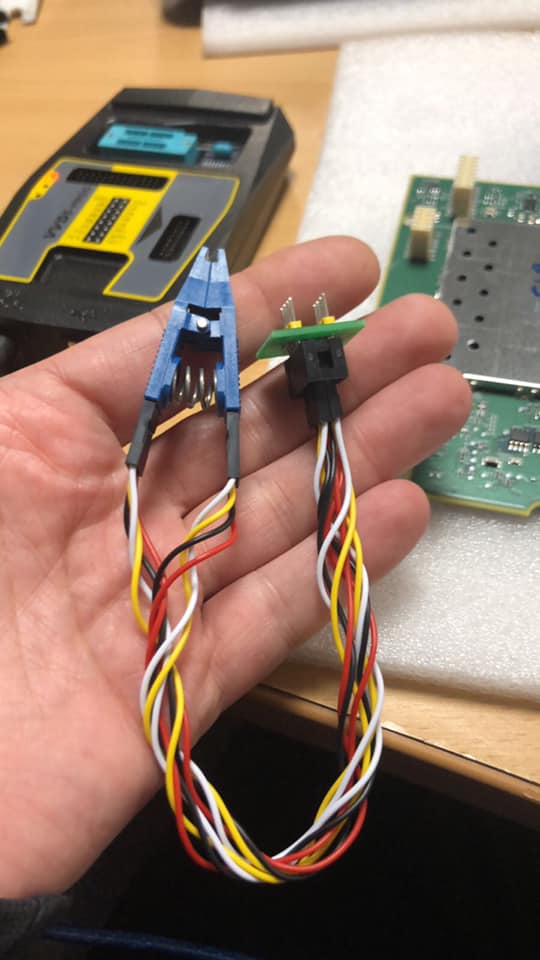
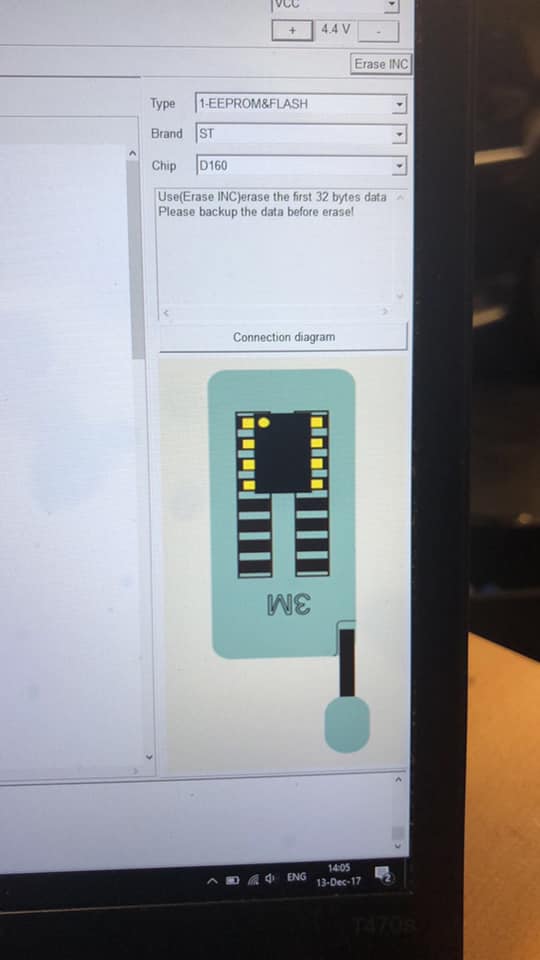
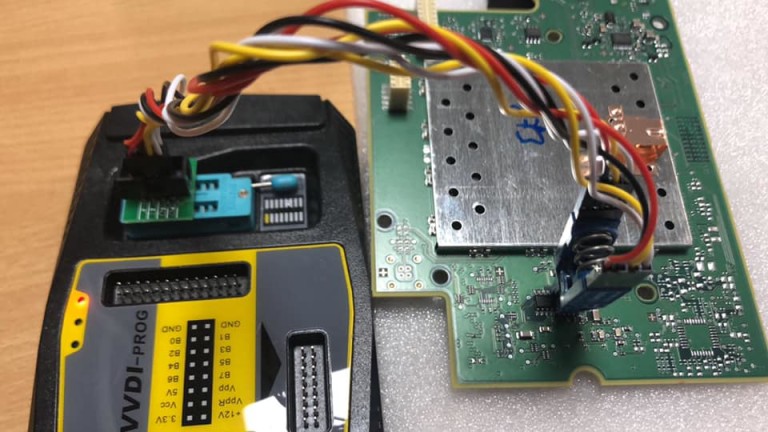
BSI = F02-00 Siemens Eeprom 95160

diagbox-telecoding-citroen-2

diagbox-telecoding-citroen-3

diagbox-telecoding-citroen-4

Telecode, Citroen

03114

DiagBox Telecoding tips and guides

Some people have complained about not being able to “Telecode” in newer versions of DiagBox (v7.63+), but they said that they were able to “Telecode” using (v7.62) and older.. Upon comparisons and helped by information released by others on various forums, the reasons seem to be in the Vehicle files (From A7 to Z9) in folders:
“C:\AWRoot\dtrd\tree\Vehicle\ ” and “C:\AWRoot\dtrd\tree\Vehicle\SUREQ\ ”

These files (that need to be edited for all PSA cars) are too many (hundreds according to some and thousands according to others), but they are TEXT editable, and if you look into them you will find few lines indicating their “Telecoding” function and saying something like:
——————————
<SubTree posc=3 posl=8 destc=3 destl=10 ident=19 FileName=”script_telexx_ManualTelecodingConnected.s” IsCritical=”NO”>
<FilePath path=”TeleXX_TPM”>
</FilePath>
</SubTree>

Note:

When you have this information “posc=3 posl=8 destc=3 destl=10”
it’s mean pos(col,line) = (3,8) , dest(col,line) = (3,10)
you can find also destyes(c,l) or destno(c,l)

so you if you have dest(c,l) = (3,10), you will find next action with pos(c,l) = (3,10)

In file, you start at “<Start dest(c,l)” and step by step you arrived to “<End pos(c,l)”
——————————
These (4) lines do NOT exist in DiagBox releases where you CAN perform Telecoding.. So, I am not sure if the best option is to remove/comment them or to change IsCritical=”NO” to IsCritical=”YES”..
Also, they are preceded or followed by a script starting like this:
<Act posc=a posl=b destc=x destl=y ident=z>
<MathAndLogic>
<Assignment>
<Source>
…….
…….
</Source>
</Assignment>
</MathAndLogic>
</Act>

If the 4 lines are removed from the script file, then the values of “destc=x” and “destl=y” in the “<Act ..” statement are replaced by the values in the “<SubTree ..” of the removed statement. I don’t know what does the value of “destc=..” represent, but “destl=..” seems to represent the number of characters between quotations in “FilePath path=” statement.

I have also noticed that few files have been removed from newer DiagBox releases and if you copy them from v7.62 and older to the same location in the newer DiagBox versions, they work. Examples:
“a08can_feux_brouillard_surequipement_install_desinstall.s” in “C:\AWRoot\dtrd\tree\Vehicle\SUREQ\A08CAN\BSI”
Or,
“tlcd_fullprocedure_PR00.s” and “tlcd_fullprocedure_PR01.s” in “C:\AWRoot\dtrd\tree\Vehicle\SUREQ\A9\BSI”

I understand that some people are working on this issue, but because the effort is so huge, I thought users may also take ownership and attempt to enable and test “Telecoding” on their own cars themselves, which is quite easy. This will help speed up creating a database of modified files sooner (if they report their modifications and share their experiences). But remember, before editing any file, it is wise to make a backup copy..

The problem is that the cars are not listed by name, but by code!!! So I have attached a “PSA_CAR_Codes” list. I cannot vouch for the accuracy or completeness of the list and members are invited to contribute, correct and/or improve it. For example:
T84 is Peugeot 3008 and X7 is Citroen C5 etc…

Hint
The name of the sub_folder indicates the “Telecoding” area in the car (like BSI) and the name of the function in the file indicates what does it do.

As always, I have posted this thread in line with my strong belief in the principle of “Sharing Knowledge and Empowering Users”.. After all, this is a “Forum” not a download site!!

Attachment: PSA car codes

Citronn vehicles Codes-Names

M33 C-Elysee II

B5 C4 I

B3 C-Quatre I Phase II

B618 C3 III

B71 C4 II

B75 DS 4

B753 DS 5LS

B754 DS 6

B73 C4L

B58 C4 Picasso I

C58 C4 Picasso I Phase II

CS15 Aircross Concept

B78 C4 Picasso II

E3 C4 Cactus

B81 DS 5

J4 C4 Aircross

X7 C5 II

X6 C6

G9 Jumpy II

K0 Jumpy III

2CV TPV

DS VGD

BX XB

AX S9

ZX N2

XM Y3

XM ph2 Y4

Xsara N6

Xsara ph2 N7

Xantia X1

Xantia ph2 X2

Saxo S8

Evasion/806 : U60

807/C8 V

C5I X3

C5I ph2 X4

_________________

==========================

Peugeot vehicles Names-Codes :

Peugeot 106

Phase 1 / 3 portes : S10

Phase 1 / 5 portes : S11

Phase 2 / 3 portes : S20

Phase 2 / 5 portes : S21

Peugeot 107

Toutes silhouettes : B0

Peugeot 108

3 portes : B30

5 portes : B31

Peugeot 1007

Berline : A08

Peugeot 205

Toutes silhouettes : M24

Peugeot 206

3 portes : T10

5 portes : T11

SW : T12

Sedan : T13

CC : T16

Peugeot 206+

3 portes : T30

5 portes : T31

Peugeot 207

3 portes : A70

5 portes : A71

SW : A72

CC : A76

Peugeot 208

3 portes : A90

5 portes : A91

Peugeot 2008

Crossover : A94

Peugeot 301

Berline : M33

Peugeot 306

Phase 1 / 3 portes : N30

Phase 1 / 5 portes : N31

Phase 1 / Sedan : N33

Phase 2 / 3 portes : N50

Phase 2 / 5 portes : N51

Phase 2 / Break : N52

Phase 2 / Sedan : N53

Peugeot 307

Phase 1 / 3 portes : T50

Phase 1 / 5 portes : T51

Phase 1 / SW : T52

Phase 1 / Sedan : T53

Phase 1 / CC : T56

Phase 2 / 3 portes : T60

Phase 2 / 5 portes : T61

Phase 2 / SW : T62

Phase 2 / Sedan : T63

Phase 2 / CC : T66

Peugeot 308 (2007 > 2013)

3 portes : T70

5 portes : T71

SW : T72

CC : T76

Peugeot 308 (2013 > �)

5 portes : T91

SW : T92

Peugeot 3008 (2009 > 2016)

Crossover : T84

Peugeot 3008 (2016 > �)

Crossover : P84

Peugeot 405

Phase 1 : D6

Phase 2 : D7

Peugeot 406

Phase 1 / Berline : D83

Phase 1 / Break : D82

Phase 1 / Coup� : D85

Phase 2 / Berline : D93

Phase 2 / Break : D92

Phase 2 / Coup� : D95

Peugeot 407

Berline : D23

SW : D22

Coup� : D25

Peugeot 408 (2010 > �)

Berline : T73

Peugeot 408 (2014 > �)

Berline : T93

Peugeot 4007

SUV : I3

Peugeot 4008

SUV : J3

Peugeot 508

Berline : W23

SW : W22

Peugeot 5008 (2009 > 2017)

Monospace : T87

Peugeot 5008 (2017 > �)

Monospace : P87

Peugeot 605

Phase 1 : Z6

Phase 2 : Z7

Peugeot 607

Phase 1 : Z8

Phase 2 : Z9

Peugeot 806

Monospace : U60

Peugeot 807

Multiplexage VAN : V2 VAN

Multiplexage CAN : V2 CAN

Peugeot iOn

5 portes : S3

Peugeot RCZ

Coup� : T75

Bipper

Utilitaire : MCVU

Tepee : MCVF

Partner (1996 > 2008)

Utilitaire : M49

Ludospace : M59

Partner (2008 > �)

Toutes silhouettes : B9

Expert (1995 > 2006)

Phase 1 : U64

Phase 2 : U65

Expert (2006 > 2016)

Toutes silhouettes : G9

Expert (2016 > �)

Toutes silhouettes + Traveller : K0

Boxer (1994 > 2002)

Toutes silhouettes : X23

Boxer (2002 > 2006)

Toutes silhouettes : U5

Boxer (2006 > �)

Toutes silhouettes : U9

Combination between VVDI KEYTOOL AND 2006 HYUNDAI SANTA FE

Here are questions and answers about 2006 Hyundai Santa Fe remote/chip cloning with VVDI Keytool error below when the user wants to clone the aftermarket generic car alarm, after the remote clone/special clone

Error information:

SN2 module detected, special clone only support wire key. Please change key model

vvdi-keytool-Hyundai

Should I use Tpx3 chip and standard wired key?

chip – ok.
What can I do to clone the alarm remote?

now. prepare remote and programming obd

That is to get the factory keyless entry. But if I want to use the aftermarket alarm how can I do it?

Not sure that there is an option to prepare a remote for santa fe in keytool. I did for Tuсson – everything works

How to you add remote to the factory alarm? Using launch scanner tool?

Go to the special function menu of your launch. I assume Launch can do it because it had an option for Immo program for Hyundai.Just don’t have the chance to use mine

Also you can program the standard with OBDSTAR X300 DP Plus

2004 VOLKSWAGEN BEETLE ADD NEW KEY: VVDI2 DONE!

Xhorse VVDI2 can do 2004 Volkswagen Beetle?
If yes, how?

Here is the steps to check:

1.Pull the instrument cluster

2.Read eeprom. By Vvdiprog
3.Open vvdi2
4.Open VW
5. Write to chip
6.Write new bin to instrument cluster
7.Install instrument cluster
8.Turn key to sync
9.Start vehicle

vvdi2-Volkswagen-Beetle

Q: How complicated it is to dismantle the cluster from the car?

A: very easy. Pop off plastic trim over IC. 2 torx screws and done. 2 plugs on rear. 1 blue, 1 black.

Q: A few days ago I made a key to A6 2002, it is not the same programming?
I read the pin code and program new key

A: I wouldn’t use vvdi2 to program this vehicle. But this is the way I would do it with the vvdi2. I would use my x100proS and pull the pin and program. Easy. But if you wanna eeprom it you can with the above steps.

VXDIAG Multi Diagnostic Tool for Full Brands including HONDA/GM/VW/FORD/MAZDA/TOYOTA/PIWIS/Subaru/VOLVO/BMW/BENZ with 1TB HDD and Lenovo T420

Please attention : This set does not include JLR DOIP, PIWIS3 License.

The hard drive comes with BMW,BENZ, GM,Ford/  Mazda,Toyota, Honda, VW ODIS,LandRover/Jaguar, Subaru,Volvo,VW,Porsche Software.

Software version:

Toyota   12.00.127
HDS      3.101.011
FORD     109
GM       2017.12
VOLVO    2014D
JLR      153
VW       4.3.3
MAZDA    109
Benz    2018.5
BMW    4.10.40
PORSCHE   18.1

HOW TO READ & WRITE 35160WT ON BMW ODOMETER

I’d like to answer the questions for you guys:

“Possible to read and write 35160WT with VVDI Prog

Tried with Vvdi programmer to reset eeprom chips on bmw clusters / odometers

But no matter how I try I can’t read ANY eprom soic 8 chips.

Then i tried a loose spare chip. Thinking if i can’t read out of circuit, i will know you have a vvdi or adapter issue

I’ve done that with 2 different Vvdi programmers.

None could read the chip off circuit or in circuit.

I’m sure i’m not trying to read a 35080WT

that’s the second eeprom on a bmw 6wb / 6wa cluster.
Strange thing here is, that cheap as crappy China tools can read both EPROMs but Vvdi can’t. Even though they’re bot on the supported eeprom list.

Finally, I desoldered the chip and used the quick release chip adapter

vvdi-prog-bmw-35160WT-read-write-1

vvdi-prog-bmw-35160WT-read-write-2

vvdi-prog-bmw-35160WT-read-write-3

vvdi-prog-bmw-35160WT-read-write-4

vvdi-prog-bmw-35160WT-read-write-5

vvdi-prog-bmw-35160WT-read-write-6-768x432

VVDI Prog is able to read 35160WT, but cannot read it

Xprog, Enigma, Smoke and Codiprog can read those but not write, so have to use an emulator and an 160Dxxx chip

But i read a post when i searched something good on the web

CG Pro 9s12 can read and write 35160WT. Perfectly!

Need a extra 35160WT adapter and also to choose in options, you´ll have to connect this adapter on separate port…

cg-pro-35160wt-adapter

CG Pro 9s12 and 35160WT:

35160wt-adapter-for-cg-pro-9s12

Chip:
ST 35160WT

Microchip PIC18F6520
Microchip PIC18F6720
Microchip PIC18F8520
Microchip PIC18F8620
Microchip PIC18F8720
Microchip PIC12F635
Microchip PIC12F683
Microchip PIC16F631
Microchip PIC16F636
Microchip PIC16F639
Microchip PIC16F677
Microchip PIC16F684
Microchip PIC16F685
Microchip PIC16F687
Microchip PIC16F688
Microchip PIC16F689
Microchip PIC16F690

Dashboard:
BMW 35080 V5 (35160WT)

2018 nouvelle arrivée Renault Renolink OBD2 Renault ECU Programmer

Renolink OBD2 Renault ECU Programmer

Renolink is a professional programming device for programming electronic control units
in Renault and Dacia vehicles, including new models recently produced.
Renolink has many features like UCH matching, airbag programming,
engine ECU programming, key coding, key deletion, dashboard coding,
eprom and flash reading and writing in Renault and Dacia vehicles.

The works you can do with Renolink programming device:

– Eprom read / write
– ECU Resetting
– Clear Crash Airbag
– Airbag reset
– Airbag Virginize
Keys
– KEY Programming
TDB (cluster)
– Indicator Programming
– ECM Programming
– UCH Programming

EPS Virginizer
– EPS Resetting

You can connect Renolink programmer device to vehicles via OBD socket,
and you can make programming easily and delete memory and introduce units
without disassembling ECU, EPROM and flash drives.
Thanks to the Renolink,you can easily virginize and re-program the parts like UCH, motor bracket,
indicator, airbag module, fuse table, which are installed new or used ones on the Renault and Dacia vehicles.

Mercedes Benz Nouvew Diagnostic Tool Released on Oct

Mercedes Benz Nouvew Diagnostic Tool Released on Oct, it is
Mercedes BEZN C6 OEM DOIP Xentry Diagnosis VCI Multiplexer

Mercedes Benz C6 OEM Xentry diagnosis VCI DOIP Pass thur interfac is the latest interface for For Mercedes & SMART vehicles can replace Star C4/C5.
XENTRY Diagnosis VCI acts as a Pass-through Interface, also called MB Star C6, For Benz C6 multiplexer to provide complete communication between a vehicle and the XENTRY software loaded on a PC.

Mercedes Benz Xentry diagnosis VCI DOIP Pass thur interface Benz C6 Overview:

Compatible Software: VXDIAG For XENTRY/Das Software
Support Vehicle: Mercede For Benz & Smart vehicles
DoIP: Support DoIP
Functions: Star Diagnostic & programming (SCN Coding)

Mercedes Benz Xentry diagnosis VCI DOIP Pass thur interface C6 Features:

Can be used for all model series of For Mercedes For Benz vehicles
Support DoIP, cover more functions during SCN Coding than SD C4/C5
Functions including diagnosing, programming, simulation studying, repair information, automotive maintenance, technical service bulletin and so on
Diagnosis updates no longer necessary – firmware updates required on rare occasions
Does not need a power supply unit for external power supply
Dandy multiplexer with a small, sturdy construction (no PC core, battery, fan, or display)
Engines (All Gasoline & Diesel Systems)
Transmissions and Electronic Selector Modules
Airmatic and Active Body Control Suspension Systems
Traction Systems: ESP / ASR / ETS / ABS / BAS / SBC braking systems
Supplementary Restraint Systems (SRS) / Airbag, All body modules OCP / UCP / LCP / SCM / SKF / KFB / RCM / DCM’s
Drive Authorisation System
Sam (Signal Acquisition) Modules
Electronic Ignition System (EIS)
Pneumatic System Equipment and ATA functions
Air Conditioning / climate control Systems
Instrument Cluster
Tyre Pressure Control
Parktronic System
Keyless Go
D2b Command & Audio Gateway (D2B and MOST networks)
TV Tuner
Headlamp Range Adjustment
Seat Electronics
Rvc, RST & Vario Roof modules
Automatic Clutch System ACS
M-Class Body Modules (AAM / EAM / DAS / SEM / VG Transfer Case)
Assyst & ASSYST + systems

Mercedes Benz Xentry diagnosis VCI DOIP Pass thur interface C6 Summary:

Mercedes Benz Xentry diagnosis VCI DOIP Pass thur interface C6 (Vehicle Communication Interface) multiplexer serves as the interface to the vehicle when performing diagnosis and repairs,
and programming electric and electronic on-board vehicle systems.

The Mercedes Benz Xentry diagnosis VCI DOIP Pass thur interface C6 does not have its own PC core, battery, fan, or display.
It is operated using the VXDIAG For XENTRY Diagnosis Pad via WLAN or a USB cable connection.

Notice:

1. Please install the 500GB HDD on laptop above 4GB Memory and I5 CPU, and use it on one laptop only. If change laptop, software may get broken and need to ship HDD back to us to copy software again.
2. ThisMercedes Benz Xentry diagnosis VCI DOIP Pass thur interface C6 can/’t support All Key Lost,needs one key at least.

DIGIMASTER 3 CHANGED KM FROM BMW E60 35080

Look here: Digimaster 3 change mileage for BMW E60 35080

Connect Digimaster 3 to the E60 dashboard

digimaster-3-bmw-e60-e61-odometer-correction-1

digimaster-3-bmw-e60-e61-odometer-correction-2

In digimaster 3:

Meter system – Europe – BMW – 5 series (E60) – Meter adjustment – 35080

digimaster-3-bmw-e60-e61-odometer-correction-3

digimaster-3-bmw-e60-e61-odometer-correction-4

digimaster-3-bmw-e60-e61-odometer-correction-5

digimaster-3-bmw-e60-e61-odometer-correction-6

digimaster-3-bmw-e60-e61-odometer-correction-7

digimaster-3-bmw-e60-e61-odometer-correction-8

Digimaster 3 and 35080 wiring diagram

digimaster-3-bmw-e60-e61-odometer-correction-9

digimaster-3-bmw-e60-e61-odometer-correction-10

Digimaster 3 is gonna read current km: 278144km

digimaster-3-bmw-e60-e61-odometer-correction-11

digimaster-3-bmw-e60-e61-odometer-correction-12

digimaster-3-bmw-e60-e61-odometer-correction-13

Then save data before odometer correction

digimaster-3-bmw-e60-e61-odometer-correction-14

Enter new km to change: 330350

digimaster-3-bmw-e60-e61-odometer-correction-15

digimaster-3-bmw-e60-e61-odometer-correction-16

digimaster-3-bmw-e60-e61-odometer-correction-16

digimaster-3-bmw-e60-e61-odometer-correction-17

digimaster-3-bmw-e60-e61-odometer-correction-18

Read out the new km to make sure the correction is successful

digimaster-3-bmw-e60-e61-odometer-correction-19

digimaster-3-bmw-e60-e61-odometer-correction-20

The new km now is 330336km

Success!

2018 New Arrival Renault Renolink OBD2 Renault ECU Programmer

Renolink is a professional programming device for programming electronic control units in Renault and Dacia vehicles,  including new models recently produced.
Renolink has many features like UCH matching, airbag programming, engine ECU programming, key coding, key deletion, dashboard coding, eprom and flash reading and writing in Renault and Dacia vehicles.
The works you can do with Renolink programming device:
– Eprom read / write
– ECU Resetting
– Clear Crash Airbag
– Airbag reset
– Airbag Virginize
Keys
– KEY Programming
TDB (cluster)
– Indicator Programming
– ECM Programming
– UCH Programming
EPS Virginizer
– EPS Resetting
You can connect Renolink programmer device to vehicles via OBD socket, and you can make programming easily and delete memory and introduce units without disassembling ECU, EPROM and flash drives. Thanks to the Renolink, you can easily virginize and re-program the parts like UCH, motor bracket, indicator, airbag module, fuse table, which are installed new or used ones on the Renault and Dacia vehicles.

Renault Renolink Fonctions:

la correspondance UCH
la programmation des airbags
la programmation du calculateur moteur
le codage des clés
la suppression des clés
le codage du tableau de bord
la lecture et l’écriture flash dans les véhicules Renault et Dacia

Les travaux que vous pouvez effectuer avec l’appareil de programmation Renolink:

– Lire/Ecrire Eprom
– Réinitialisation de l’ECU
– Effacer la collision d’Airbag
– Réinitialisation de l’airbag
– Airbag Virginize

Clé 
– Programmation de clé
– TDB (cluster)
– Programmation des indicateurs
– Programmation d’ECM

– Programmation d’UCH
– EPS Virginizer
– Réinitialisation EPS

Package includes:
1pc x Renolink OBD2 Renault ECU Programmer
Logiciel Affiche:
Logiciel Affiche
Logiciel Affiche
Logiciel Affiche 1.52
Logiciel Affiche renault renolink 1.52
renault renolink 1.52
renault renolink 1.52 Logiciel
renault renolink
renault-renolink-software
renault renolink 1.52 software
renault-renolink-software