Monthly Archives: January 2016

Digiprog III 4.94 Successfully Tested and Failed Car Model

Digiprog III 4.94 Successfully Tested and Failed Car Model

“Ok” means the car model successfully changed mileage by V4.94 Digiprog III Digiprog3 Odometer Master.

Worked Car Model:
1)For VW, Audi, Skoda vehicles:

Passat 2007 —> OBD OK
passat 2011 work obd 5 min
passat 2012 work obd
passat cc 2012 work obd
Passat 2011 menu dash diag -2012 read ok/write ok /3 minute.
passat 2006 dash work
passat 2011 work by OBD

Tiguan 2007 —> OBD OK
tiguan 2009: ok test Many Time always ok
Tiguan 2011 OBD no problem, takes about 10 minutes

Jetta 2013 take golf 6 on car list. Work fine 2 minutes
jetta 2012 work obd
jetta 2014: ok test Many Time always ok

Skoda Superb (3t) II 2009y only by obd less then 5min
Skoda Roomster 2009 —> Diag work Perfect
Skoda octavia 2009 1.9tdi instrument ok, ecu ok, dsg reset ok
SKODA Fabia 2009 obd ok. fabia -diag-read ?-write ok. (digi4.94)
skoda superb 2011 nec+24c64 obd works fine.

audi a4 2010 obd ok, audi a3 2010 obd ok
A6, 2009 work OBD, 4-5 minute.
no problem with audi a3 for now 2011 and 2010 doing ok by obd

Volkswagen Eos obd2 ——ok
vw eos 2007 —> Diag obd2 work

Golf 6 2012 obd ok
golf 2007: dash and dsg ok
golf mk5..ok
Golf 4 MM Just open dash en look voor 24C** it takes 2 minutes

300 m 2009 ok
wrangler 2012 ok
VW evoque 2012 work by OBD
Seat MII 2013 —> OBD Work

2)For BMW vehicles:
BMW E46 2004 —> 35080 Clip Work

3)For Ford vehicles:
Ford Fiesta 2012 —> OBD OK
Ford Fiesta HCS12 —> ST48 Work
2012 Ford Focus – 95320 – by ST1 work ok

4)For Mitsubishi:
For read & write correct Mileage use
Mitsubishi Outlander 93C86 V2 —> Work Perfect on Peugeot 4007 2012

5)For Mercedes Benz:
w211 2005 dash via st60 read ok/write ok/ezs sync blocked ok.
E39 m5 dash done with digi using st47
MERCEDES w210 E – DB 4_99 with Stecker 10 , ok!

6)For Opel:
-Opel Vivaro 2013 —> EEPROM Clip work 93c76
-Astra J 2011 work by OBD.
-Opel Insignia 2014 —> OBD Work perfect

7)For Fiat:
Fiat Grande Punto EVO 2011 dash– obd OK…. fiat doblo
Fiat Ducato 2012 work perfect OBD
Fiat Doblo 2009 —> OBD Work perfect 1 sec. Job

8)Other models:

Galaxy 2008 new model by the OBD ok
Successfully made chevrolet orlando like a opel insignia

Digiprog read/write 35080 for 100%.

Range Rover Evoque 2013 via obd ok

Nissans: 2002 Altima 93C66 OK in circuit with Murano; 2001 Xterra 93c56 OK unsolder with Patrol

Toyota RAV 4 2007 —> eeprom clip 93c56 work

– Made : sportage 2012
Swift 2014
Ranger 2010
Prado 2006
Runner 2006
Navarra 2012

All eeprom on board …i did NOT try obd
– salvage Yard
nitro 2009 ok
patriot 2013 ok
2015 xtrail does work with digiprog 4.94, chip 93c86 worked a treat
volvo s80 2008+ work good 10min.

Failed Car Model:
Digiprog V4.94 cannot work on some
Digiprog 3 can not do some Golf 6 and Polo Dash by obd.
Digiprog 3 can do only VDO dash Golf 6 by obd, not Magneti Marelli.
A3 sportback 2009. killed
Focus 2011 not work

How to check if the SBB Key Programmer support your car models?

How to check if the SBB Key Programmer support your car models?

SBB Key Programmer V33 is a new device used as a portable unit for programming keys in immobilizer units on vehicles. As we all known, the SBB Key Programmer can support cars like: Alfa,Fiat,Mazda,Ford,Peugeot,Citroen,Renault and so on. How to check if one car is supported?
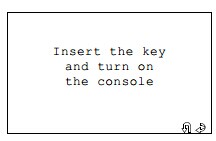
If a car model is enabled after choose the car model, the display will show:

sbb-car-model-check-1

Press ESC to quit or press ENTER to continue.

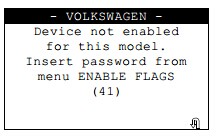
If a car model is not enabled after choose the car model,a beep will be heard and the screen will display:

sbb-car-model-check-2

OBDSTAR X-100 PRO Auto Key Programmer Add New Tested Car Model!

OBDSTAR X-100 PRO Auto Key Programmer Add New Tested Car Model!

Today we share the car models that our engineer has tested with the OBDSTAR X-100 PRO Auto Key Programmer. Some car models failed the test. Some cars successfully through the test.

Kia Sportage D70F3423 2015 successfully done less than 20 seconds.
2008- savana asking to enter ecu code
Nissan Leaf Electric Car 2014 Mileage correction done
Dodge durango 2014 …. work perfect
Kia soul with 24c16tw …. obd not ok                                                                             Hyundai accent 2014 with 24c16tw ……not work, but other accent with red screen tacho light 24c16 work well

JLR SDD V143 for VXDIAG VCX NANO install notice

vxdiag-vcx-nano-for-land-rover-and-jaguar-wifi-version-new-1-300x300

Le système d’exploitation:
Windows XP

Préparation
Remarque: s’il vous plaît débranchez la connexion Internet lors de l’installation et l’utilisation de JLR143.
Cliquez sur l’icône d’ordinateur portable sur la barre de menu du bureau pour ouvrir la connexion réseau.
Désactivez toutes les connexions réseau Connexion au réseau local et connexion réseau sans fil

Partie 1 Installez SDD
Ouvrez le Poste de travail >> 143-1 (F :), de copier “Driver” “DF5td” “DFStd_KEY” sur le bureau.
Ouvrir “SDD143.00_FULL”.
Choisir la langue d’installation pour continuer.
Cliquez sur Oui pour redémarrer votre ordinateur.
Cliquez sur Suivant.
Installation …

Cliquez sur Suivant pour installer SDD.
Sélectionnez «Je l’accepte … accord” et cliquez sur Suivant.
Cochez sur «Je l’ai lu et compris …” et cliquez sur Suivant.
Destination: cliquez sur Suivant.
Langues: Cliquez sur Suivant.
Cliquez sur Installer pour commencer l’installation.
Installation SDD …

Cliquez sur Suivant pour installer M0XA UPort 1110/1130/1150 pilote Windows.
Lieu de destination: cliquez sur Suivant.
Dossier Menu Démarrer: cliquez sur Suivant.
Cliquez sur Installer pour commencer l’installation.
Installation M0XA UPort 1110/1130/1150 pilote Windows.
Cliquez sur Terminer pour l’installation de M0XA UPort 1110/1130/1150 pilote Windows.
Allez sur l’installation SDD …
Cliquez sur Terminer lorsque l’installation réussie de SDD et redémarrez votre ordinateur.

Partie 2 Installez VDF_JA
Ouvrez le Poste de travail >> 143-1 (F:) >> VDF_JA_143.
Choisissez la langue d’installation.
Installation …
Cliquez sur Terminer après avoir installé avec succès VDF_JA.

Partie 3 Installez VDF_JV
Fermez toute l’interface, et de rouvrir mon ordinateur >> 143-2 (F:) >> VDF_JV_143.
Choisissez la langue d’installation.
Installation …
Cliquez sur Terminer après avoir installé avec succès VDF_JV.

Partie 4 Installez Tests de Pinpoint supplémentaires
Ouvrez le Poste de travail >> 143-2 (F:) >> SPA_143.
Prompt: Tests de Pinpoint supplémentaires seront installés comme une tâche de fond. Cliquez sur OK.
Installation Tests de Pinpoint supplémentaires …. (attendre pendant environ 1 heure)
Cliquez sur Terminer après l’installation Tests de Pinpoint supplémentaires.

Partie 5 Installez SDD 143.01.001
Fermez toute l’interface, et de rouvrir mon ordinateur >> 143-3 (F:) >> SDD 143.01.
Cliquez sur Oui pour redémarrer votre ordinateur.
Installation SDD 143.01 …
Cliquez sur Terminer après l’installation SDD 143.01.001, et redémarrez votre ordinateur.

Partie 6 Installez VDF_LA
Fermez toute l’interface, et de rouvrir mon ordinateur >> 143-3 (F:) >> VDF_LA_143.
Choisissez la langue d’installation.
Installation …
Cliquez sur Terminer après l’installation VDF_LA.

Partie 7 Installez VDF_LV
Ouvrez le Poste de travail >> 143-3 (F:) >> VDF_LV_143.
Choisissez la langue d’installation.
Installation …
Cliquez sur Terminer après l’installation VDF_LV.

Partie 8 Installez VX Gestionnaire
Ouvrez le pilote sur le bureau, puis à ouvrir VX Manager1.0.5.0612.
Cliquez sur Suivant pour installer VX Manager1.0.5.0612.
Cliquez sur “I accept the agreement” et Suivant.
Cliquez sur Suivant.
Installation du gestionnaire VX …
Installation VCX SDK Driver …
Cliquez sur Fermer lorsque l’installation complète.
Cliquez sur Terminer lorsque VX Manager est installé avec succès.
Redémarre ton ordinateur.

Partie 9 Installez le logiciel USB …
Assistant de nouveau matériel détecté: cliquez sur Suivant, avec une sélection de “install … (Recommander)”.
Installation …
Cliquez sur Terminer pour installer des logiciels pour le convertisseur USB de série.
Assistant de nouveau matériel détecté: cliquez sur Suivant, avec une sélection de “install … (Recommander)”.
Installation …
Cliquez sur Terminer pour installer des logiciels pour USB Serial Port.
Faites un clic droit sur Poste de travail pour Gérer.
Sélectionnez Gestionnaire de périphériques >> Ports (COM et LPT) >> USB Serial Port (COM4).
Ensuite, la gestion de l’ordinateur à proximité.

Partie 10 Installez JLR SDD
Gestionnaire de VX ouverte sur le bureau

Partie 11 Run JLR SDD
Ouvrez JLR SDD sur le bureau.
Fermer l’installation de Windows Internet Explorer 8 interface.
Internet Explorer – Moteur de recherche par défaut: cliquez sur OK.
Gérer les modules complémentaires: cliquez sur Fermer

How to get security code when programming key with XTOOL X-100 PAD?

How to get security code when programming key with XTOOL X-100 PAD?

X-100 PAD is a tablet with the latest technologies to perform key programming, mileage adjustment, oil service light reset, timing belt service light reset, tire pressure warning light reset , EPB reset, throttle body reset, DPF reset, battery reset, steering angle calibration and OBD-II engine diagnosis.

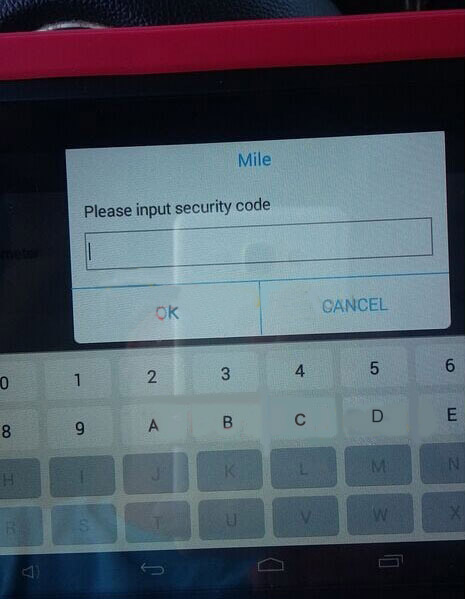
One of our customer use this to program key for 2008 Chevy Express Cargo Van. XTOOL X-100 PAD Tablet Key Programmer asks for security code. Where to get the security code?

Look at this photo. When you make this key, enter this page. You will read the code. Send this code, your detailed car list, year to sales@eobdii.fr. We will send these information to XTOOL company to calculate the code and resend it to you.

Attention: Only GM series vehicles will need this.

xtool-x-100-x100-pad-tablet-key-programmer-technical

More about the XTOOL X-100 PAD: http://www.eobdii.fr/wholesale/xtool-x-100-pad-tablet-key-programmer.html.

VPECKER Easydiag Wireless OBDII Full Diagnostic Tool V6.4 Software Updated!

VPECKER Easydiag Wireless OBDII Full Diagnostic Tool V6.4 Software Updated!

Vpecker Easydiag Client V6.4 Updated Information

1. (Update from “Setting -> Update” )
1). Support the BlueTooth connection. (Need Bluetooth Version VPecker Easydiag, will release soon)
2). Optimize the WIFI connection and license checking.
3). Optimize the production activation.
4). Fix some display bugs

2. SUBARU PRO V18.0 in ESS (Update from “Online store”)
Covered up to 2015 models: Legacy, Outback, Forester, SUBARU XV, WRX STI, Tribeca, etc.

3. MITSUBISHI PRO V18.0 in ESS (Update from “Online store”)
Covered up to 2015 models: 380, 73 TRUCK, ADVENTURE, CHALLENGER, CHARIOT, CLIPPER, COLT, DELICA, DION, ECLIPSE, EK-WAGON, ENDEVOR, EXPRESS, GALANT, GRANDIS, L200, L300, LANCER, MAVEN, MINICA, MINICAB, MONTERO, OTTI, OUTLANDER, PAJERO, TOWNBOX, TRITON, ZINGER/FUZION, i.

4. OIL RESET V18.0 in ESS (Update from “Online store”)
Covered up to 2014 models: Citroen, Peugeot, Mini, Lincoln, Pontiac, Rover, Saturn, Vauxhall, Cadillac, Chevrolet, Chrysler, Dacia, Daewoo, Ferrari, Opel, Buick, Maserati, Saab, OLDSMOBILE, Renault, Volvo, Besturn, Acura, BYD, Holden, Dodge, Ford, Honda, Infiniti, Isuzu, Jeep, Lexus, Nissan, Romeo, Scion, Subaru, Toyota, Suzuki, etc.

V2015-3 BMW ICOM Rheingold ISTA-D 3.48.20 ISTA-P 3.55.1.001 Win8 500GB HDD ISTA-D can not start Problem Solved!

V2015-3 BMW ICOM Rheingold ISTA-D 3.48.20 ISTA-P 3.55.1.001 Win8 500GB HDD ISTA-D can not start Problem Solved!

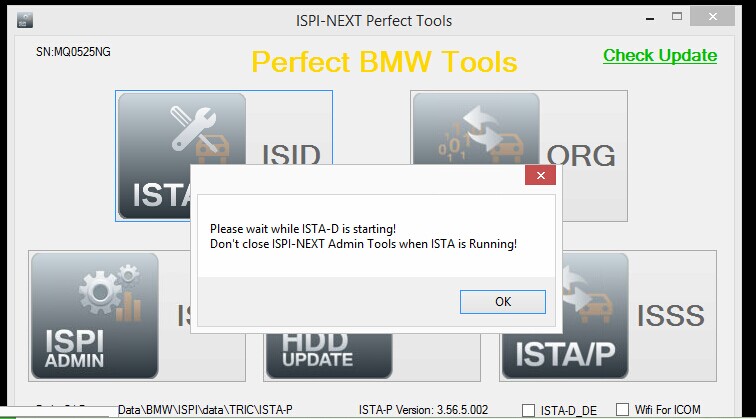
Hello, Shelly. First, I like shopping from you all the time. You told me that the V2015-3 BMW ICOM can support language as French, Greece, Italian,Russia and so on. That is true. But when I start the ISTA-D, it can not open. Can you tell me what is going on?

v2015-3-bmw-icom-win8-1

Shelly reply: Hello, friends. I sent all the details to our engineer. He told me that please follow the step bellow:
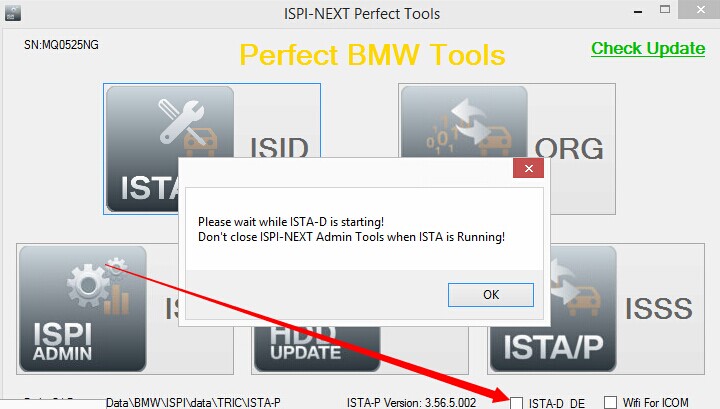
1) Restart your PC.
2) Start the ISTA-D.
3) When that error message showed, do not click anything. Wait 1 to 2 minutes. The software will get sccess into the ISTA-D automatically. Then click ISTA-DE. It will be faster.

v2015-3-bmw-icom-win8-2

Xhorse VVDI Benz VVDI MB TOOL Key Programmer Latest Version V2.0.5 Updated!

Xhorse VVDI Benz VVDI MB TOOL Key Programmer Latest Version V2.0.5 Updated!

Xhorse VVDI Benz VVDI MB TOOL Key Programmer updated from V2.0.3 to V2.0.5. This is the new update information.

1. Add password calculation for lost all key. Support W166, W246, W212, W212(old). After success find password, it will need pay 2 calculation times
2. Password calculation with working key support: add working key test before data acquisition
3. Add EIS status test, working key test function
4. Fix bug for OBD read W203, W639, W463(K) EIS
5. Autodetect W212 EIS with ELV
6. Fix bug for read v51 key password via NEC adaptor
7. Add IR repair key function
8. Bugfix

Attention: All user update device to firmware v2.0.5, software v2.0.5, the lower version don’t support password calculation

About how to update, please learn from: http://blog.eobdii.fr/how-to-update-firmware-of-the-original-xhorse-vvdi-benz-vvdi-mb-tool-key-programmer/.

BMW ICOM A1 or A2 V01.40.05 Firmware Update Steps

BMW ICOM A1 or A2 V01.40.05 Firmware Update Steps

Both the BMW ICOM A1 and the BMW ICOM A2 interface has updated the firmware to the newest version V01.40.05. Now we will show you the update steps.

1. Use the lan cable to connect the BMW ICOM A1 or A2 interface to the computer. Use the 12V adapter to connect the BMW ICOM A2 interface or just connect the interface with the car.
2. Use the IE to open this http://169.254.33.45:60080/.
user name: root
password: NZY1150263
3. Click once on “Update Firmware”. Then you can see the firmware information of the ICOM interface.
4. Choose ICOM-BootImage-01-25-02.bin. Then set the image type to be SYSTEM. Click “Send the file” one time.
5. When the computer prompt “Write the image file to the flash?”, choose “Yes”. At this time, the BMW ICOM A1 or A2 interface light will turn to red.
6. Click “Update Firmware”, after the tips of “The SYSTEM IMAGE update was successfull”.
7. Choose ICOM-ApplicationImage-01-40-05.bin. Set the image type to be APPLICATION. Click “Send the file”. This will take a few minutes to excute.
8. When the “Write the image file to the flash?” showed on the screen, choose “Yes”. The BMW ICOM A1 or A2 interface light will turn to red the second time.
9. When everything is back to normal, click “reboot”.

Attention:
1) Please set the local connection to be Automatically Obtain.
2) If your BMW ICOM software version is V2015.11, you need to update the BMW ICOM firmware to V01.40.05.
3) BMW ICOM firmware update needed file download from: http://www.mediafire.com/download/0c1f39i1905g29c/bmw-icom-firmware-update.zip.

Nouveau Logiciel de Renault Can Clip V154 Updated

Nouveau Logiciel de Renault Can Clip V154 Updated

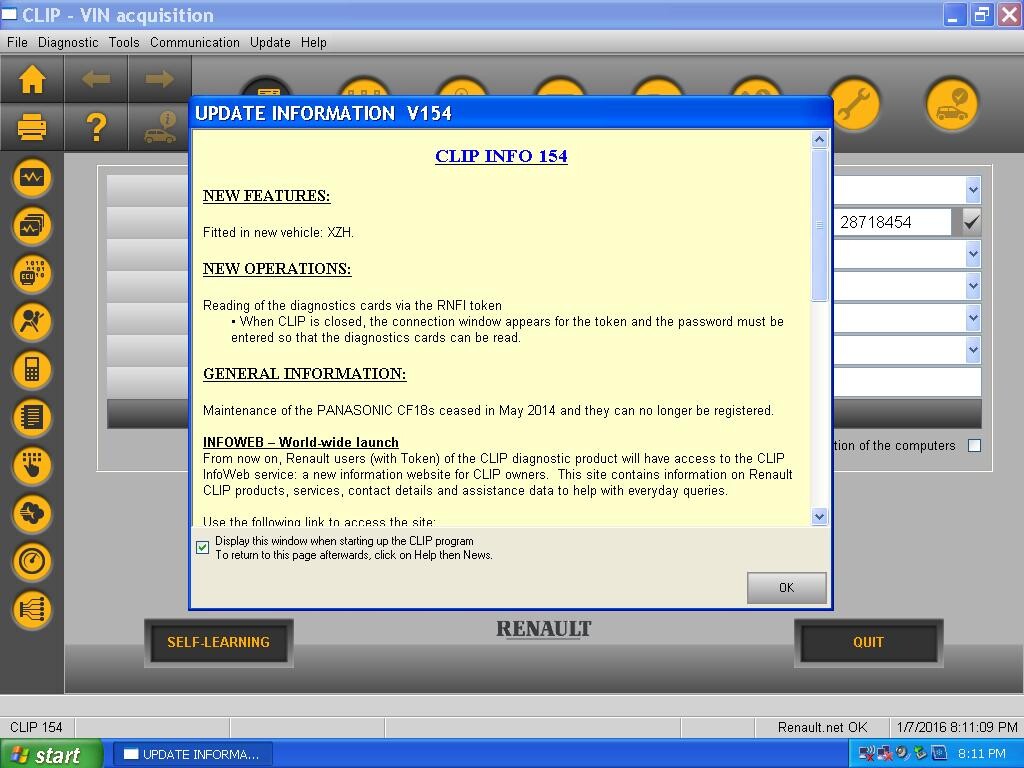
V154 New Features: Fitted in new vehicle: XZH.
V154 New Operations: Reading of the diagnostics cards via the RNFI token.

When CLIP is closed, the connection window appears for the token and password must be entered so that the diagnostics card can be read.

Renault Can Clip V154 Software:

renault-can-clip-v154-software