Comment utiliser CarProg pour Audi A3, TT, R8 tableau de bord 2010+

Comment utiliser CarProg pour Audi A3, TT, R8 tableau de bord 2010+

Here, i’d like to share a tutorial released by codecard.eu. It’s for the educational purpose only.

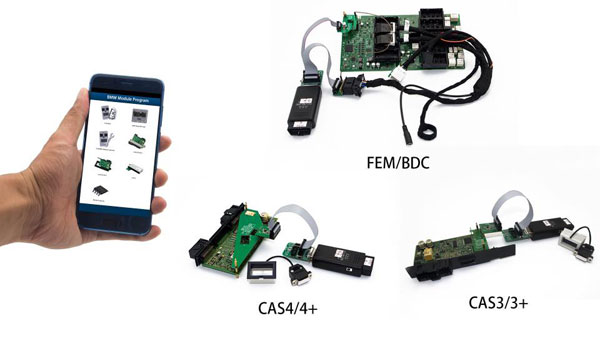
Car: Audi A3, TT, R8 2010+

Purpose: read/write EEPROM, change odometer, read/write immo data for key programming or dashboard cloning

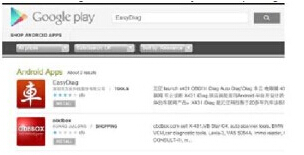
Optional tools: Carprog copy version or genuine, or VVDI2 Xhorse

Tutorial:How to get CarProg to work for Audi A3, TT, R8 (2010+):
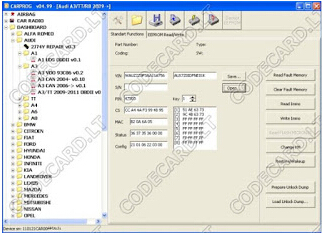
CarProg changes mileage in the car by OBDII:
Connect CarProg with A1 adapter to car OBDII.

Load A3/TT 2009-2011 OBDII software. Switch ignition ON.

Push “Prepare Unlock Dump” – odometer will be reseted to 0km.

Push “Change KM”

CarProg will show 0km

Enter new odometer value and push “OK”

Odometer correction is complete!

CarProg adds new key (if one working key exists):
connect CarProg with A1 adapter to car OBDII.

Load A3/TT 2009-2011 OBDII software.

Switch ignition ON.

Note original odometer value. Push “Prepare Unlock Dump”.

Odometer will be changed to 0km.

Swich ignition OFF.

Remove dash from car and read EEPROM 24C32 manualy (using CarProg EEPROM software);
2. Save this EEPROM dump;
3. Put dash back to car and connect via OBDII again;
4. Press button “Load unlock dump” and load saved eeprom file.
5. Now you can read IMMO file with button “Read immo”
6. Save this immo file;
7. Load VAG KEY software;
8. Open immo file, put transponder to the Carprog A3 antena and press write button;
9. Choose new key possition and save new immo file;
10. Load A3/TT 2009-2011 OBDII software;
11. Press button “Load unlock dump” and load saved EEPROM file again. Load new immo file with “Open” button.
12. Write immo file with “Write immo” button. Write old odometer with “Change KM” button
CarProg programs new keys when all keys are lost (IMMO IS ACTIVE):
Remove dash from car and read eeprom 24C32 manualy (using CarProg EEPROM software);
2. Save this EEPROM dump to have backup;
3. Fill EEPROM dump range 0×812 – 0×9BF in hex editor with FF FF … ;
4. Write this damaged dump to EEPROM;
5. Put dash back to car and connect via OBDII again; Cluster display will show “Error”;
6. Push “Prepare Unlock Dump”; Odometer will reset to 0km;
7. Remove dash from car and read EEPROM again 24C32 manualy (using CarProg EEPROM software)
8. Save this eeprom dump (THIS ONE WILL BE UNLOCK DUMP FILE);
9. Put dash back to car and connect via DIAG now( Load A3/TT 2009-2011 OBDII software);
10. Press button “Load unlock dump” and load saved UNLOCK DUMP file;
11. Load your saved backup (original eeprom) and press write;
12. Now you can read IMMO file with button “Read immo”;
13. Save this immo file;
14. Load VAG KEY software;
15. Open immo file, put transponder to the Carprog A3 antena and press write button;
16. Choose new key possition and save new immo file;
17. Load A3/TT 2009-2011 OBDII software;
18. Press button “Load unlock dump” and load UNLOCK DUMP file again. Load new immo file with “Open” button.
19. Write immo file with “Write immo” button. Write old odometer with “Change KM” button
1

NOTE: you could change km and program new keys with CarProg original. With CarProg HQ china clone, you can change km but need luck with key programming.

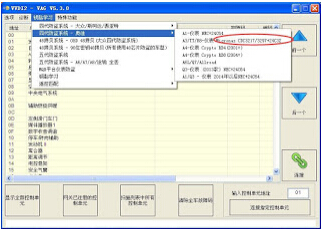
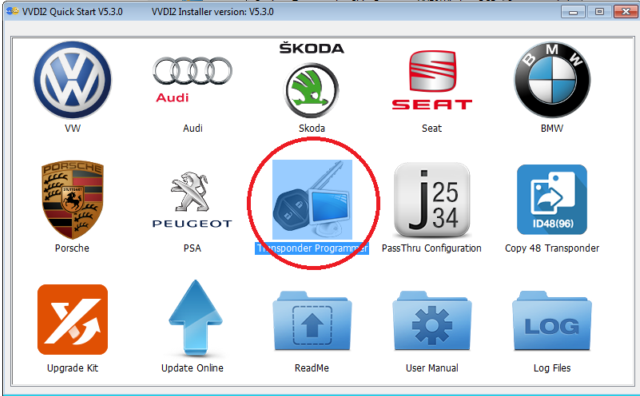
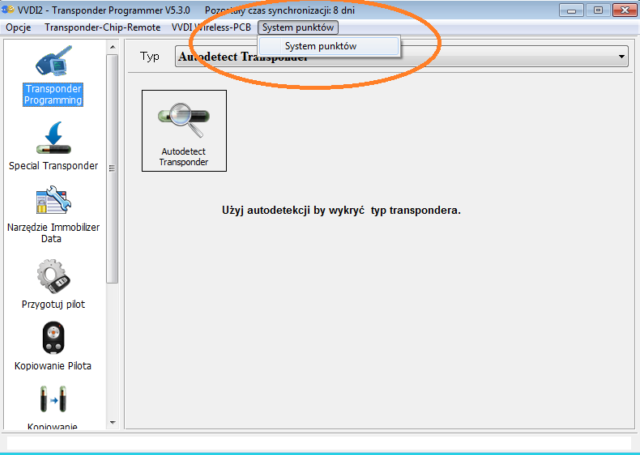
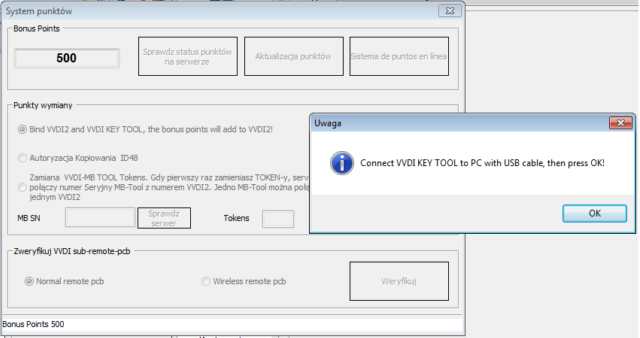
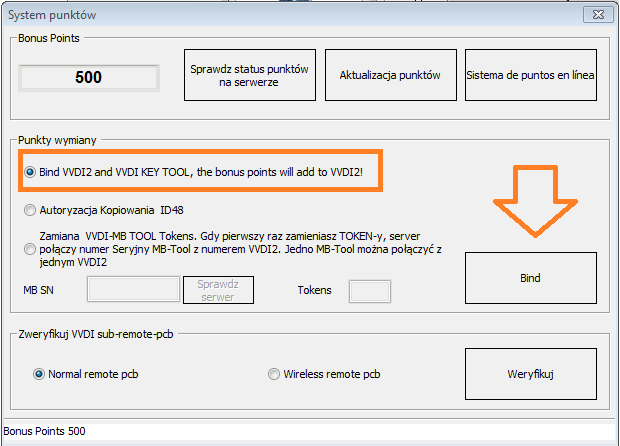
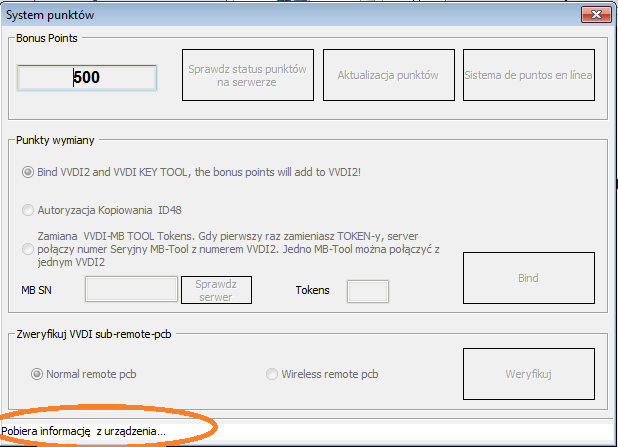
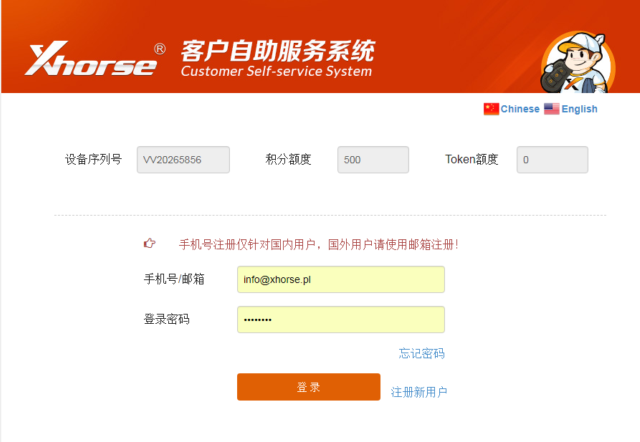
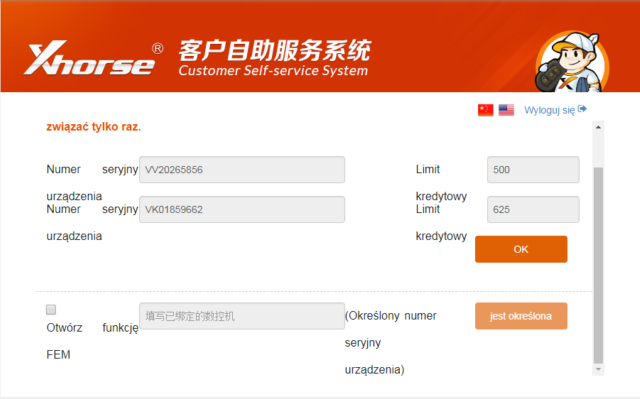
For VAG immo, Xhorse VVDI2 is the best option.

VVDI2 VAG 5.3.0 supports Audi A3, TT, R8 dashboard Micronas CDC3217/3297+24C32

2

Launch X431 EasyDiag 3.0 Plus – Comment télécharger, enregistrer et mettre à jour

Most people prefer EasyDiag 3.0 Plus to a one-to-one kit is because when they change their car in the future, all they need to do is to buy the software for their next car instead of buying a brand new diagnostic kit.

Compared with LAUNCH Easydiag 2.0 Plus, Easydiag 3.0 Plus is better in the following aspects.

LAUNCH Easydiag 3.0 Plus includes 2 free vehicles’ software + DEMO + EOBD

LAUNCH Easydiag 3.0 includes hardware+ EOBD+ DEMO

LAUNCH Easydiag 2.0 Plus VS LAUNCH Easydiag 2.0:

LAUNCH Easydiag 2.0 Plus includes 2 free vehicles’ software + DEMO + EOBD

LAUNCH Easydiag 2.0 includes hardware+ EOBD+ DEMO

Notice: Demo and EOBD also belong to one of the car model. if you downloaded Demo and EOBD first, then you cannot download other car brand software for free, we suggest you download the car software you need first, then download Demo and EOBD for free.

This is an informative post on how to use original Launch easydiag 3.0 for IOS / Android incl. Android / IOS app download, registration, activation, login, buy the car brand software, download car brand software, diagnostic, update etc.

How to Use Launch X431 Easydiag 3.0?
Main procedure:

1.Download App

2.Register

3.Activate

4.Login

5.Buy car software

6.Download car software

7.Diagnose

Here we go one by one.

Download easydiag APP
IOS: In the app store, search “EasyDiag” .

Android: In the google play, search “Easydiag”

Step 1: Turn on your Smart Device.

Step 2: Go into the Google or Android Play Store:

Google Play can be found in the following url as well: http://play.google.com/store

Step: 3: Input the keyword “Easy Diag” in the search bar and then click the Easy Diag software icon to download.

p 1


2

Register -> Active -> Login

3

4

Buy the car software what you want
Menu:

1) One brand car software price: 50USD

2)3 brand cars software price:99.95USD

3)5 brand cars software price: 149.95USD

New user get free EOBD software.

After the free-update expire, the update fee is 29.95USD

5

6

7

8


Download the car software and update
After pay the car brand software successfully, you can download them.

Update method:

On the home page, click on the “Software upgrade” to update all the car brands you paid.
To update one single car brand, please go to the specific page and quickly enter the “Software upgrade” page.
9

10

Diagnostics

1) Accessible systems: Engine, ABS, SRS, Transmission and more

2) Diagnostic Functions: Read and clear codes and view enhanced live data etc.

3) Diagnostics Feedback:

If you met any question on the diagnostic, please provide the dealer with the Launch Easydiag 3.0 serial number, car brand, model & year.

11

FAQ

1 .Communications error with vehicle ECU?

Please kindly check:

1 Whether the dongle is properly connected.

2 Whether the vehicle ignition switch is on.

3 If all checks are normal, send vehicle year, make , model and VIN number to us using Diagnostic Feedback feature.

2.Failed to enter vehicle ECU system?

Please confirm:

1 Whether the vehicle is equipped with the system.

2 Whether the tested system is electronic control system.

3 Whether the dongle is correctly connected.

4 Whether the vehicle ignition switch is on If all checks are normal, send vehicle year, make , model and VIN number to us using Diagnostic Feedback feature.

3.The diagnostic application is failing?

1 Press the Home key to navigate to the home screen.

2 Select “Settings”->“Apps”.

3 Select the application name from the APP list.

4 Select “Force Stop”,and then tap “OK” to confirm.

5 Select “Clear Date”, and then tap “OK” to confirm.

Precautions on using easydiag 3.0

1. This device is a precision electronic instrument. Handle it with care,Avoid dropping.

2. This device only operates on the 12V passenger vehicles equipped with OBD II management system.

3. To avoid damage to this device due to frequent use, you are recommended to use the included extension cable to connect it to vehicle’s DLC.

4. Turn off the ignition switch while plugging/unplugging the device.

5. Be sure to always remove the device once testing and /or diagnosis is complete,Failure to do so may result in a drained or weakened battery.

VVDI2 et VVDI Key Tool copie transpondeur VW 48 96bit

If you have VV-04 activation (Clone 48 96bit) for VVDI2, you can combine VVDI2 with vvdi key tool and use Copy 48 on Keytool

1) Register Keytool apps on your smartphone:

and connect Keytool via Bluetooth

2) Connect VVDI2 to your PC and go to Transponder Programmer

3) Go to SYSTEMS POINTS

combine-vvdi2-and-vvdi-key-tool-1

4) Connect Keytool to your PC with a USB cable,VVDI2 still connected with a USB cable

combine-vvdi2-and-vvdi-key-tool-2

5) Select BIND VVDI2 and Keytool and press BIND VVDI will display information to connect Keytool to a PC

combine-vvdi2-and-vvdi-key-tool-3

6) Then read the information

combine-vvdi2-and-vvdi-key-tool-4

7) you will be redirected to the login page, enter the same login information you entered when logging in to Keytool on android

combine-vvdi2-and-vvdi-key-tool-5

combine-vvdi2-and-vvdi-key-tool-6

combine-vvdi2-and-vvdi-key-tool-7

8) After logging in you will see the state of VVDI2 and Keytool

9) if you want to transfer points from Keytool to VVDI2 , press OK

10 ) Moved points

combine-vvdi2-and-vvdi-key-tool-8

combine-vvdi2-and-vvdi-key-tool-9

11) VVDI Key Tool for 4896bit count will display the status of points from both devices

combine-vvdi2-and-vvdi-key-tool-10

COMMENT METTRE A JOUR L’OUTIL DE PROGRAMMATION XPROG M XPRONG ECU POUR XPROG 5.74

COMMENT METTRE A JOUR L’OUTIL DE PROGRAMMATION XPROG M XPRONG ECU POUR XPROG 5.74

As we all known , Xprog M 5.74 is the latest the xprog programming tool.
Some customers ask whether they can update their xprog m 5.0 to xprog m 5.74.
Here we share detail steps about how to update xprog m ecu programming tool to xprog m 5.74 ecu remapping tool.

Eobdii.fr Xprog Update Notice:

You are at your risk.

For Newer Xprog M 5.74 ,pls connect

20180329174525

You also need: ATMEGA64 Repair Chip update XPROG-M

20180329175213

Free download XPROG Box V5.7.4 software:

https://mega.nz/#!PQUzGAKI!LuBfkREVI9vnjPtPKlhdjbv6welC8GkHoZM4Bm9wois

Free download XPROG M V5.7.4 setup exe:

https://mega.nz/#!vUknWAaZ!VwXXnaREXg4oRFRUYkvmPpkdEyj6ILX4hiEL3obYhMg

How to update XPROGM V5.0 software to XPROG M V5.74:

Unzip the XPROG 5.7.4.zip contents to a folder on your desktop.

Open the folder AVRDUDESS and run avrdudess.exe program.

The following procedure will flash the version 5.0 firmware on your XPROG device.

Select your programmer.

Click on “Detect” at the top right corner. It will detect ATMEGA64.

Select your flash file which is in the Firmware folder.

Select your EEPROM file which is in the Firmware folder.

Enable the “Erase flash and EEPROM (-e)” option.

Set the following in the “Fuses & lock bits”

L: 0x2F

H: 0xCA

E: 0xFF

LB: 0x3C

And enable the “Set fuses” and “Set lock” options.

Finally click on “Program” and wait till it finishes and verify all the data are flashed correctly.

If not then try again.

Now that the Xprog has version 5.0 firmware, go to the “XprogDesktop” folder and run “XprogDesktop.exe” file.

Click on “Help->Hardware info…” and once it opens it will ask to upgrade the firmware.

If not, then click on the “Upgrade” button. Once this procedure is finished you can try and read a processor. It will ask for a certificate. If it fails try again.

When it is finished the XPROG will run the latest firmware and you will be able to work with the latest Xprog 5.74 software!

Again note that this is not a 100% successful guide, some work and some may not.

20180329174509

Comment puis-je utiliser OBDSTAR X300 DP sur BMW CAS2 CAS3 CAS4 via OBD

Comment puis-je utiliser OBDSTAR X300 DP sur BMW CAS2 CAS3 CAS4 via OBD

Is it possible to add one key to BMW CAS2/CAS3/CAS4,using OBDSTAR X300 DPpad yellow version

On cas 2,3 we used tools like usually VVDI2,CGDI BMW.

On cas3+ with working key!!If it is AKL(all key lost),you need to pull ISN code on dde or dme!!! for registry a key you need downgrade the cas,register key and after backup.
On cas4 Obdstar x300 dp is not working on obd!! Just to Block or active key !!!!

Disable and Enable keys:
CAS3(CAN)
Enable keys
Disable keys
CAS4(CAN)
Read keys information
Keys ID
Keys status
Current ignition key No.
Enable keys
Disable keys
K Line
Read version information
Read keys information
Keys ID
Keys status
Remote battery status
Current ignition key NO.
Enable keys
Disable keys

11

4
FEM/BDC:
Key programming
Key information
Key programming processing
Key adding
Key detect
Function introduction
Operation guide
Other functions :BMW FEM/BDC Smart Key Programming Procedure

obdstar-x300-dp-bmw-fem-bdc-smart-key-programming

Keep updating soon….

How Yanhua Mini ACDP connect to BMW CAS4 without soldering

How Yanhua Mini ACDP connect to BMW CAS4 without soldering

bmw-cas4-fem-adapter-1
This post will tell how to use Yanhua Mini ACDP Programming Master connect
to BMW CAS4 without soldering
CAS4 Wholeset Schemeatic Diagram

1
CAS4 probes location schematic diagram

2

The procedure as shown below:

Step 1,Install copper pillar,use M2.5*12+6 specified copper pillar to install support frame

3
Step 2,Install the CAS4 interface board

Tip:Aim at the points D1/D2/D3/D4 accurately and press them, then lock the two copper pillars

4

Step 3,Connect BDM Adapter,then plug the BDM Adapter into the CAS4 specified interface board

5

Step 4,Connect the ACDP with OBP+ICP adapter, then finished

2018 New Original Yanhua Mini ACDP Clé Programmeur Master Sans Soudure Pour BMW Séries

Yanhua Mini ACDP Highlights:

Test car NO longer needs engines
YANHUA car keys programming NO longer need soldering iron
Car locksmith NO longer needs soldering work.
The first in the world
Programming no need soldering

Yanhua Mini ACDP Functions

1. Memory programming:
Support 93/24/25/35/95 series EEPROM in circuit (ICP)and on board(OBP)programming and parts of Freescale/ NEC MCU in circuit programming(ICP).

2. BMW module programming:
(1) Support cas1-cas4+and FEM/BDC IMMO key programming, mileage reset, program recovery.
(2)BMW engine ECU data reading and ISN code reading

3. VW module programming. MMC instrument
4. Instrument mileage and airbag ECU reset/maintenance is under development.
5. BENZ. BMW Audi and various models are upgraded successively

Yanhua Mini ACDP IMMO/Mileage Programming

No need to remove chip
No need soldering
No need to cut the line
No need to lift the pin

Install ACDP App from App Store.


BMW: CAS4/FEM/BDC/16ODOWT

BMW CAS4/FEM/BDC/16OBDWT

Solder-free programming Data safety

WIFI Free connection

1. Overturn the traditional work mode, single operation is changed to team cooperation
2. Change of operation mode, PC operation is changed to mobile phone operation
3. Change of test connection mode, electric soldering iron is changed to no-solder dedicated connector
4. Change from artificial observation to intelligent monitoring Artificial observation / trying is changed to automatic detection algorithm, grap hical in dication the relability of connection.
Ensure the data is not damayed and lost
5. Change of service mode: Offline service is changed to online synchronous service

ICP: Memory and MCU programming In Circuits

Memory and MCU programming In Circuits

MCU programming in Circuits

A game changer for BMW Key Programming
1. CAS4/CAS4+ Key Programming Without Soldering or removing component.
2. FEM/BD.C Key Programming without Soldering/Welding
3. Read ISN Code from OBD Port directly(Partially)

BMW CAS-CAS3+ Key Programming by OBD (Buy SK247-1 Module Seperatly):
Read CAS EEPROM
Add Keys
Reset Mileage
Back up or recover CAS
All keys Lost

BMW CAS4/CAS4+ (Buy SK247-1 Module Seperatly):
Read CAS4 EEPROM without soldering/welding
Add Keys without soldering/welding
Reset Mileage without soldering/welding
Back up or recover CAS without soldering/welding
All keys Lost without soldering/welding

FEM/BDC (Buy SK247-2 Module Seperatly):
All keys lost without soldering/welding
Add keys without soldering/welding
Delete Keys without soldering/welding
Enable/Disable keys without soldering/welding
Read Key ID
Repair/Replace FEM Module without soldering/welding
Reset Mileage without soldering/welding

Read and Write ISN Code (Buy SK247-3 Module Seperatly):
N20(mevd1724, mevd172P, mevd1729), N13(mevd1725, ), N55(mevd172, mevd1726, mevd172G, mevd172S, MEVD17, ), MSV80, MSD81, MSD85, MSD85HY, MSD87, MSV90, MEVD1728(s63), mev1722, med172, mevd1727, dde701_edc17c50, BMSX….

BMW 35080, 35160DO WT Read & Write (Buy SK247-4 Module Seperatly)
Read and write BMW M35080, 35160DO WT etc EEPROM

Fujitsu CPU MB91F Read & Write Module (Buy SK247-5 Module Seperatly)
Supports Honda FIT, Vezel, Fifth generation Hyundai Sonata, Kia K3/K5 etc Fujitsu CPU MB91F series read & write function.


2018 Nouveau Xprog-M XPROG-Box ECU Programmer V5.84 with USB Dongle and AUTH-0028-1

(Hot)  2018 Latest XPROG-M V5.84 with USB Dongle 
Top Reasons to Get 2018 Xprog-M V5.84
1. Software version: 5.84, Firmware version: 4.4
2. With USB Dongle, NO need activation
3. Add new authorization: AUTH-0028-1 Renesas V850 Authorized and AUTH-0028-2 Renesas SuperH Authorized 2017/10/9
4.  Language: English
XPROG-M V5.84 Tips:
1. DO NOT use this newest dongle to update the older version Xprog to V5.84
2. Close anti-virus software on your computer; otherwise, X-prog software would be killed.
3. Disconnect the internet; otherwise, the hardware would be damaged.
4. Uninstall the old version of xprog before you install V5.84 software we provide, because our xprog-box hardware is not compatible with newer or older software; otherwise, the hardware will be damaged and will lose its warranty…
5. Never try to UPDATE for the hardware will be damaged if you want to try to update it online, then you will lose its warranty.
XPROG-M V5.84 Authorizations:
AUTH-0001 Motorola HC05 family authorization (allows to read/write EEPROM)
AUTH-0002 Motorola HC08 family authorization (allows to read/write EEPROM)
AUTH-0003 Motorola HC11 family authorization (allows to read/write EEPROM)
AUTH-0004 Motorola HC12, 9S12 family authorization (allows to read/write EEPROM and flash memory)
AUTH-0005 Texas Instruments TMS370/TMS374 family authorization (allows to read/write EEPROM)
AUTH-0006 Motorola HC05Bxx and HC05Xxx family bypass security authorization (allows to read/write secured EEPROM and flash memory)
AUTH-0007 ST M35080 authorization. Read/Write/Erase device to delivery state.
AUTH-0008 BMW EWS3 authorization
AUTH-0009 ATMEGA family authorization (allows to read/write EEPROM and flash memory)
AUTH-0010 MB ZGS001 authorization
AUTH-0011 Motorola HC11EA9/E9 bypass security authorization (allows to bypass security bit and read EEPROM and RAM memory)
AUTH-0012 National CR16 authorization (allows to read/write EEPROM memory)
AUTH-0014 ST7, ST10 family authorization (allows to read/write internal flash)
AUTH-0015 MPC5xx authorization (depending on device program automatically detects MPC5xx, M95xxx device type, flash, external flash and configuration memory size)
AUTH-0018 Motorola HC12, HC912, MC9S12, MC9S12X bypass security authorization (allows to read/write secured EEPROM and flash memory)
AUTH-0020 ARM (Micronas, …) Family authorization (allows to read/write internal flash and external serial EEPROM)
AUTH-0021 ARM (Micronas, …) Family bypass security authorization (allows to read/write secured and non-secured internal flash and external serial EEPROM, view/change mileage, Chassis number (VIN), serial number and PIN code).
AUTH-0023-1 MAC7xxx
AUTH-0023-2 XC23xx
AUTH-0024-1 MC9S12Cxx
AUTH-0024-2 MC9S12XE
AUTH-0024-3 9S12XE SECURITY
AUTH-0024-4 MC9S12HA/HY/P
AUTH-0025-1 MPC/SPC5xxx Authorized 2016/3/13
AUTH-0027-1 HC(S)908 update Authorized 2016/3/13
AUTH-0027-2 HC(S)908 sercurity Authorized 2016/3/13
AUTH-0028-1 Renesas V850 Authorized 2017/10/9
AUTH-0028-2 Renesas SuperH Authorized 2017/10/9
XPROG-M V5.84 Adapters:
ADP-0001 TMS370 PLCC28 programming adapter
ADP-0002 TMS370 PLCC44 programming adapter
ADP-0003 TMS370 PLCC68 programming adapter
ADP-0004 Motorola HC05B/X PLCC52 programming adapter
ADP-0005 Motorola HC05B/X QFP64 programming adapter
ADP-0006 ST M35080 in-circuit programming adapter
ADP-0008 TMS374 family in-circuit programming adapter
ADP-0009 MC68HC05V12 programming adapter
ADP-0010 TMS374 on-board programming adapter
ADP-0011 HC11EA9/E9 programming adapter
ADP-0017 HC(S)12 BDM / ARM Micronas in-circuit programming/bypass security adapter
Additional adaptor for 5M48H P-Flash
ADP-0019 Rev.A
EWS3 adaptor
EEPROM adaptor
QFP28 adaptor
QFP64 adaptor
QFP80 adaptor
QFP112 adaptor
QFP144 adaptor
Installation Notice:
Windows System Requirement as Below
1. Windows system should be windows XP 32bit OR windows 7 64 bit, all the patch software for the windows system should be installed already and the windows properly works well…
2. The windows system should be with at lest 2 partitions (except the CD ROM.)
3. Can not be working with virtual harddisk.
Install manuals in words:
1. Click the file “installation.reg”, get the file information to the regedit.
2. Install the file “AdbeRdr11000_zh_CN.exe”, it is a must, otherwise the Xprog software will not start.
3. Plug the Xprog main interface to the computer, install the USB driver.
4. Copy the folder “XPROG-BOX5.84” to the desktop, and open it, and run the “xprogdesktop.exe”, then software open.
Software Display:
xprog m ecu box software display 1
xprog-m ecu box software display 2
xprog-m ecu box software display 3
Package Includes:
1pc x  XPROG-Box Hardware (Aluminum Enclosure) .
20pcx  Adapters Set
1pc x  USB Cable.
1pc x USB Dongle
1pc x  CD with XPROG-Box Software (V5.84)

Version française Foxwell NT520 Pro Multi-System Scanner adds Mercedes Benz & same functions as NT510

Français Foxwell NT520 Pro Multi-Système Scanneur
Foxwell NT520 Pro est l’outil de scan professionnel le plus rentable pour les amateurs, les petits garages, les réparations indépendantes, les garages spécialisés et les techniciens en fournissant un diagnostic de niveau OE sur tous les systèmes électroniques. Il n’inclut pas seulement des fonctions de base telles que des codes et des données en direct, mais aussi des fonctions avancées telles que l’actionnement, l’adaptation et la programmation. En outre, il vous permet d’accéder aux fonctionnalités de service les plus couramment requises telles que la réinitialisation de la lumière du service pétrolier, l’ajustement du corps de l’accélérateur, la régénération DPF et bien plus encore.
Délicement développé par les experts les plus distingués de cette industrie, Foxwell NT520 Pro multi-système scanneur est l’outil de scan professionnel le plus rentable de l’industrie. C’est un outil unique qui offre une véritable couverture, profondeur et valeur pour les différents constructeurs automobiles.

Notice:
Quand vous recevez le produit, enregistrez d’abord sur le site officiel, et puis choisir la marque dont vous avez besoin
NT520 Pro Langues:
Anglais, chinois, français, néerlandais, espagnol, japonais, russe, polonais, néerlandais, portugais, coréen, suédois, italien, russe, thaïlandais, hongrois
Les marques disponibles sont Chrysler, GM, Honda, Accura, Kia, Toyota, Lexus, Sicon, Land Rover, Jaguar, OPEL, Vauxhall, VW, AUDI, Seat, Skoda et plus encore.
nt520 pro software included
Foxwell NT520 Pro shows live vehicle sensors data in text and graph format and allows you to focus on any suspicious or symptom-specific data parameters it’s powerful graphing capability gives you the real picture of what’s going on in the
vehicle.
You can view 2 parameter graphs simultaneously and merge them into one coordinate, so you can easily see how they affect each other, providing you with the most comprehensive and functional look at live data possible.
nt520 live data shows 1
NT520 Pro cannot only read your codes, but it can also actuate components, run system tests, program control modules.Reading the trouble codes from your vehicle is easy, but without live data, bi-directional controls and other special functions, you may not have enough information to get the problem fixed right It allows you to use the scan tool temporarly activate or control a system or component with
NT520 Pro, the check of electronic components such as switches, sensors, relays & actuators is made a simple task. saving your time and labor costs. It gives you the ability to flash a control unit with new program data. Provided that a module can be re-coded.

NT520 Pro allows for the coding and programming of a replacement control module or changing previously stored incorrect coding as expensive factory tools do

nt520 pro live data shows
In additon it has access to the most commonly requirede service features like brake deactivation ,adaptation and service resets.
nt520 pro live data shows
Foxwell NT520 Pro update online:
With Internet access, you will always have the latest bug fixes, new vehicles, newly added parameters and functionality at your fingertips. And they are free for life long time after your registration. Simply connect the scanner with your computer,log into the PC application and click update. The application does all the work, syncing the latest software to your tool.
nt520 pro live data shows
Foxwell NT520 Pro design: 
The easy yet elegant design of this scanner was developed by technicians for technicians. Clearly arranged keypad,menu-driven operation, shortcuts and impressive 2.8 color display together make the scanner extremely easy to use
Foxwell NT520 Pro good quality:
NT520 Pro is built to last. It is constructed to resist impact and damage in the tough workshop environment. A rubberized sleeve protects your investment. The secure fit. extra corner padding and screen protector ensure your scan tool will be around for a long time.
Foxwell NT520 Pro Spécifications:
Affichage: rétroéclairé, 240 * 320 écran couleur TFT
Température de fonctionnement: 0 à 60 ° C (32 à 140 ° F)
Température de stockage: -20 à 70 ° C (-4 à 158 ° F)
Alimentation externe: 8 à 18 V par véhicule fourni
Dimensions: 200 * 100 * 38MM (L * W * H)
Affichage: 2.8 « écran couleur TFT
Température de stockage: -20 à 70 ° C (-4 à 158 ° F)
Dimensions: 145 * 94 * 32MM
Color Box: 530 * 525 * 336mm

Processus de mise à jour Foxwell NT520 Pro:
Pour mettre à jour votre NT520 Pro, suivez les trois étapes ci-dessous:
Étape 1: Obtenez une ID FOXWELL (ouvrez le site ci-dessous pour afficher les détails)
             http://www.foxwelltech.com/support/item-216.html
Étape 2: Enregistrez le produit avec le numéro de série du produit et le mot de passe du produit (ouvrez le site ci-dessous pour afficher le détail)
              http://www.foxwelltech.com/support/item-217.html
Etape 3: Mettre à jour le produit par l’application de mise à jour FoxScanner.
1. Il existe deux façons de télécharger l’application PC de mise à jour.
une. Visitez notre site www.foxwelltech.com et allez dans la page Produit. Trouvez votre modèle de produit et cliquez dessus pour voir le profil du produit. Sélectionnez l’onglet Télécharger pour télécharger le fichier d’application PC.
B. Connectez-vous à www.foxwelltech.com, allez dans votre centre membre et sélectionnez Produit enregistré. Cliquez sur Détails du logiciel. Vous trouverez le lien juste en haut des logiciels.
2. Décompressez le fichier de l’application. Suivez les instructions sur l’écran de l’ordinateur pour installer l’application et le pilote.
3. Double-cliquez sur l’icône du bureau pour lancer l’application.
4. Retirez la carte TF du scanner, placez-la dans le lecteur de carte et branchez le lecteur dans l’ordinateur. La carte TF se trouve sur le côté gauche du scanner.
5. Connectez-vous avec votre ID Foxwell et votre mot de passe.
6. Foxscanner reconnaît automatiquement le numéro de série et affiche toutes les applications disponibles, lisez-le attentivement avant la mise à jour. Veuillez noter que vous êtes autorisé à sélectionner et à installer n’importe quel logiciel du véhicule à partir de la liste de mise à jour disponible gratuitement et, à l’avenir, vous êtes autorisé à installer des mises à jour de la marque sélectionnée uniquement.
Dans le cas où vous souhaitez installer un autre logiciel de véhicule, contactez-nous ou connectez-vous à votre centre membre pour passer une commande d’achat de logiciels supplémentaires.
7. Cliquez sur la case (s) en-tête en regard du logiciel que vous souhaitez mettre à jour, puis cliquez sur le bouton Mettre à jour pour télécharger.
8. Lorsque le bouton Mettre à jour est cliqué, il commence à télécharger. Et vous pouvez vérifier l’état actuel. Si l’état actuel affiche le téléchargement, ne fermez pas l’application de mise à jour. Ne fermez pas Foxscanner jusqu’à ce qu’il s’affiche.
9. Cliquez sur Gestion du logiciel pour examiner tous les logiciels mis à jour.
10. Pour désinstaller un logiciel, sélectionnez-les et cliquez sur le bouton Désinstaller.
Plus d’informations détaillées sur la mise à jour de Foxwell NT520 Pro, lire le manuel de mise à jour de Foxwell NT520 Pro update aux “Fichiers de téléchargement associés”
Le design simple mais élégant de ce scanner a été développé par des techniciens pour les techniciens. Un clavier clignoté, une opération guidée par menus, des raccourcis et un impressionnant écran couleur de 2,8 pouces, rendent le scanner extrêmement facile à utiliser.
Foxwelll NT520 Pro est conçu pour durer. Il est construit pour résister aux impacts et aux dommages dans l’environnement de l’atelier difficile. Un manchon caoutchouté protège votre investissement. L’ajustement sécurisé, le rembourrage d’angle supplémentaire et le protecteur d’écran garantissent que votre outil de balayage sera disponible pendant une longue période.
Package includes:
1pc x NT520 Pro Multi-System Scan Tool
1pc x Main 16pin cable
1pc x User’s Guide
1pc x Memory Card
1pc x USB Cable
1pc x Nylon Carry Pouch

Original Yanhua Mini ACDP-Programming Master Fujitsu CPUMB91F Read & Write Module pour BMW CAS4/FEM/BDC/160DOWT No Need Soldering

Original Yanhua Mini ACDP-Programming Master Fujitsu CPUMB91F Read & Write Module pour BMW CAS4/FEM/BDC/160DOWT No Need Soldering
Top Reasons to Get ACDP Programmer Master 
No need to remove chip!
No need to cut the line!
No need soldering!
No need to lift the pin!
ACDP Programming master description
Radical change!
Subversion
Tesla car NO longer needs engines
YANHUA car keys programming NO longer need soldering iron
Car locksmith NO longer needs soldering work.
The first in the world
Programming no need soldering
BMW: CAS4/FEM/BDC/16ODOWT

bmw cas4 fem adapter

Solder-free programming Data safety
WIFI connection Free connection
1. Overturn the traditional work mode Single operation is changed to team cooperation
2. Change of operation mode PC operation is changed to mobile phone operation
3. Change of test connection mode Electric soldering iron is changed to no-solder dedicated connector
4. Change from artificial observation to intelligent monitoring Artificial observation / trying is changed to automatic detection algorithm, grap hical in dication the relability of connection. Ensure the data is not damayed and lost
5. Change of service mode: Offline service is changed to online synchronous service
IMMO/Mileage Programming
No need to remove chip
No need soldering
Functions
1. Memory programming:
Support 93/24/25/35/95 series EEPROM in circuit (ICP)and on board(OBP)programming and parts of Freescale/ NEC MCU in circuit programming(ICP).
2. BMW module programming:
(1) Support cas1-cas4+and FEM/BDC IMMO key programming, mileage reset, program recovery.
(2)BMW engine ECU data reading and ISN code reading
3. VW module programming.
MMC instrument
4. Instrument mileage and airbag ECU reset/maintenance is under development.
5. BENZ. BMW Audi and various models are upgraded successively
vw module programming
ICP: Memory and MCU programming In Circuits
mini acdp icp programming circuits
acdp icp programming circuits
MCU programming in Circuits
acdp mcu programming circuits
Package includes: 
1pc x Yanhua Mini ACDP programming master