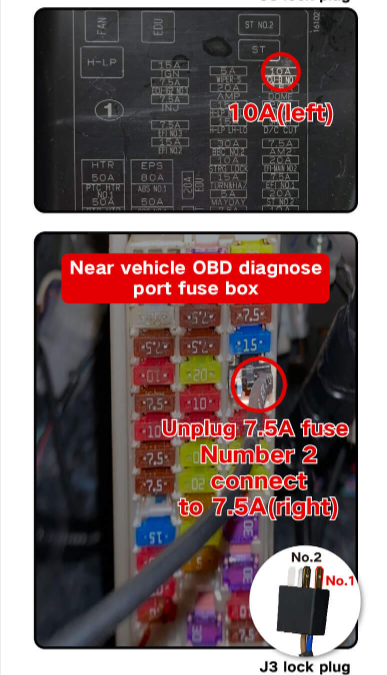
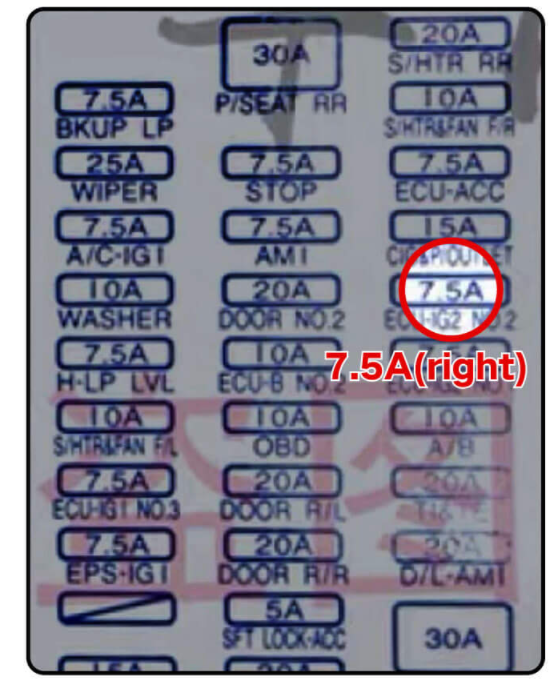
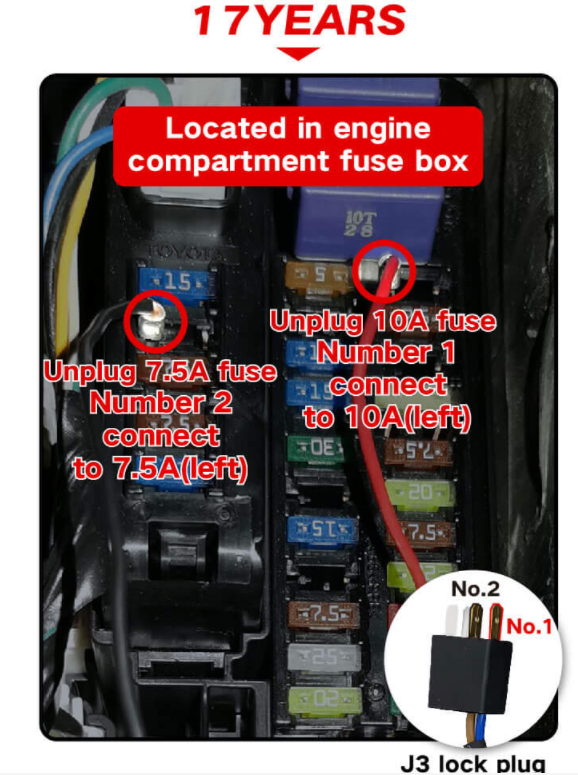
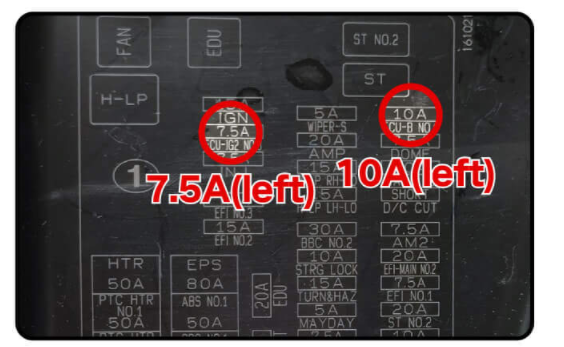
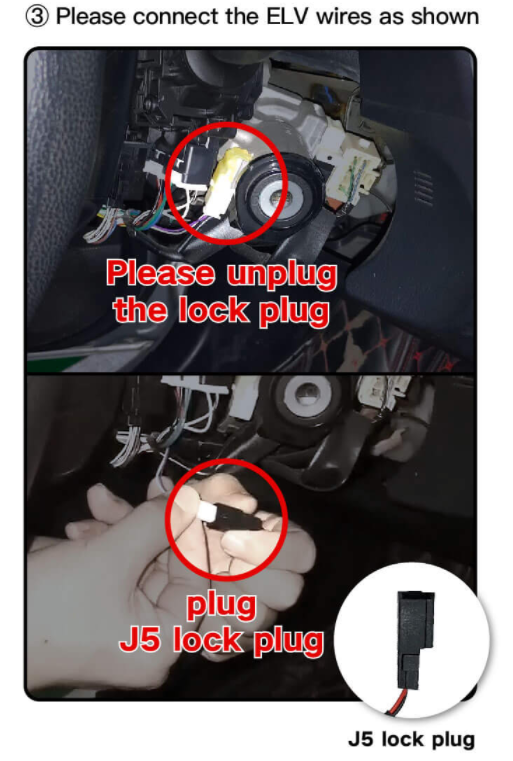
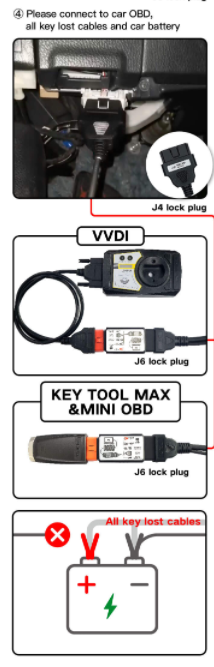
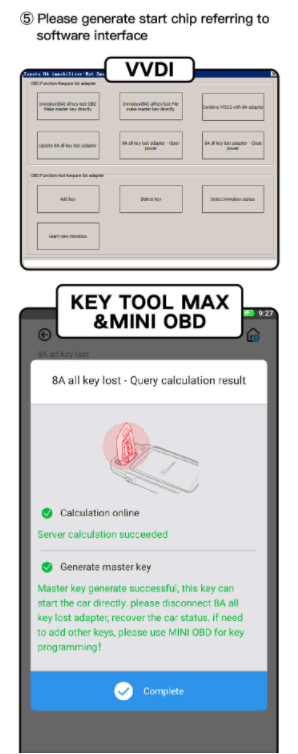
XHORSE Toyota 8A Non-smart Key is new released by Xhorse company which need to work together with VVDI Key Tool and VVDI Max
It can support Toyota Corolla,Prado,Levin,RAV in the year 2015,2016 and 2017


XHORSE Toyota 8A Non-smart Key is new released by Xhorse company which need to work together with VVDI Key Tool and VVDI Max
It can support Toyota Corolla,Prado,Levin,RAV in the year 2015,2016 and 2017
Good News
Renault CAN Clip is now updated to V195 version
For the new version, there are some information need to share with our customers
NEW FEATURES:
No new vehicles for this version.
NEW FEATURES:
https://dcs.renault.com/rnz_pub/opencms/system/login/ClipDiag/redirect.jsp
GENERAL INFORMATION:
In order for the return of the diagnostic files towards the central server to be more fluid, remember to connect Clip and close the session daily.
New ADT probe available for sale.
Be careful to keep the old VI Alliance to make the legacy.
As part of the Windows 10, 64-bit migration project planned for 2020 for all clip entries, the period of validity of applications will gradually be reduced from one year to one month.
Warning :
Maintenance of the PANASONIC CF19 MK3 ceased in March 2018 and they can no longer be registered.
Maintenance of the Tecra A11 and CF19 MK2 ceased in January 2017 and they can no longer be registered.
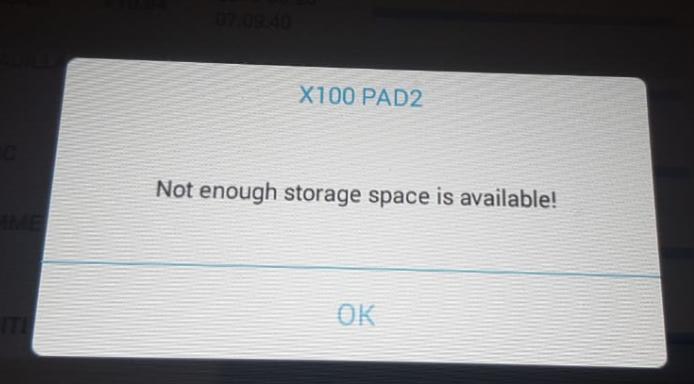
Solution for Xtool X100 PAD2 “Not enough storage space is availalbe !!” Problem
Some of my customer who ususally encounter the problem “Not enough storage space is availabe” when do the update.
We consulted with Xtool factory who informed that the memory of older version X100 PAD2 is with 16GB, so customer need to delete some vehicle
models and release some memory.
Here is the error picture.
But how to solve it ?
Here is the steps
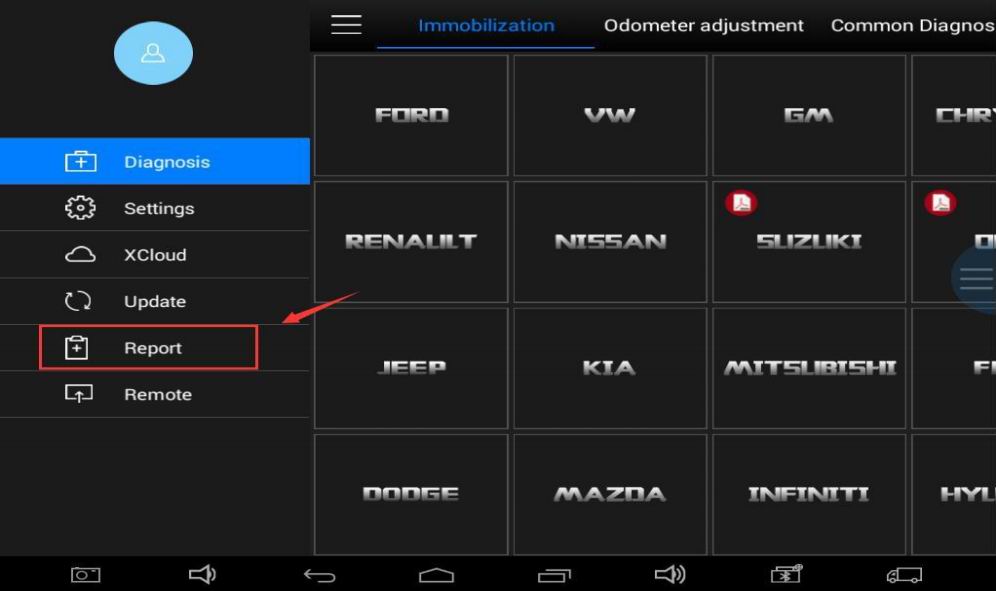
Step1 、 Open the app and find the Report
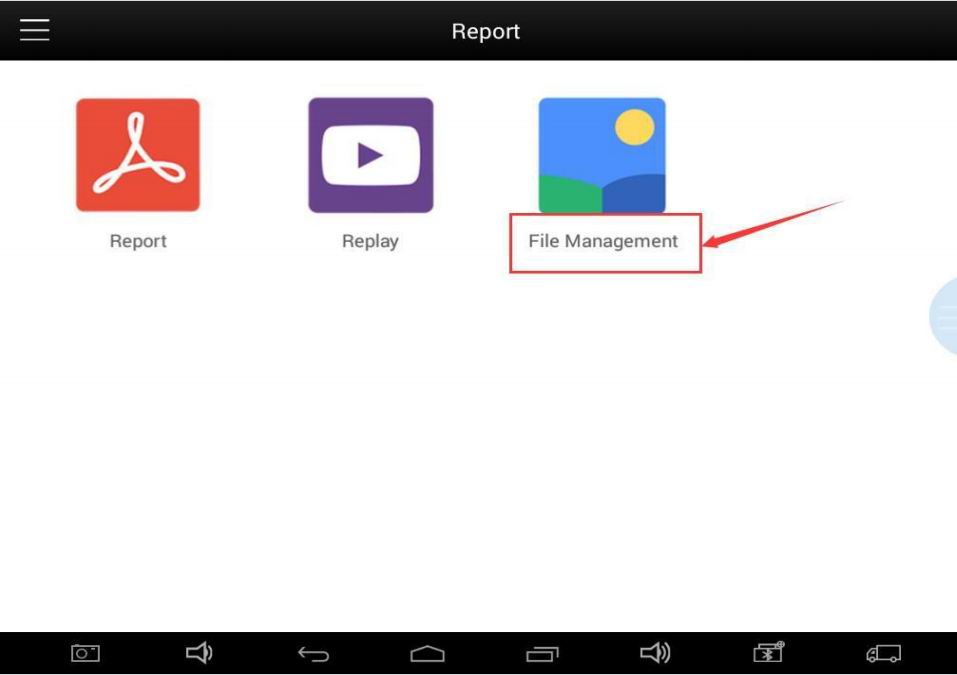
Step2 、 Find the “File Management” menu
Step3、Select the “Edit” , click on the unneeded car
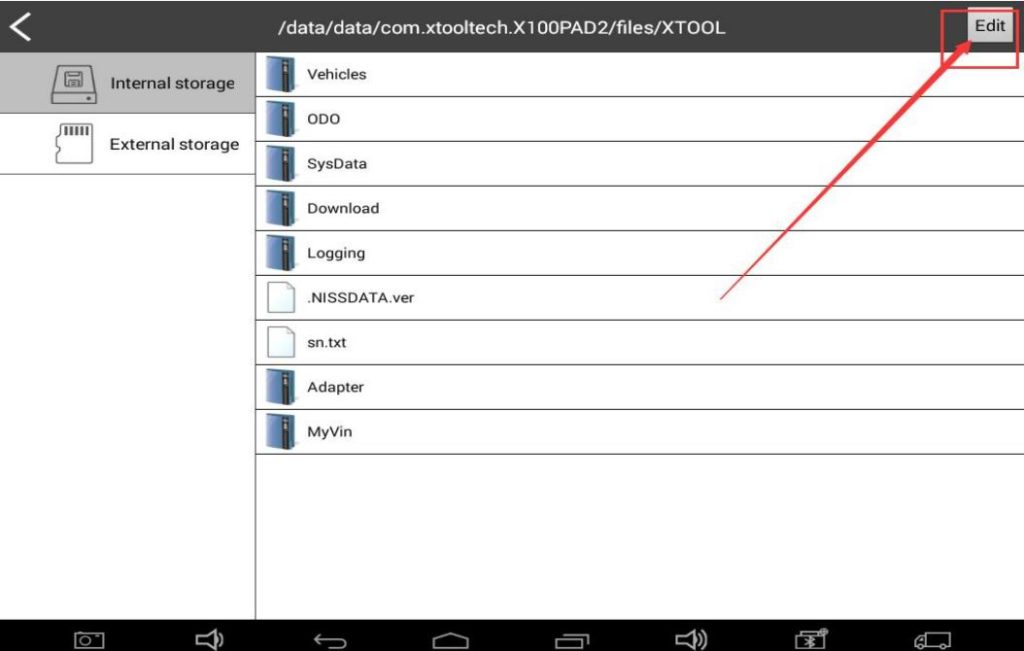
Step4、Delete the software. Upgrade Immo software first, and then upgrade diagnostic software

When you open the Abrites commander BMW v10.4/v10.5 software with SVCI2020/SVCI2019 device, the following error will be reported when reading the DTC functions.
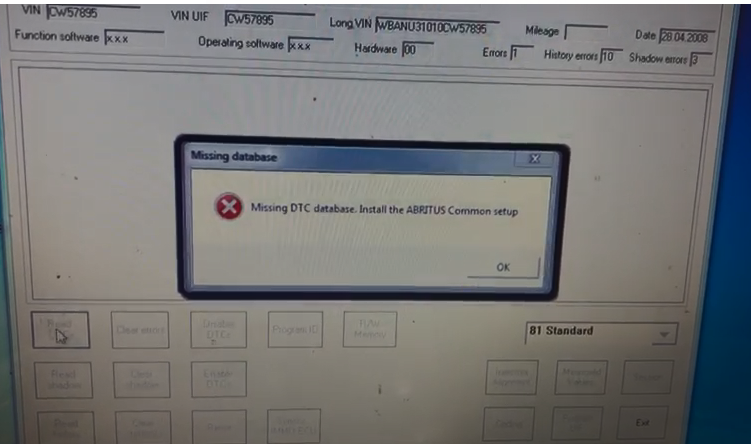
Solution:
step 1: Open the SVCI2020 installation directory
step 2: Enter “C: Program Files (x86)\Abrites Commander Software List\Common2\ ” directory and copy BMW folder to “C: Program Files (x86)\Abrites Commander Software List\Common\” directory.
Yanhua ACDP Automatic Authorization FAQ
Q:After the ACDP bonded, it shows the device does not obtain the authorization of the relevant function, as shown:
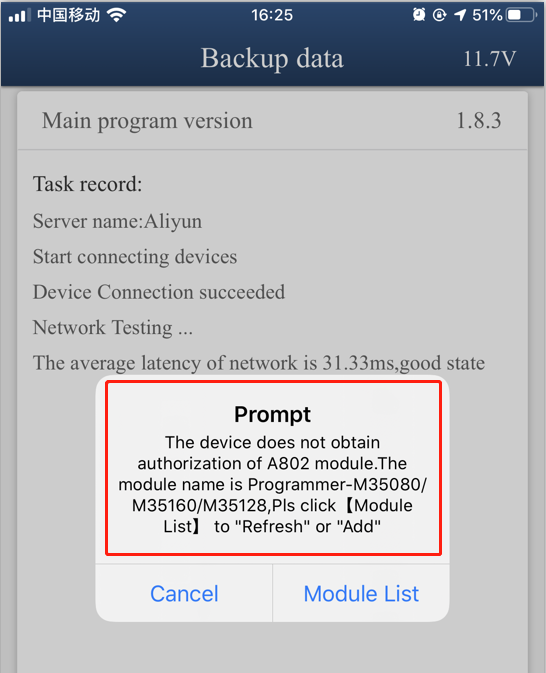
A:
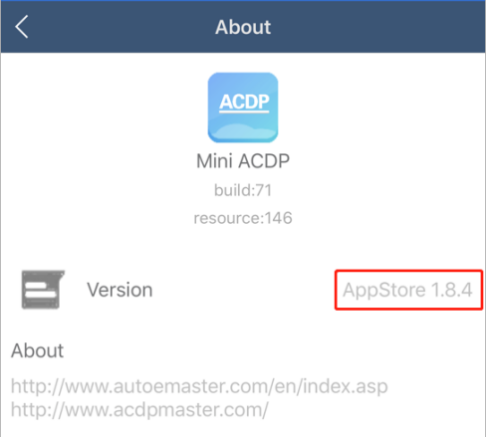
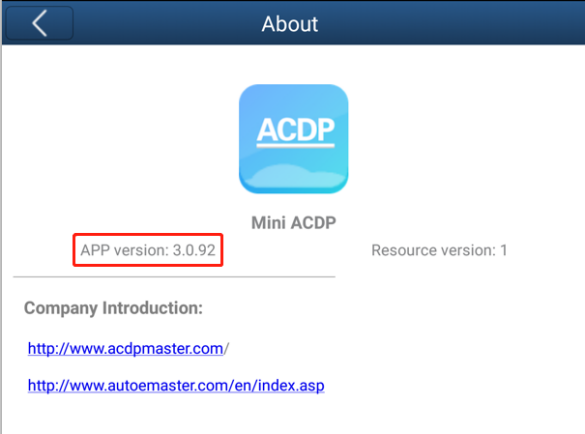
1.Please make sure the IOS version is 1.8.4 or above,and Android version is 3.0.92 or above, as shown:
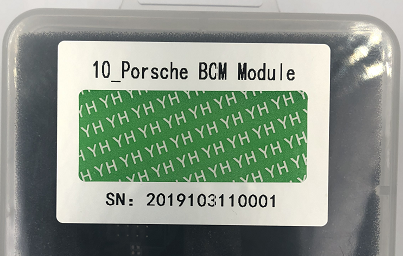
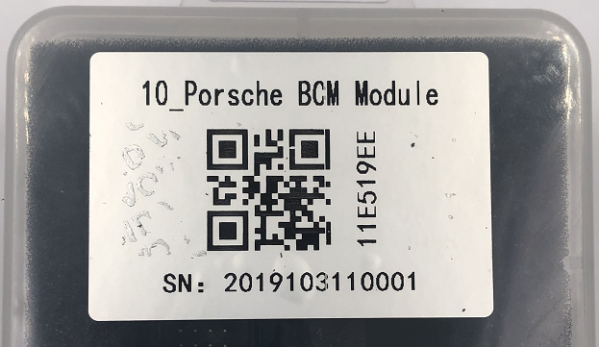
2.There is a paster with authorization code on the module box,take off the green security seal and clean up the QR code.
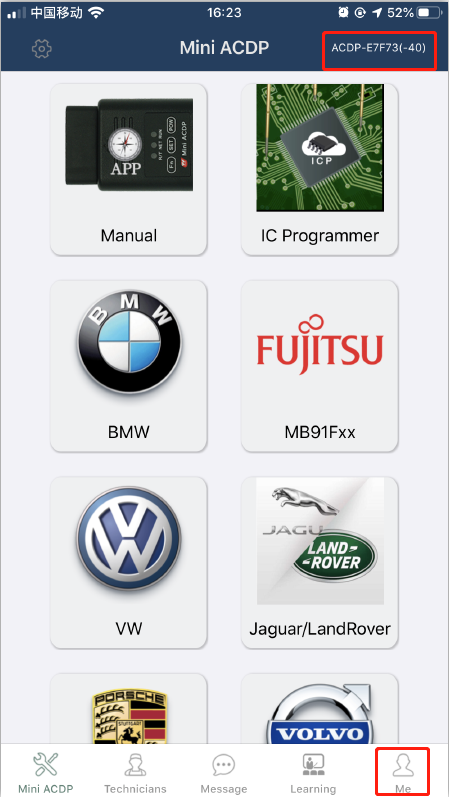
3.Make sure the ACDP has bounded successfully,and click “me”:
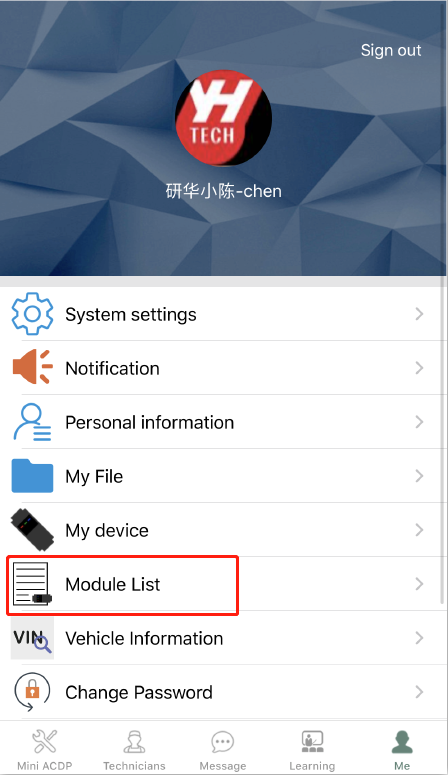
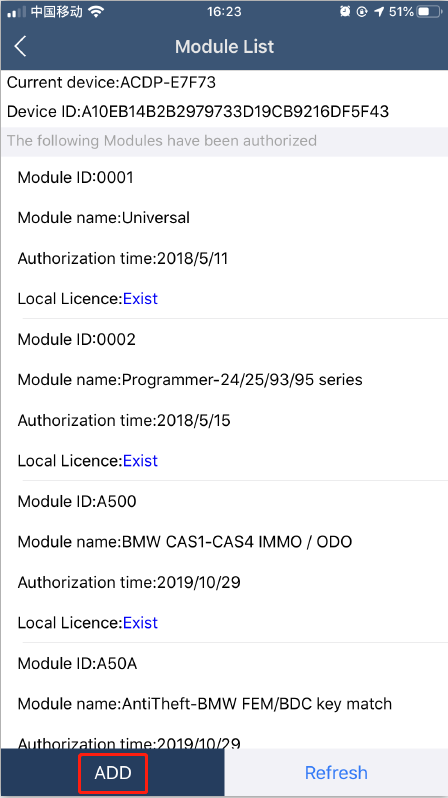
4.Click “module list”:
5.Click “ADD”
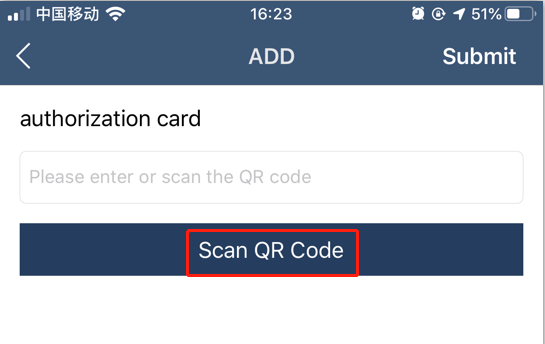
6.Click “Scan QR Code” to start scanning the QR code on the paster or type the authorization card(Capital letters only)
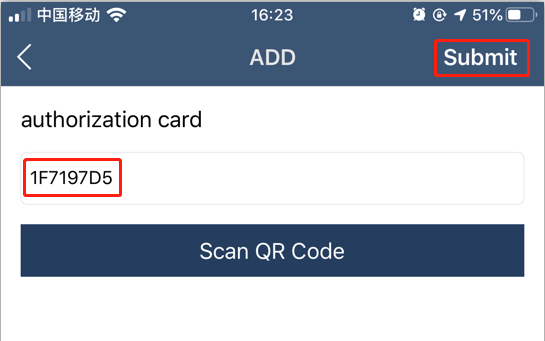
7.Check the authorization card number and click “Submit” after confirmed.
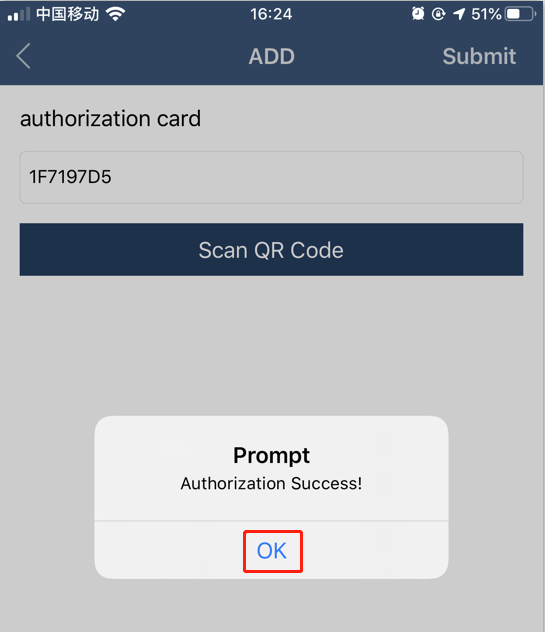
8.When the prompt comes with authorization success,click “OK”
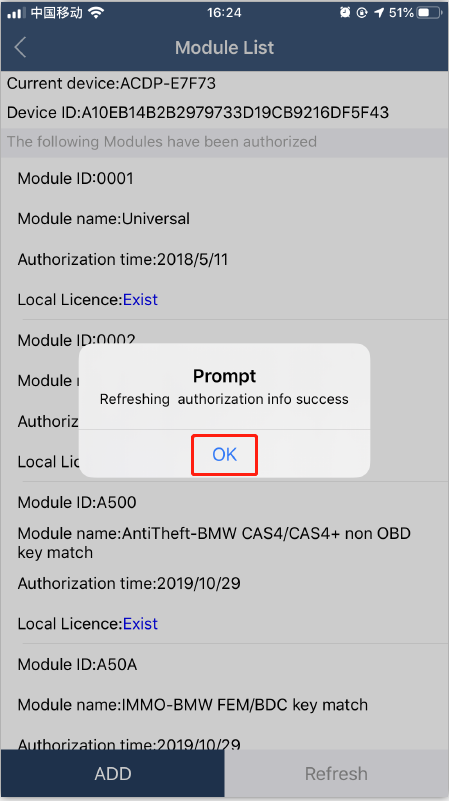
9.When the prompt comes with refreshing authorization info success,click “OK”
10.If you want more module authorization info,please click “ADD”for more.

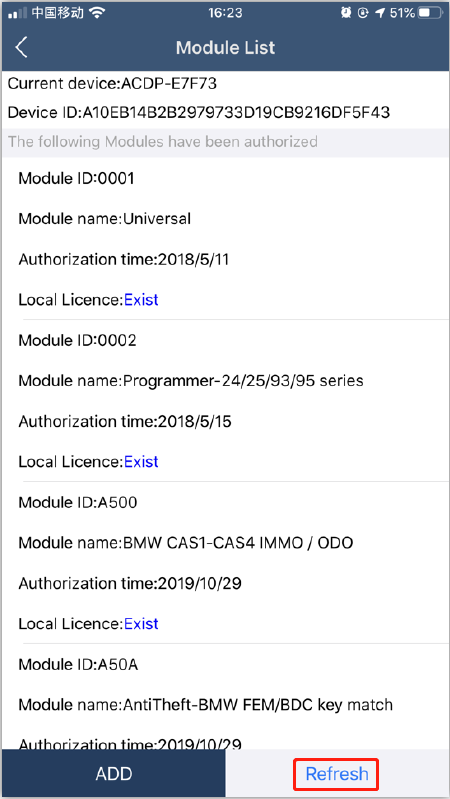
11.If you change another phone or PC,after the ACDP bounded,please click “Refresh”to download your authorization info.
Lonsdor K518ise latest update FIAT,OPEL,ALFA ROMEO and BORGWARD with key progrmming, ECU programming and code reading funtion.
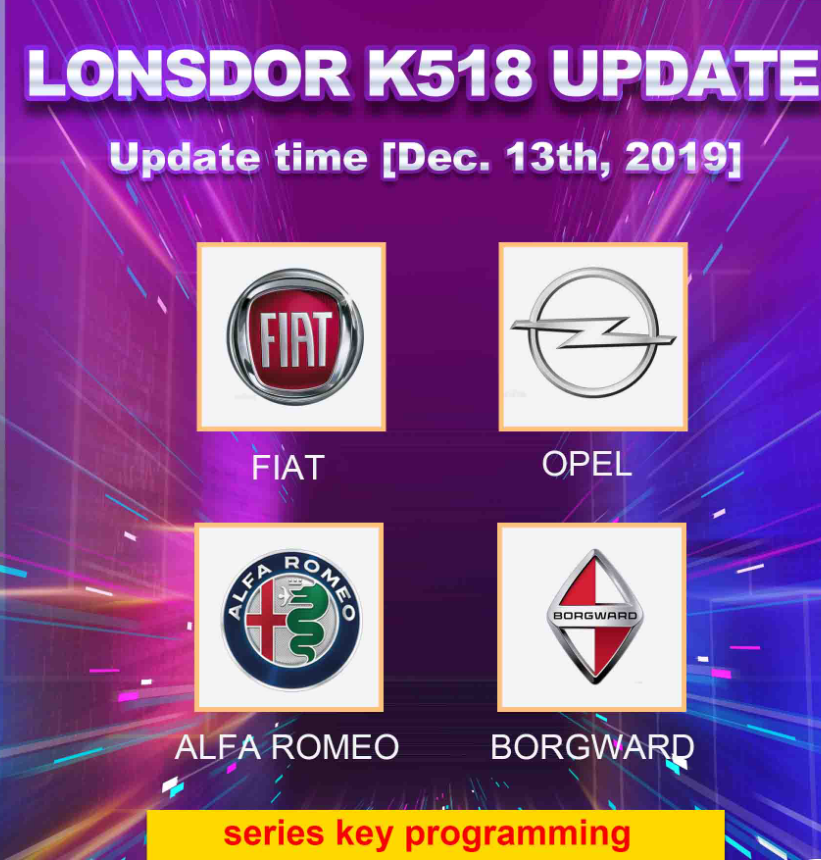
Detail list:
| Brand | Model | Function |
| FIAT | FIAT\North America\UNO | Key count,Program key,Remote count,Program remote,Backup EEPROM,Recover EEPROM,Backup FLASH,Make dealer key(48),Read PIN code, |
| BORGWARD | BORGWARD\BX6\PEPS | Add smart key,Delete smart key,Program EMS,Program PEPS,Program TBOX,Program new system,Write ESCL PIN code, |
| BORGWARD\BX7\PEPS | Add smart key,Delete smart key,Program EMS,Program PEPS,Program TBOX,Program new system,Write ESCL PIN code, | |
| BORGWARD\BXI7\PEPS | Add smart key,Delete smart key, | |
| OPEL | OPEL\IMMO\Select from vehicle\Zafira\Zafira-A\1995-2006\Immobilizer | Clear fault code,Program key,Delete key,Program immo ECU,Program engine ECU,Reset immo ECU,Reset engine ECU,Turn on burglar alarm system,Read PIN code, |
| OPEL\IMMO\Select from vehicle\Astra\Astra-K\Immobilizer | All key lost,Add key,Read key count,Clear fault code,Read PIN code, | |
| OPEL\IMMO\Select from vehicle\Astra\Astra-K\Smart key | All smart key lost,Add smart key,Read key count,Clear fault code,Read PIN code, | |
| OPEL\Remote\Corsa\Corsa-C | Program remote,Delete remote, | |
| OPEL\IMMO\Select from vehicle\Astra\Astra-F\1995-2004\Immobilizer | Clear fault code,Program key,Delete key,Program immo ECU,Program engine ECU,Reset immo ECU,Reset engine ECU,Turn on burglar alarm system,Read PIN code, | |
| OPEL\IMMO\Select from vehicle\Astra\Astra\1995-2004\Immobilizer | Clear fault code,Program key,Delete key,Program immo ECU,Program engine ECU,Reset immo ECU,Reset engine ECU,Turn on burglar alarm system,Read PIN code, | |
| ALFA ROMEO | ALFA ROMEO\Select from vehicle\IMMO\The Centenario/GT\2003-2010\Immobilizer | Read key count,Program key,Read remote count,Program remote, |
Good news! FVDI 2019 is coming soon! What’s the difference between it and other old versions. Check the newest comparison diagram incl. hardware, software and vehicle coverage.
FVDI 2014 vs. FVDI 2015 vs. FVDI 2018 vs. FVDI 2019 (Hardware)
| Version | FVDI 2014 | FVDI 2015 | FVDI 2018 | FVDI 2019 |
| Support software | AVDI 18 software | AVDI 18 software | AVDI 18 software+ VVDI2 software | AVDI 18 software+ VVDI2 software |
| Software version | One version | two version | two version | three version |
| Support the years of Vehicle manufacture | before 2014MY | before 2015MY | before 2015MY | before 2019MY for VW/Mercedes/BWM |
| connection network | NO | YES | YES | NO |
| Online activate | NO | YES | YES | NO |
| useful life | forever | 5 years | 5 years | forever |
| stability | Strong | general | general | Strong |
| needs repaired | No | may be | may be | No |
FVDI 2014 vs. FVDI 2015 vs. FVDI 2018 vs. FVDI 2019 (Software)
| Version | SVCI 2014 | SVCI 2015 | SVCI 2018 | SVCI 2019 |
| VVDI | x | x | v1.2.2 | v1.2.2 v4.2.1 |
| TAG | v6.2 | v6.2 | v6.2 | v6.2 |
| VW/Audi/Skoda/Seat | v18.0 | v18.0 v24.0 | v18.0 v24.0 | v18.0v24.0v37.0 |
| BMW/Mini | v10.4 | v10.4 | v10.4 | v10.4v10.5 |
| Mercedes_Benz/Smart/ MAYBACH | v5.11 | v5.11 v7.0 | v5.11 v7.0 | v5.11v7.0v10.8 |
| Renault/Dacia | v5.2 | v5.2 v6.3 | v5.2 v6.3 | v5.2 v6.3 |
| Peugeot/Citroen | v5.10 | v5.10 v6.7 | v5.10 v6.7 | v5.10 v6.7 |
| Fiat/Lancia/Alfa Romeo | v5.1 | v5.1 v5.7 | v5.1 v5.7 | v5.1 v5.7 |
| Opel/Vauxhall | v5.8 | v5.8 v6.6 | v5.8 v6.6 | v5.8 v6.6 |
| Ford/Mazda | v4.9 | v4.9 | v4.9 | v4.9 |
| Chrysler/Doge/Jeep | v3.3 | v3.3 | v3.3 | v3.3 |
| Toyota/Lexus/Scion | v9.0 | v9.0 | v9.0 | v9.0 |
| Nissan/Infiniti | v4.3 | v4.3 | v4.3 | v4.3 |
| Hyundai/KIA | v2.1 | v2.1 | v2.1 | v2.1 |
| Volvo | v4.3 | v4.3 | v4.3 | v4.3 |
| Mitsubishi Motors | v2.1 | v2.1 | v2.1 | v2.1 |
| Porsche | v4.1 | v4.1 | v4.1 | v4.1 |
| DAF | v1.0 | v1.0 | v1.0 | v1.0 |
| Bikes/Snowmobiles/ Water scooters | v1.2 | v1.2 | v1.2 | v1.2 |
FVDI 2014 vs. FVDI 2015 vs. FVDI 2018 vs. FVDI 2019 (Vehicle coverage)
| Version | SVCI 2014 | SVCI 2015 | SVCI 2018 | SVCI 2019 |
| VVDI | ||||
| TAG | before 2014MY | before 2015MY | before 2015MY | before 2015MY |
| VW/Audi/Skoda/Seat | before 2014MY | before 2015MY | before 2015MY | before 2019MY |
| BMW/Mini | before 2014MY | before 2015MY | before 2015MY | before 2019MY |
| Mercedes_Benz/Smart/ MAYBACH | before 2014MY | before 2015MY | before 2015MY | before 2019MY |
| Renault/Dacia | before 2014MY | before 2015MY | before 2015MY | before 2015MY |
| Peugeot/Citroen | before 2014MY | before 2015MY | before 2015MY | before 2015MY |
| Fiat/Lancia/Alfa Romeo | before 2014MY | before 2015MY | before 2015MY | before 2015MY |
| Opel/Vauxhall | before 2014MY | before 2015MY | before 2015MY | before 2015MY |
| Ford/Mazda | before 2014MY | before 2015MY | before 2015MY | before 2015MY |
| Chrysler/Doge/Jeep | before 2014MY | before 2015MY | before 2015MY | before 2015MY |
| Toyota/Lexus/Scion | before 2014MY | before 2015MY | before 2015MY | before 2015MY |
| Nissan/Infiniti | before 2014MY | before 2015MY | before 2015MY | before 2015MY |
| Hyundai/KIA | before 2014MY | before 2015MY | before 2015MY | before 2015MY |
| Volvo | before 2014MY | before 2015MY | before 2015MY | before 2015MY |
| Mitsubishi Motors | before 2014MY | before 2015MY | before 2015MY | before 2015MY |
| Porsche | before 2012MY | before 2012MY | before 2012MY | before 2012MY |
| DAF | before 2014MY | before 2015MY | before 2015MY | before 2015MY |
| Bikes/Snowmobiles/ Water scooters | before 2014MY | before 2015MY | before 2015MY | before 2015MY |
In conclusion:
Compared with FVDI 2014, FVDI 2015 and FVDI 2018, FVDI 2019 has the advantages in following aspects:
Hardware: Supports more versions and cars models. It has strong stability and no need repairing.
Software:Supports more versions for VW/Audi/Skoda/Seat, BMW/Mini, Mercedes_Benz/Smart/MAYBACH.
Vehicle coverage: Support the years of Vehicle manufacture before 2019MY for VW/Audi/Skoda/Seat, BMW/Mini, Mercedes_Benz/Smart/MAYBACH.
FVDI 2020 is the Latest FVDI ABRITES Commander Version. It is the update version of FVDI 2018. FVDI 2020 has not button battery and need to be activated, it will not lock the machine, and the serial number will not be lost.
FVDI 2020 has more 19 softwares than FVDI 2018:
ABRITES Commander for VAG V37.0,
ABRITES Commander for BMW V10.5,
ABRITES Commander for Mercedes V10.4
ABRITES Commander for Bikes V2.0
ABRITES Commander for Chrysler V3.4
ABRITES Commander for Daihatsu V1.4
ABRITES Commander for FIAT V7.6
ABRITES Commander for Ford V7.7
ABRITES Commander for Hyundai V4.4
ABRITES Commander for JLR V2.6
ABRITES Commander for Mitsubishi V3.7
ABRITES Commander for Nissan V5.7
ABRITES Commander for OPEL V7.5
ABRITES Commander for Porsche V7.1
ABRITES Commander for PSA V6.3
ABRITES Commander for Renault V7.4
ABRITES Commander for Suzuki V1.2
ABRITES Commander for Toyota V11.4
ABRITES Commander for Volvo V6.2
How to install FVDU 2020 software?
CD is only one executable file, double-click the “AbritesCommanderSetup. Exe”
Start the installation,Do not plug USB into your computer during installation
After the installation is complete, USB is connected to the computer.
How to start FVDI 2020 software quickly?
FVDI 2020 ABRITES Commander quick launch software has 42 shortcut ICONS, click the icon to launch the corresponding software. Compared to the quick start of SVCI 2018, clicking the icon does not display the activation dialog box.
The last icon is the firmware upgrade program, click to start the firmware upgrade program.
Note: Must be connected to the Internet to download the latest firmware program, download and click upgrade to update the firmware program.
Click the icon, the tray in the lower right corner of the computer will appear the dongle program icon
This post comes with the diagnostic operations about VIDENT iAuto 702 Pro.
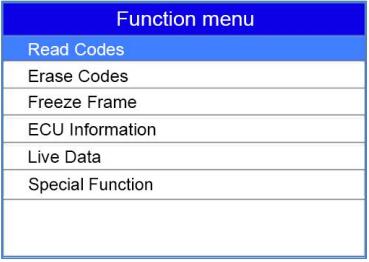
1.Read Codes
2.Erase Codes
3.Freeze Frame Data
4.ECU Information
5.Live Data
– Complete Data List
– Custom Data List
6.Special Function
Let’s go one by one!
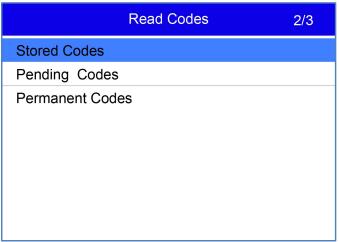
Part 1: Vident iAuto 702 Pro Read Codes
Read Codes menu lets you read trouble codes found in the control unit. Typical menu options include:
Present/Permanent/Current Codes
History Codes
Present/Permanent/Current codes stored in a control module are used to help identify the cause of a trouble or troubles with a vehicle. These codes have occurred a specific number of times and indicate a problem that requires repair.
History codes are also referred to as past codes that indicate intermittent DTCs that are not currently active.
Step 1: Select Read Codes from Function Menu and press the OK key. A code list including code number and its description displays.
Step 2: Use the up and down arrow keys to scroll through data to select lines, and left and right arrow keys to scroll back and forth through different screens of data.
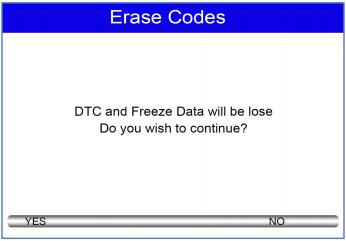
Part 2: Vident iAuto 702Pro Erase Codes
1.Erase Codes menu lets you to clear all current and stored DTCs from a selected control module. Also it erases all temporary ECU information, including freeze frame.
2.Erase Codes does not fix the problem that caused the fault! DTCs should only be erased after correcting the condition(s) that caused them.
Steps: Select Erase Codes from Function Menu and press the OK key. Follow the on-screen instructions to complete the procedure.
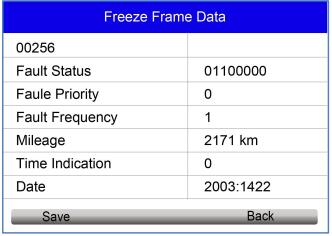
Part 3: Vident iAuto702 Pro Freeze Frame Data
Freeze Frame Data menu displays freeze frame data, a snapshot of critical vehicle operating conditions automatically recorded by the on-board computer at the time of the DTC set. It is a good function to help determine what caused the fault.
Part 4: Vident iAuto 702 Pro ECU Information
ECU Information screen displays the identification data of the control module under test, such as the control module identification string and the control module coding. 1. Select ECU Information from the menu and press the OK key. 2. A screen with detailed information of the selected control module displays.
Part 5: Vident iAuto 702 Pro Live Data
Live Data menu lets you view and record real time PID data from a selected vehicle electronic control module.
Menu options typically include:
Complete Data List
Custom Data List
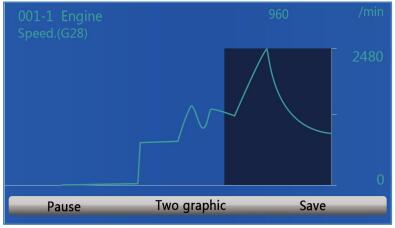
1.Complete Data List
Complete Data List menu lets you view all live PID data from a selected system.
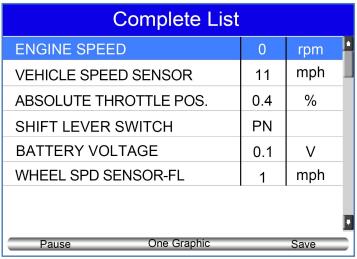
Step 1: Scroll with the up and down arrow keys to highlight a line, if the One Graphic on the bottom is highlighted, it indicates graphing is available for the selected line. Press the function key One Graphic to display the PID graph.
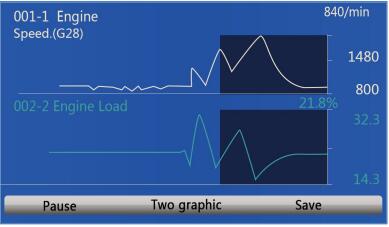
Step 2: Press the function key Two Graphics to display two PID graphs in one screen
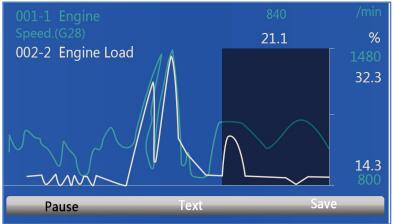
Step 3: Press the function key Merge Graph to display two PID plots in one coordinate for easy and intuitive diagnosis
Step 4: To record the data to memory of the scan tool, use the function key SAVE, and press Stop Saving to stop recording at any time.
Step 5: Press Text to return to text viewing of PID data
Step 6: Select Pause to suspend collecting data from the scan tool and use the Start key to resume
collecting data
Step 7: Press the ECS key to return to the previous menu
2.Custom Data List
Custom Data List menu lets you to minimize the number of PIDs on the data list and focus on any suspicious or symptom-specific data parameters.
Step 1: Select Custom List from the menu and press the OK key. The custom data stream selection screen displays. Scroll with the up and down arrow keys to highlight a line, press the OK key and then repeat the action to make more selections.
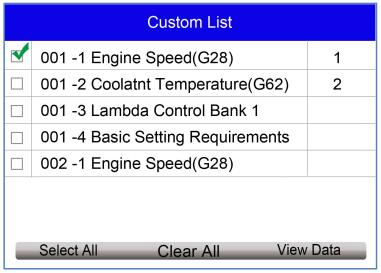
Step 2: When finished selection, use the function key VIEW DATA to display selected items.
Part 6: Vident iAuto702 Pro Special Functions(&Active Test)
The Active Test function is used to access vehicle-specific subsystem and component tests. Available tests vary depending on the manufacturer, year and model, and only the available tests display in the menu.
During an active test, the tester outputs commands to the ECU in order to drive the actuators. This test determines the integrity of the system or parts by reading the engine ECU data, or by monitoring the operation of the actuators, such as switching a solenoid, relay, or switch, between two operating states.
Selecting Active Test opens a menu of test options that varies by make and model. Selecting a menu option activates the test. Follow all screen instructions while performing tests. The content and pattern of the on-screen information vary according to the type of test being performed. Some toggle and variable control tests display Active Test Controls at the top of the screen with data stream information below, or vice versa.
Step 1: Choose the electronic control module, such as ABS.
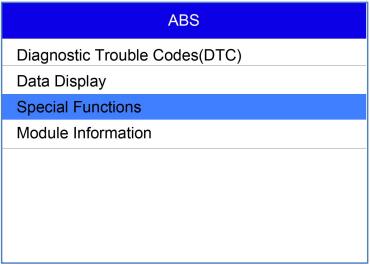
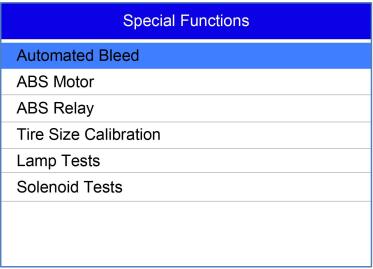
Step 2: Enter Special Functions
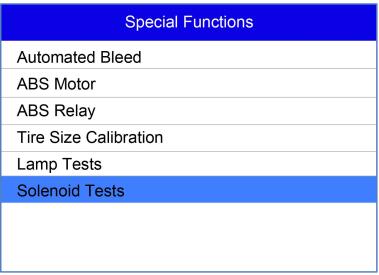
Step 3: Choose available active test such as Solenoid Tests
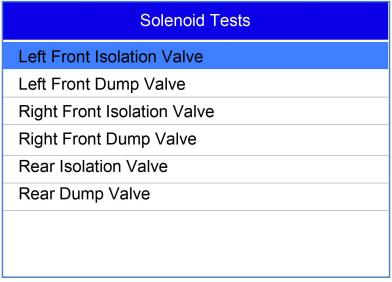
Also this special function is designed to provide you with quick access to the vehicle systems for various scheduled service and maintenance performances. The typical operation screen is a series of menu driven executive commands. By following the on-screen instructions to select appropriate execution options, enter correct values or data, and perform necessary actions, the system will guide you through the complete performance for various service operations.
VXDIAG for XENTRY diagnosis VCI is not only a professional diagnostic tool for Mercedes -Benz, but also a good Diesel Particulate Filter regeneration tool working with original XENTRY software. This article will highlight the DPF regeneration function for Star C6.
Why do you need a Star C6 for Mercedes-Benz Diesel?
VXDIAG for XENTRY Diagnosis VCI acts as a Pass-through interface, also called Star C6. It is the latest interface for For Mercedes & SMART vehicles can replace Star C4/C5. With the DPF regeneration function in this diagnostic tool, it can solve the problem of grey particles blocking filter, avoid replacing the new one.
Besides that, it will save money & time and use easily, just operate follow the prompts step by step on the software.
You can save approximately US$1,000.00 to be regenerated by the 4S car dealership. In addition, this function can only be done on the original computer, other OBD2 scanners which are about US$1,000.00 on the market are also impossible to support. Even if the scanner could issue regeneration commands, it wouldn’t be able to complete this process and re-test the exhaust data.
How to use VXDIAG multi diagnostic tool for Benz Diesel?
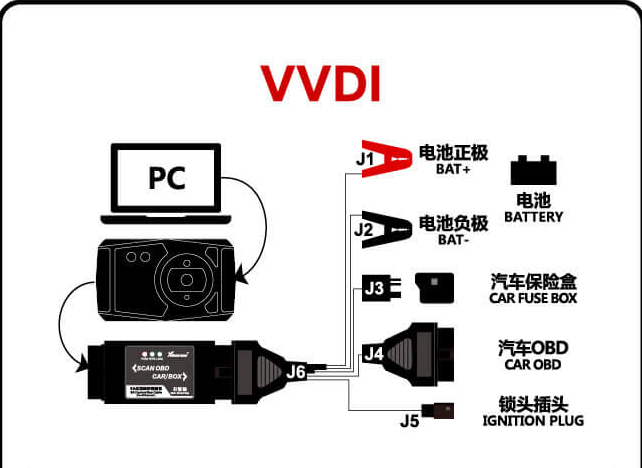
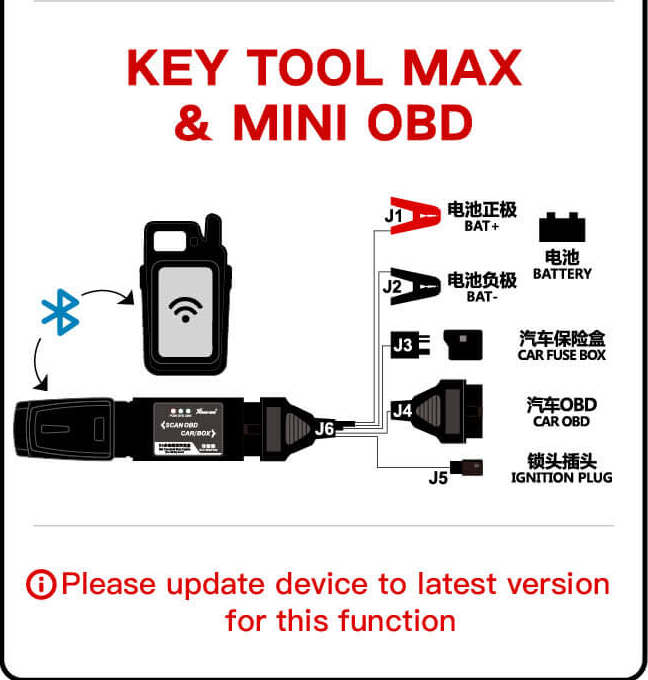
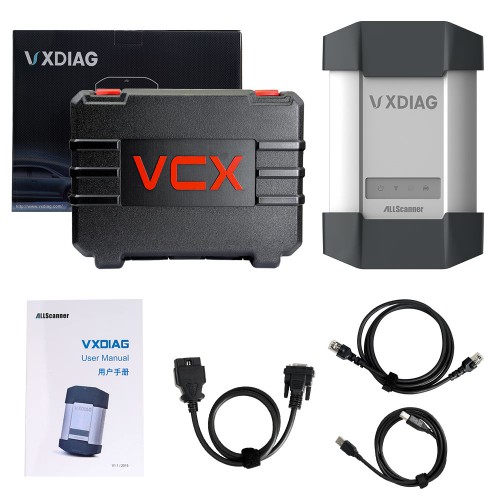
Tools Need
Procedure:
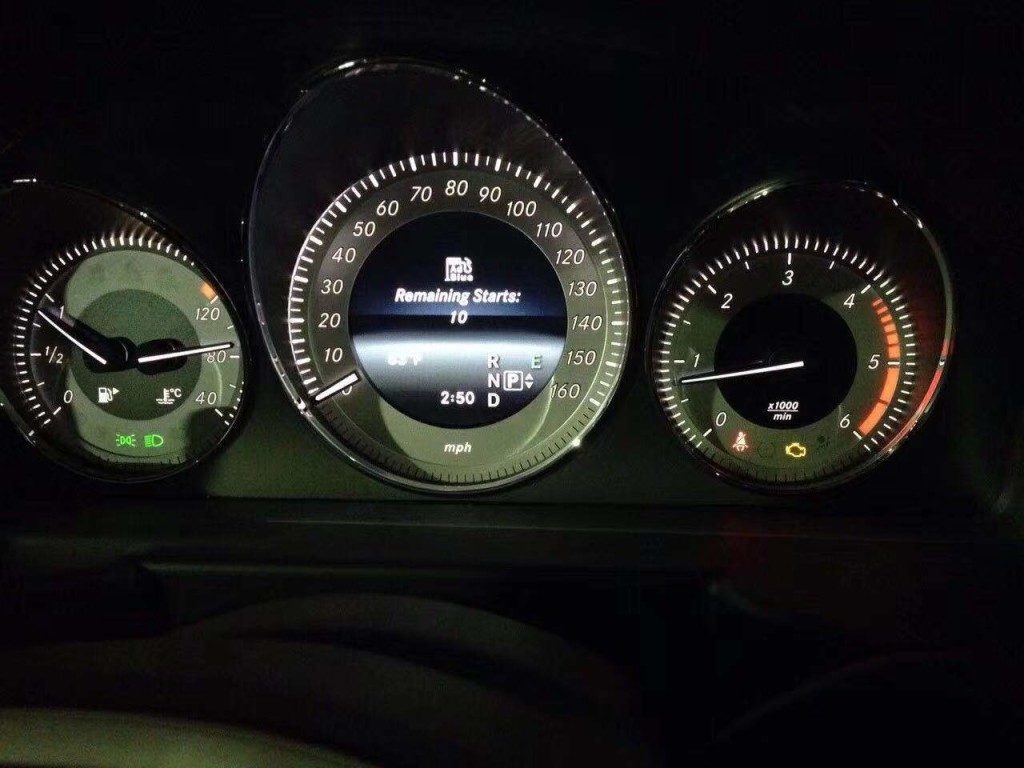
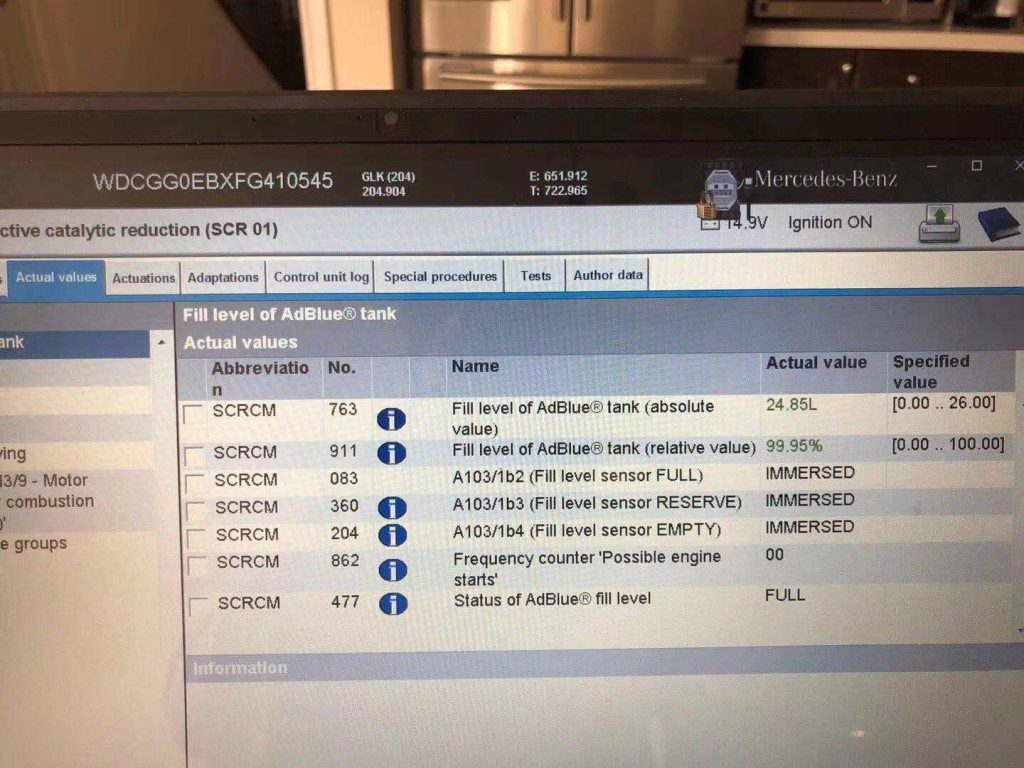
This is the current Mercedes-Benz car status

Connect Star C6 to the car OBD interface
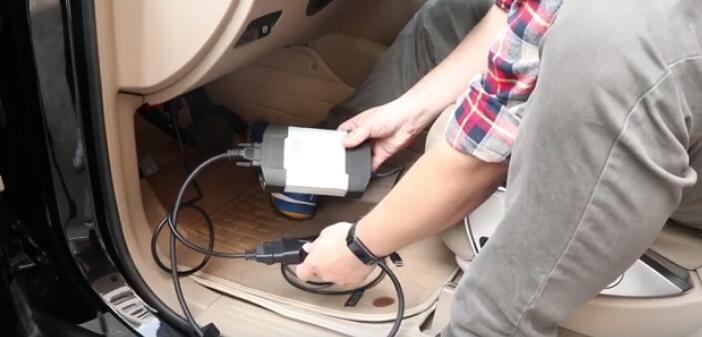
The indicator lights up means the connection has been successfully connected
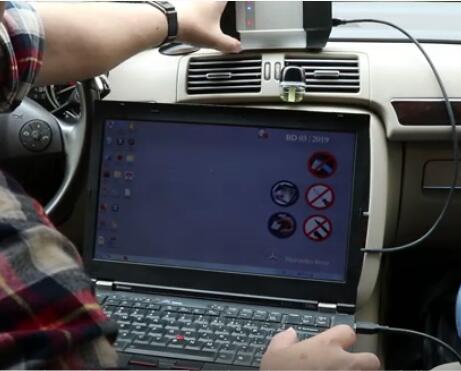
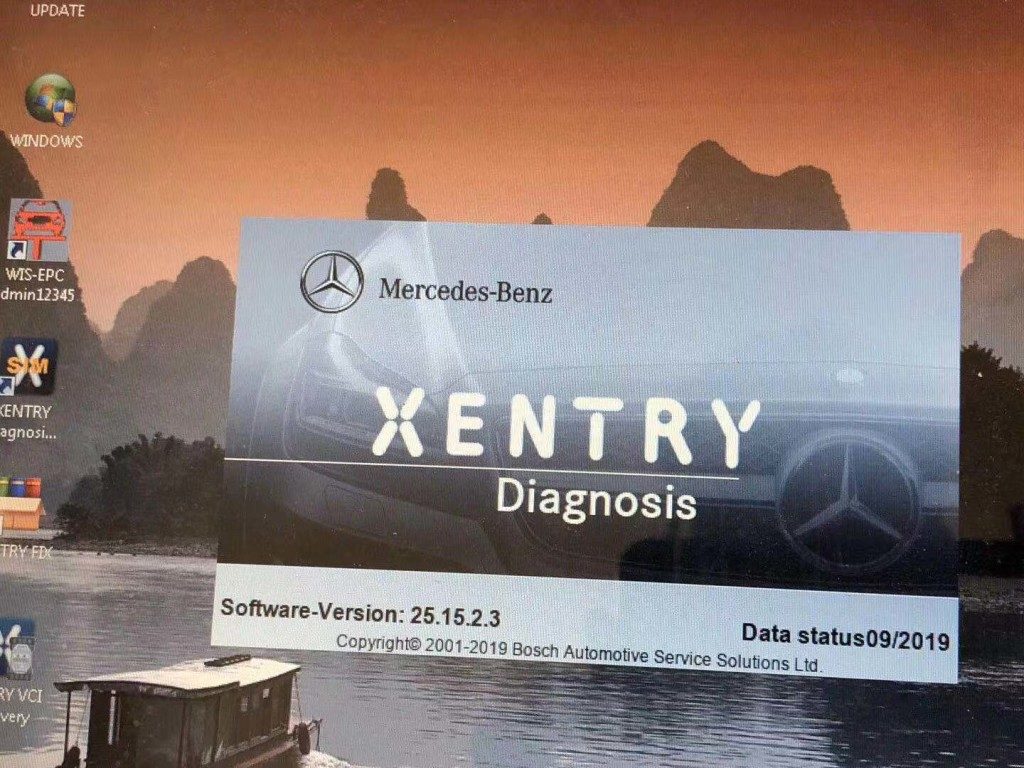
Open the XENTRY software and select car model
Quick test automatically
Click on “Actual values” to show data
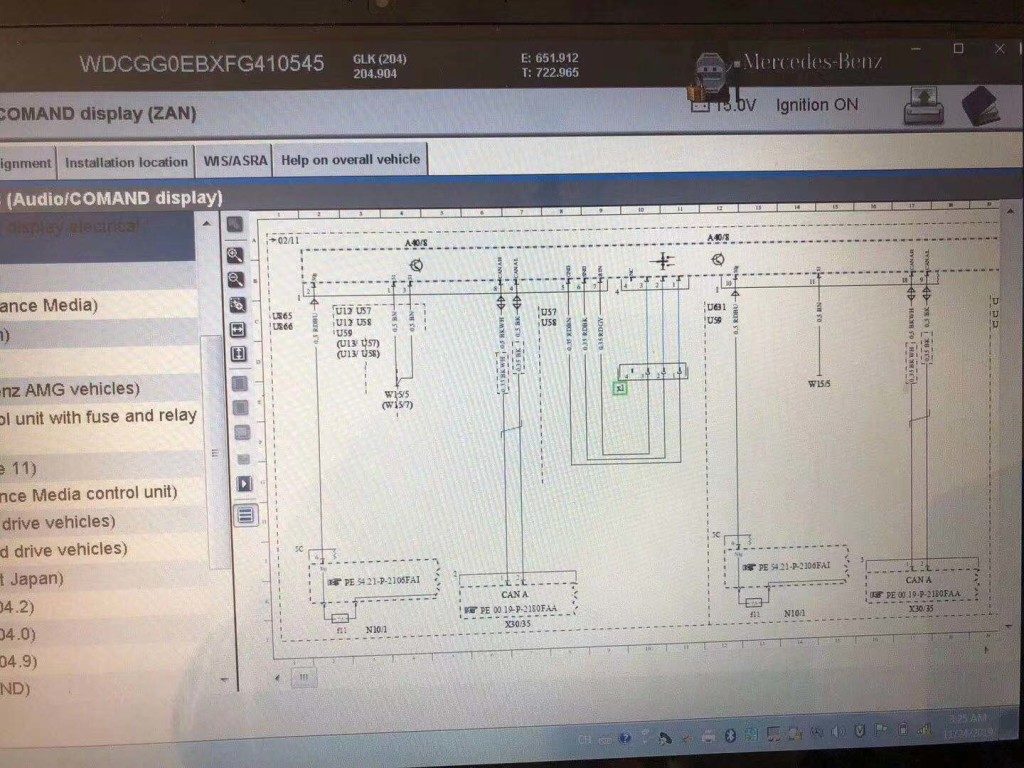
Audio/ Command display
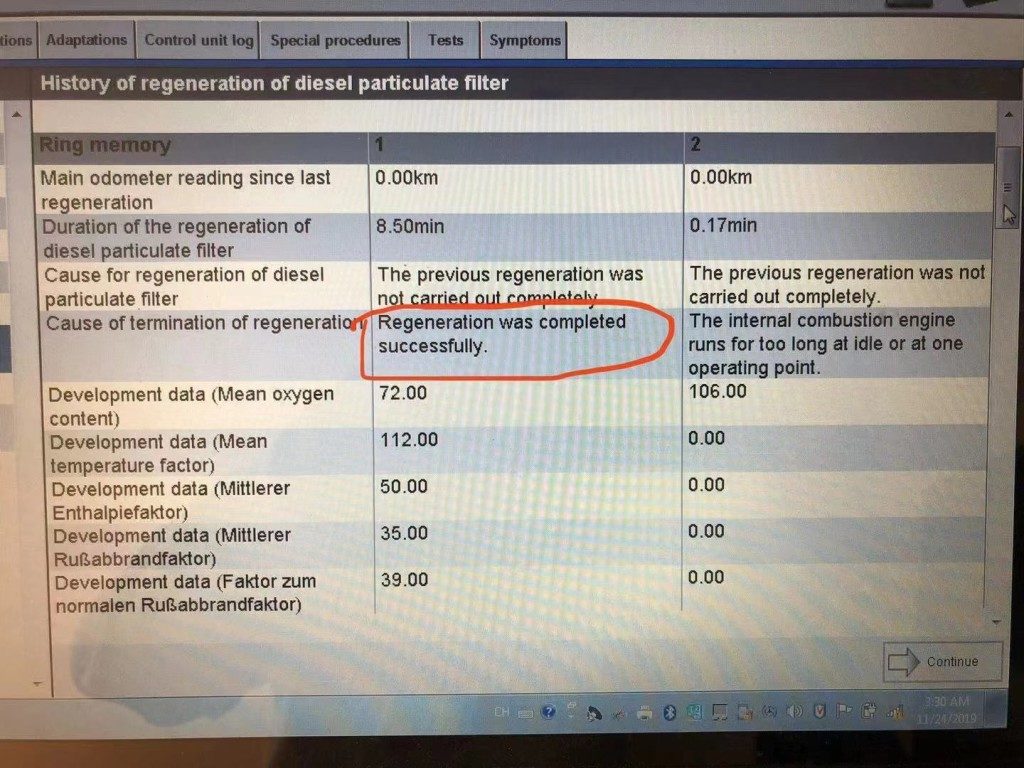
Then follow the prompts on the screen to operate
Important! When finish regenerating, it will show “Regeneration was completed successfully”