Monthly Archives: August 2015

Digiprog 3 to change mileage for Ford Mondeo 2007 24C16

Digiprog 3 to change mileage for Ford Mondeo 2007 24C16

For the V4.94 Digiprog III Digiprog3 Odometer Master Programmer, there are three ways to change tachometer mileage: by OBD2, dismantle dashboard, dissemble chip etc. Here introduces one way to do Ford Mondeo mileage correction with V4.94 Digiprog III. If you fail to correct mileage by OBD2, then try another way around.

Preparation:
V4.94 Digiprog III Digiprog3 Odometer Master Programmer
Ford Mondeo 2007 24C16
Plug: ST01
Dismantle Tacho

1. Identify Chip 24C16
2. Desolder Chip 24C16
3. Clean Chip 24C16
4. Set Plug ST01 cable on Chip
5. Red cable on pin 1
6. Pin 1 bottom left
7. Choose vehicle in digiprog iii
8. PKW/LKW—Ford-Mondeo-2007-24C16
9. Data Backup/Data restore
10. Data Back up EEPROM
11. Chip type
12. Read data
13. Write data
14. Or Data restore EEPROM
15. Load data
16. Write
17. Connect replace tacho
18. Choose vehicle program
19. Enter KM value and confirm entry
20. Programming operation completed

v4-94-digiprog-iii-odometer-correction-on-ford-1v4-94-digiprog-iii-odometer-correction-on-ford-2v4-94-digiprog-iii-odometer-correction-on-ford-3

CG100 Airbag Restore Devices Support Renesas and Infineon to V2.68.3

CG100 Airbag Restore Devices Support Renesas and Infineon to V2.68.3

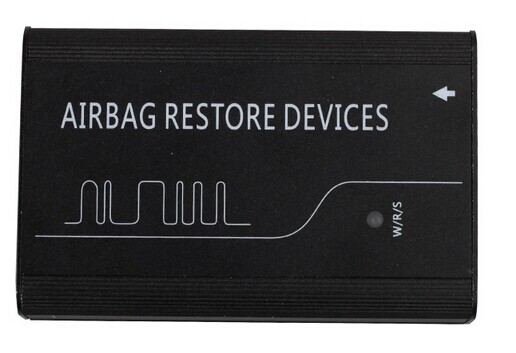
CG100 Airbag Restore Devices support Renesas and Infineon can support all functions of Infineon XC236x Flash Programmer and renesas repair function. The newest version updated to V2.68.3.

cg100-airbag-restore-devices

CG100 V2.68.3 free update

SRS updated as follows:

1 89170-33A10
2 89170-0D690
3 89170-0N060
4 89170-43808
5 89170-78030
6 Read and write data for Peugeot 2008

Mileage correction updated as follows:

1 9S12 can automatically calculate KM
2 Add the wiring diagram for a variety of instrument
3 Add the wiring diagram for ATMEGA
4 Fix the error that some ATMEGA CPU fails to replace with other model.
5 Can calculate ISN when program key for BMW MINI engine 1766

More information about the CG100 Airbag Restore Devices.

How to install V151 Renault CAN Clip Software?

How to install V151 Renault CAN Clip Software?

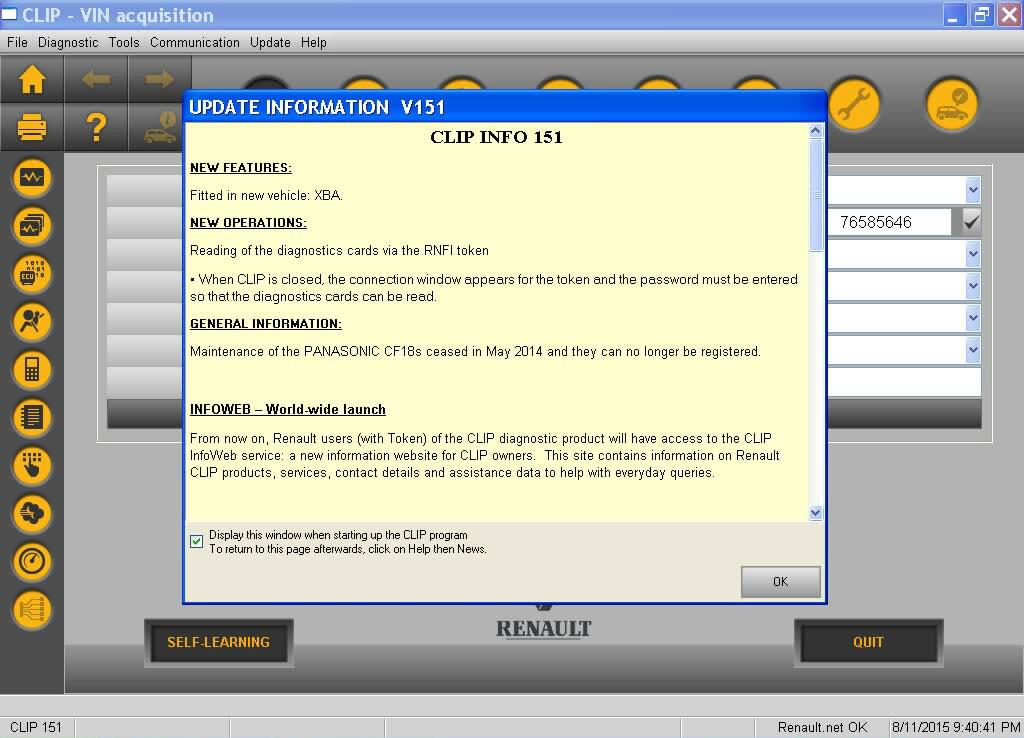
Renault CAN Clip Diagnostic Tool interface has recently released to V151 (Aug. 12th). The newest version adds new vehicle XBA model.

Software version: V151
v151-renault-can-clip-1

Multi-Language: English, German, Brazil, Danish, Spanish, Finnish, French, Italian, Norwegian, Dutch, Portuguese, Romania, Swedish
Operating system: Windows XP SP2/SP3

How to update Renault CAN Clip software to V151?

1) For those who need to update previous version V145, V149 to V151, please order Item No: SP19-S Nouveau Logiciel de Renault Can Clip V151 in our website and install it to run an upgrade.
2) For those who want to buy new V151 Renault clip interface, you need to purchase SP19-S V151 software as well.

How to install Renault CAN Clip V151 diagnostic software?

Main steps:
1) Install CAN CLIP Patch & Driver
2) Register & Crack Renault CLIP
3) Connect Renault Can Clip interface
4) Computer Test
5) Diagnose vehicles

Detail instructions:
1) Install Patch & Driver

Insert CD to computer
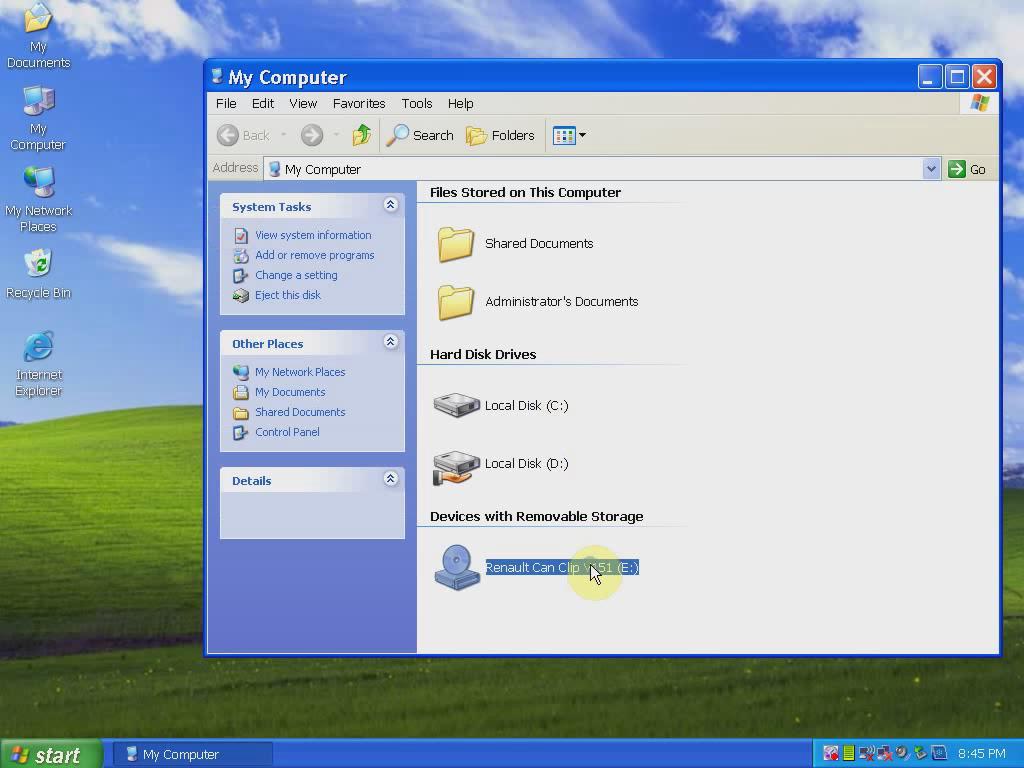
Open My Computer
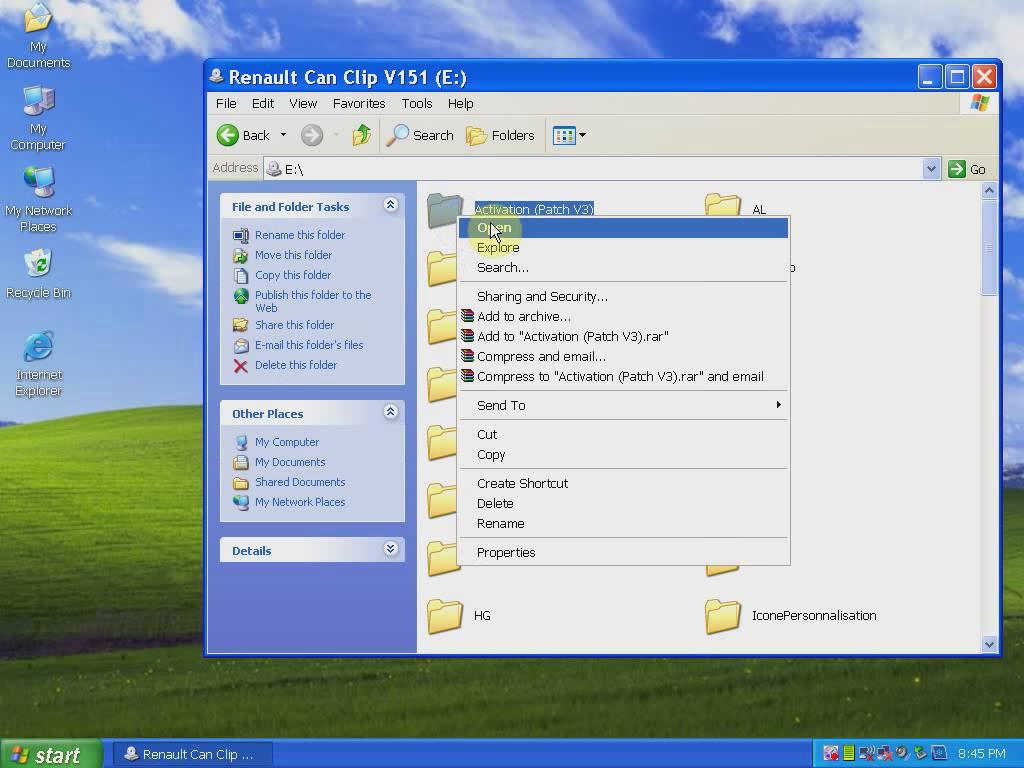
Open Renault CAN CLIP V151 (E:) DVD
v151-renault-can-clip-2

Open “Activation (Patch V3)” folder.

v151-renault-can-clip-3

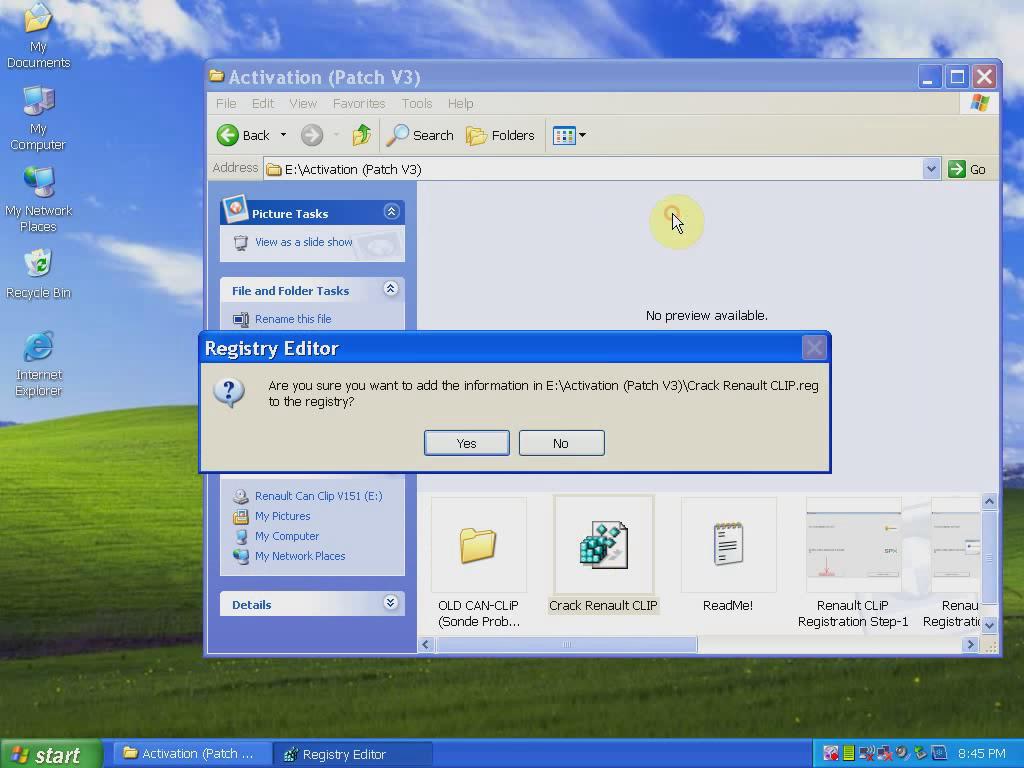
Merge “Crack Renault CLIP”.
Click Yes to accept registry editor prompt.
v151-renault-can-clip-4

Click OK.
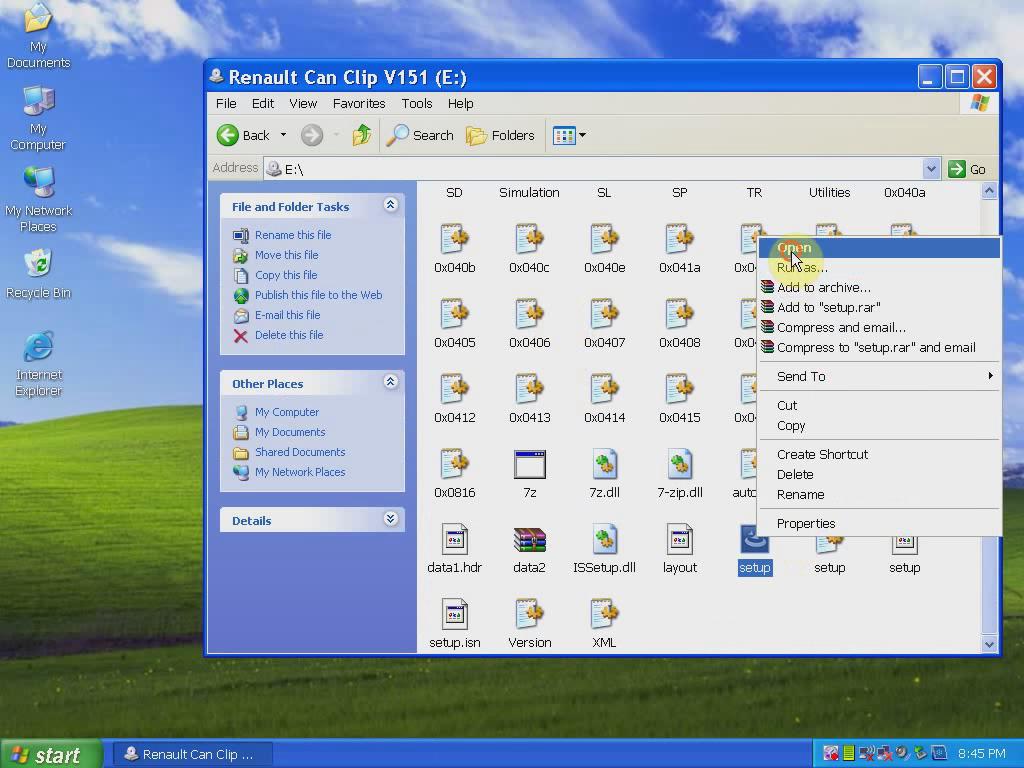
Open Setup on folder.

v151-renault-can-clip-5

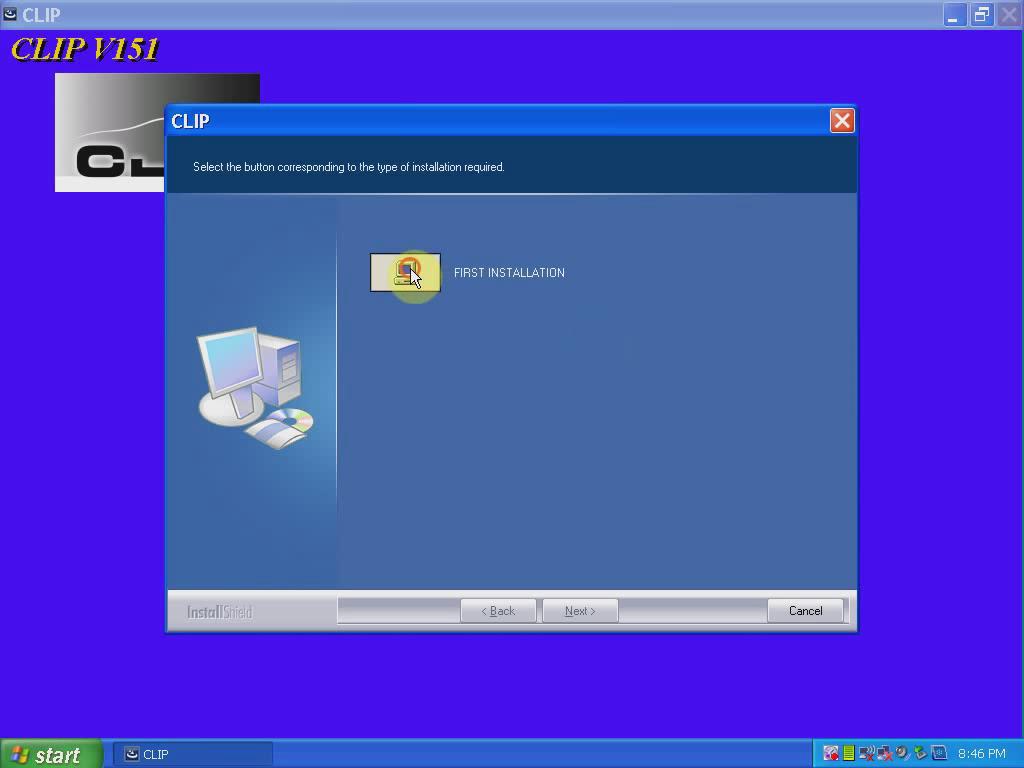
Click on FIRST INSTALLATION.

v151-renault-can-clip-6

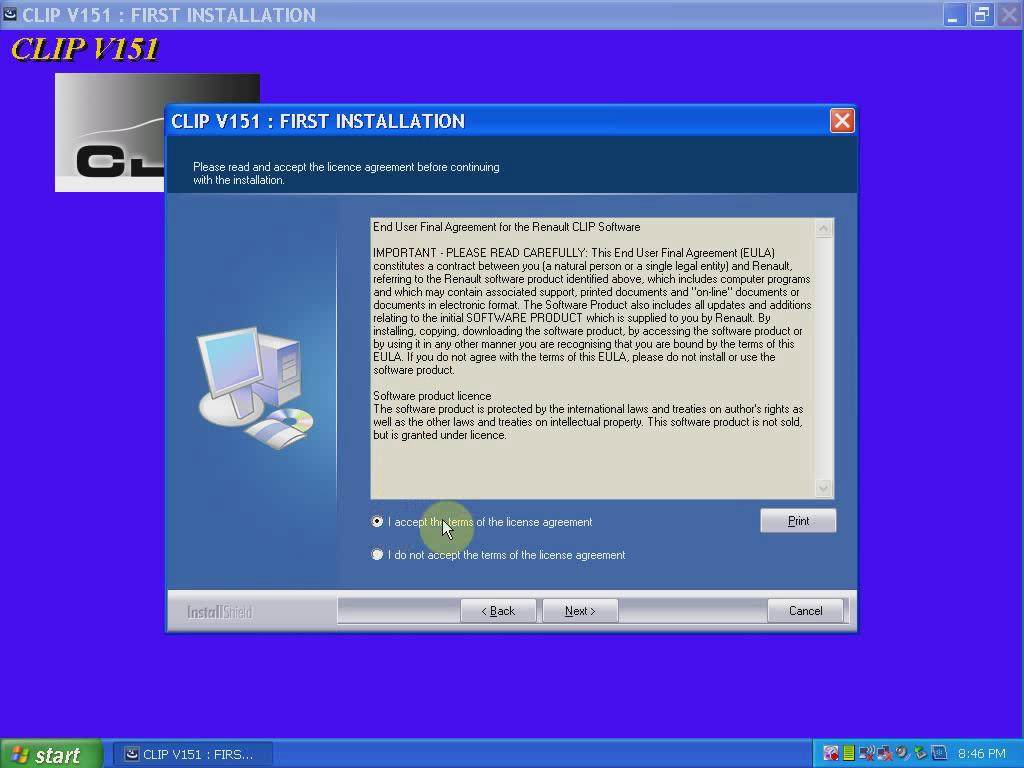
Accept license agreement.

v151-renault-can-clip-7

Click Next
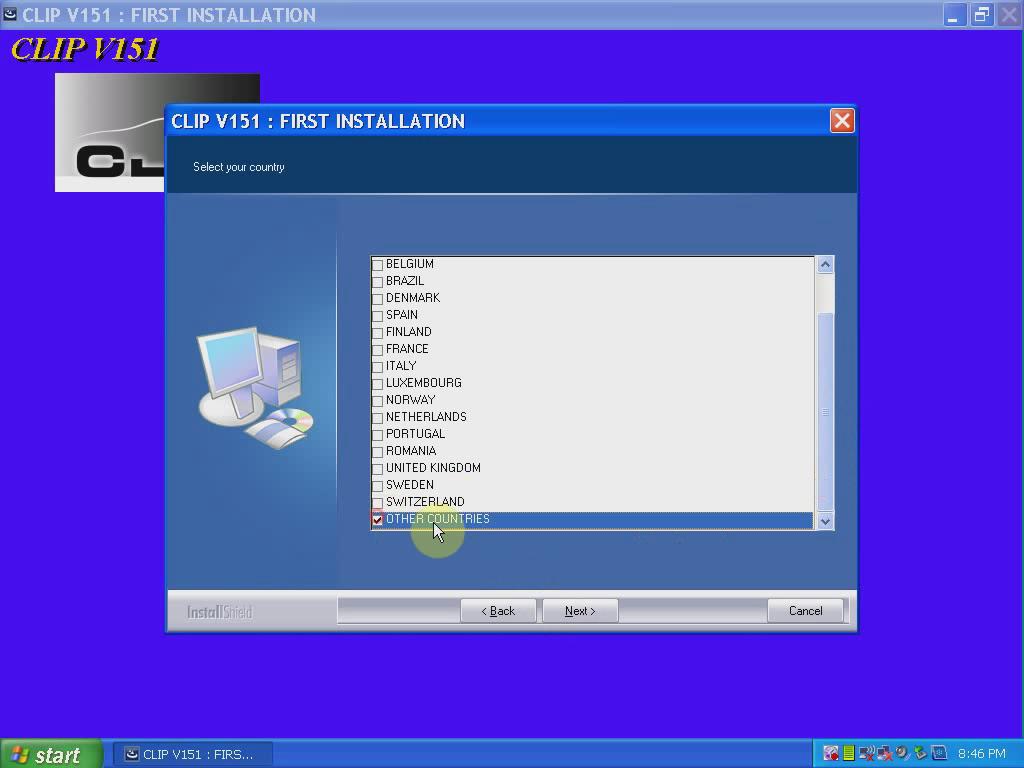
Select your country, click Next.
v151-renault-can-clip-8

Select software language, click Next.
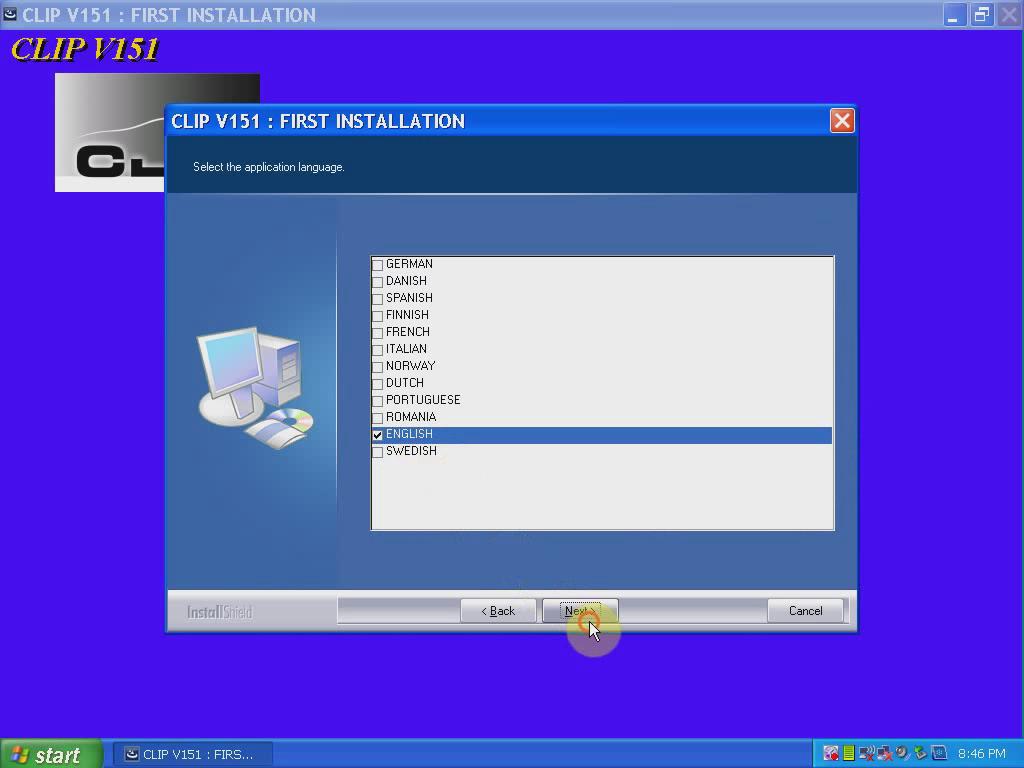
v151-renault-can-clip-9

Select manufacturer to install, click Next.
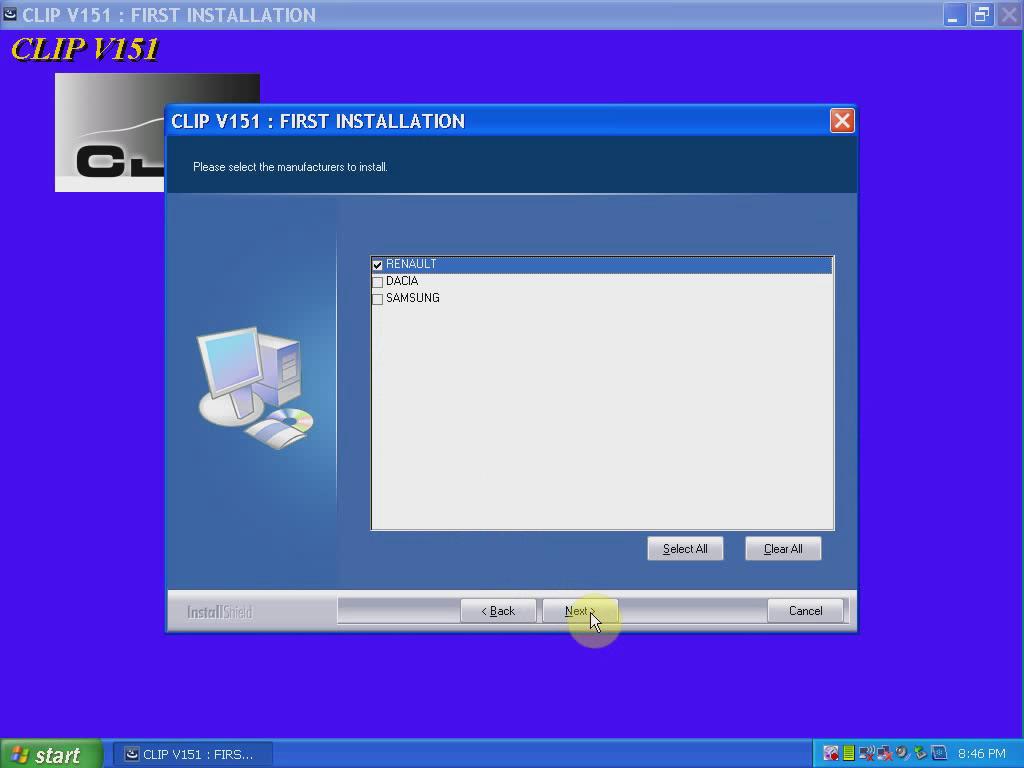
v151-renault-can-clip-10

Click Next
Click Next
Agree license agreement
Click Next
Do not change destination directory
Click “Install Now”.
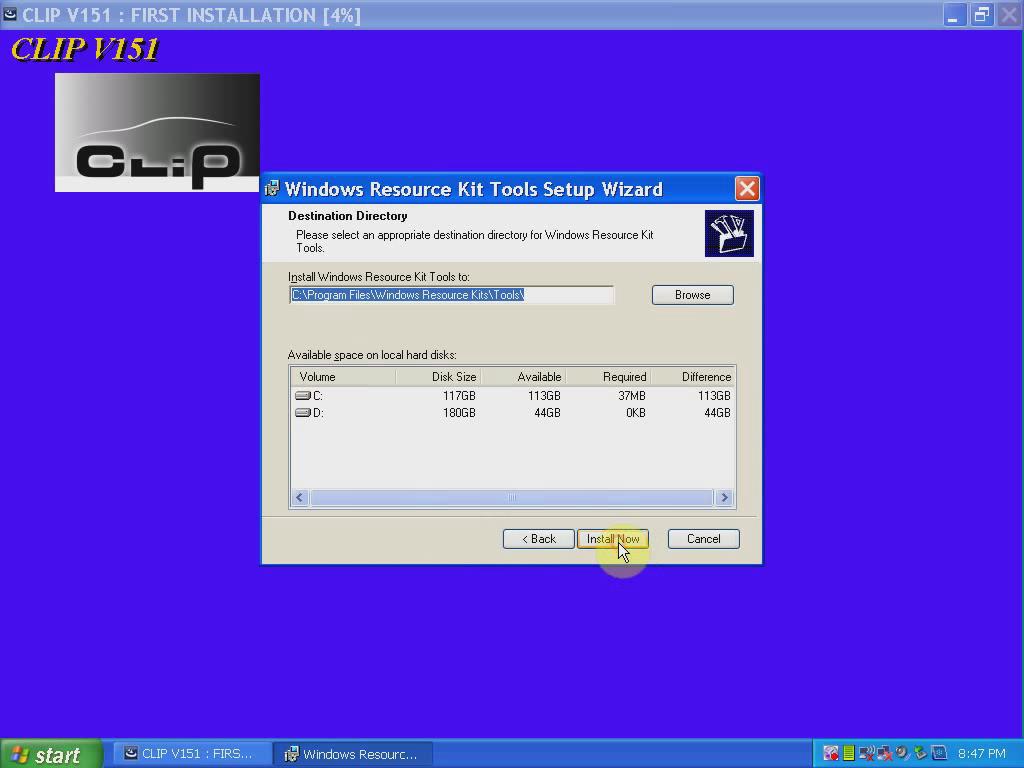
v151-renault-can-clip-11

Click Finish when software setup is installed completely.
Restart the computer

2) Register & Crack Renault CAN CLIP V151

CLIP V151 FIRST INSTALLATION completed, click Finish.
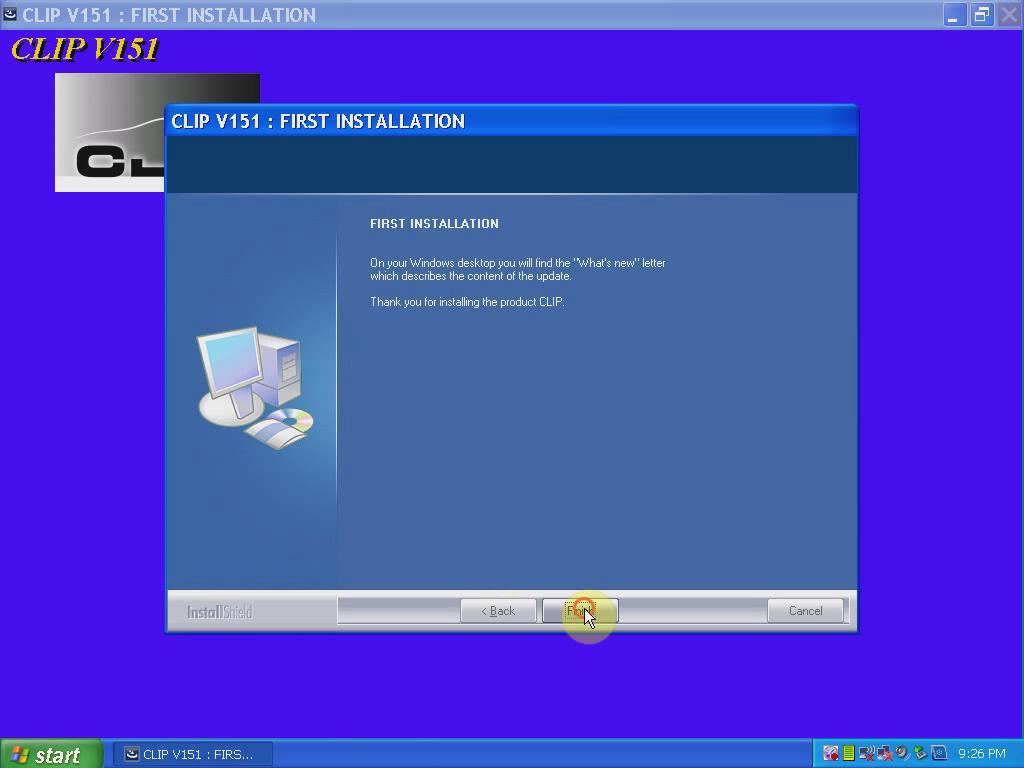
v151-renault-can-clip-12

Right click CLIP software on desktop>> Find Target>> find the “RSRWin” file, cut and paste it to desktop.

Open My Computer
Open Renault CAN CLIP V151 (E:) DVD
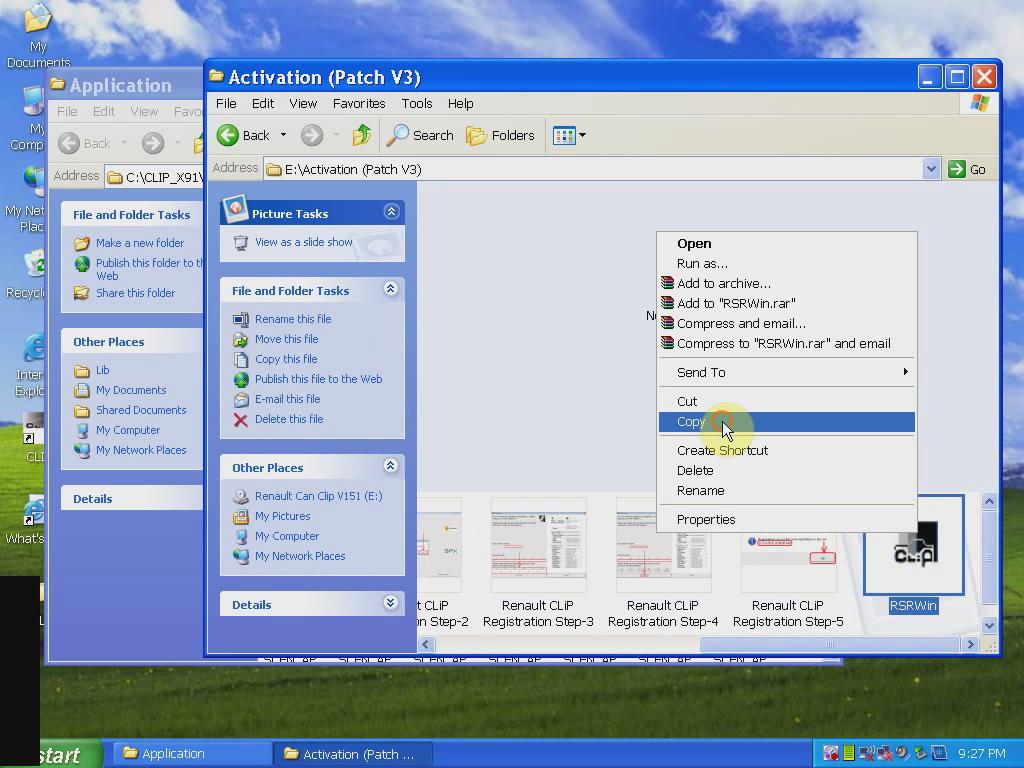
Open “Activation (Patch V3)” folder
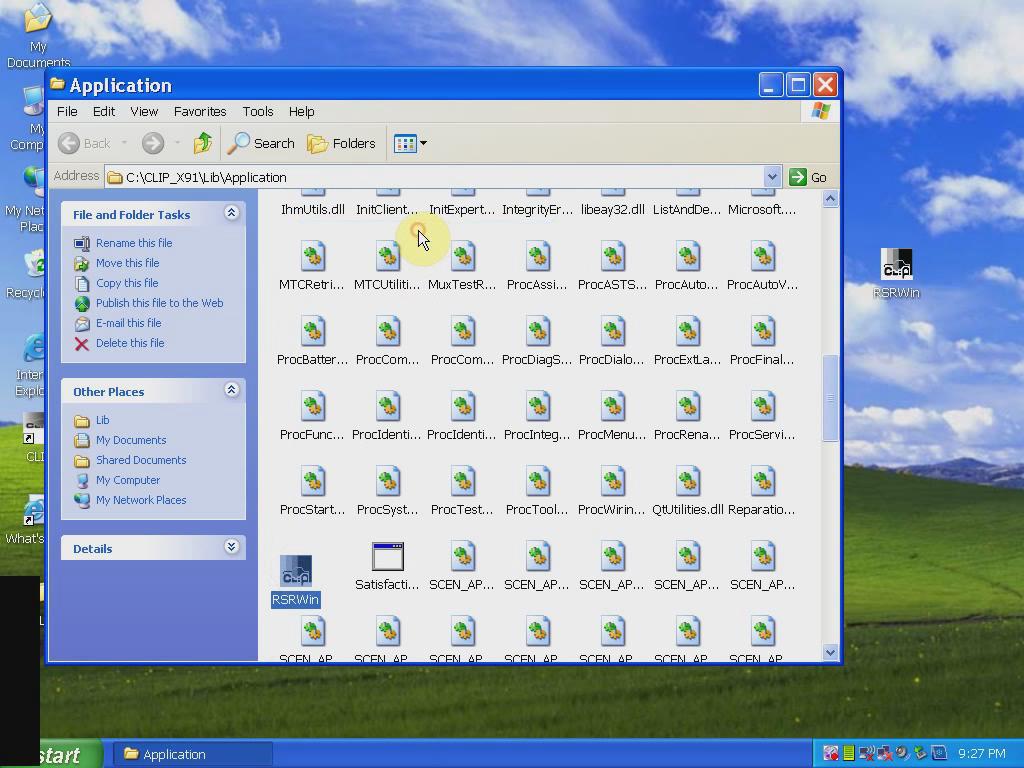
Copy “RSRWin” file and paste it to “Application” folder
v151-renault-can-clip-13

Open “RSRWin” file on Application folder
v151-renault-can-clip-14

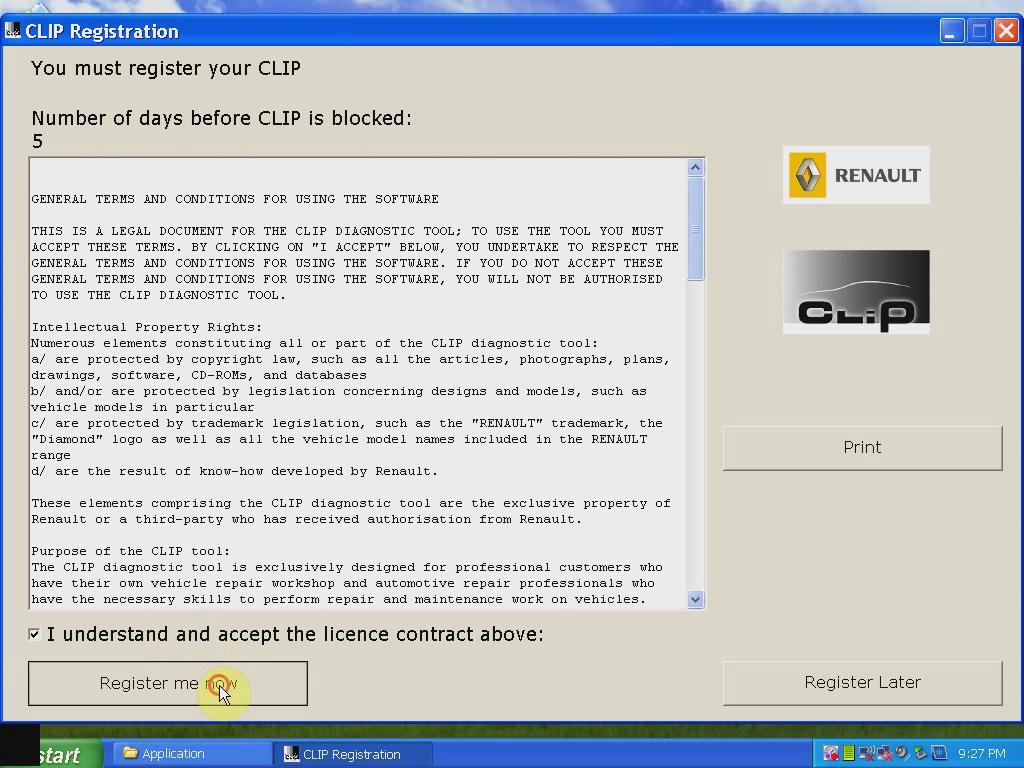
Tick “I understand and accept the license contract above”.
Then click “Register me now”.
v151-renault-can-clip-15

Click OK
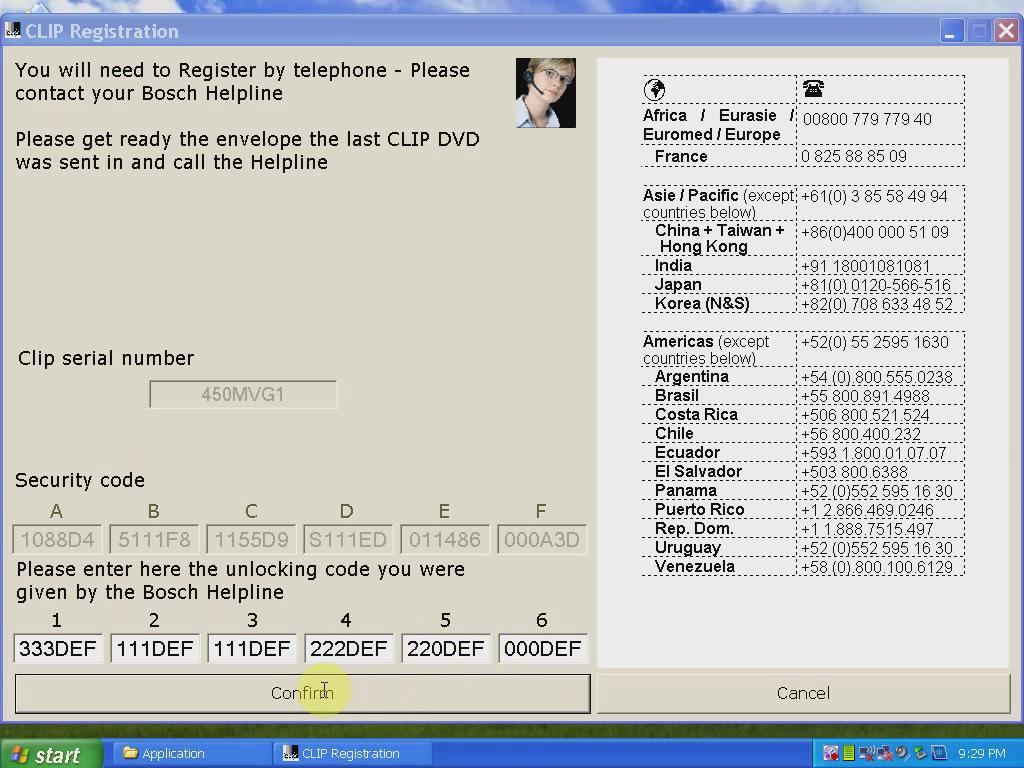
Enter register security code
Press Confirm button
v151-renault-can-clip-16

Click OK
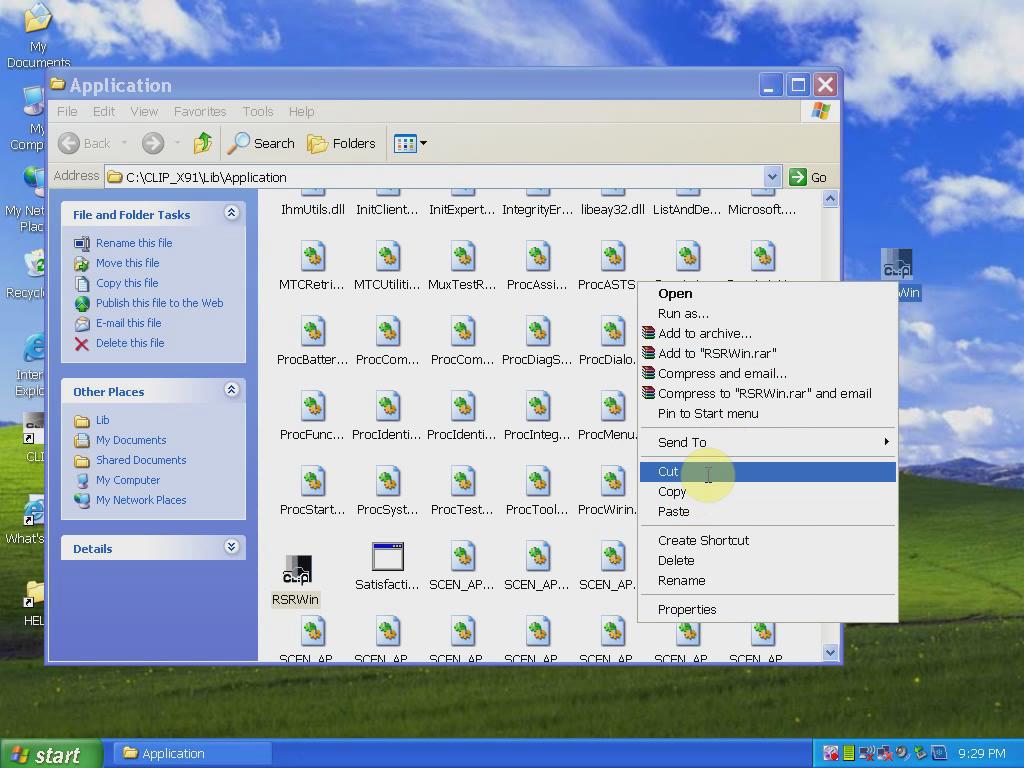
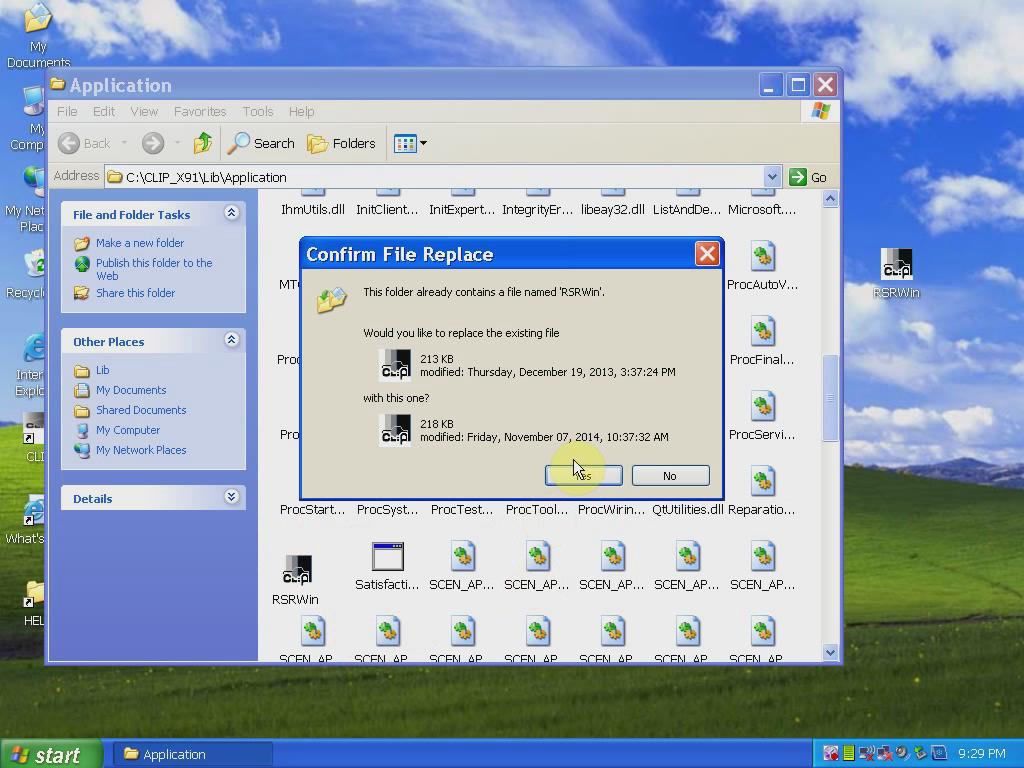
Open Application folder
Cut “RSRWin” file from desktop and replace “RSRWin” file in Application folder
v151-renault-can-clip-17


v151-renault-can-clip-18

3) Connect Renault CAN Clip interface
Connect Renault CAN Clip interface with computer via COM Port
Wait the system to detect the hardware wizard
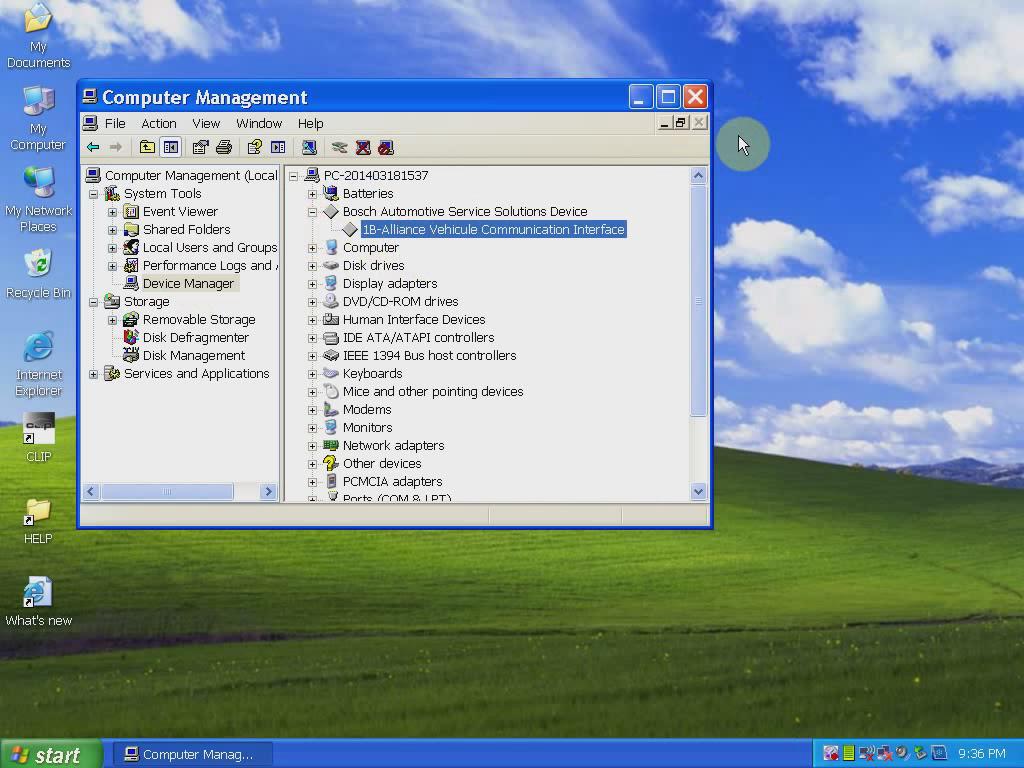
Open My Computer>>Device Manager>> Bosch Automotive Service Solutions Device>> 1B-Alliance Vehicle Communication Interface, to check well communication is built.
v151-renault-can-clip-19

4) Computer Test
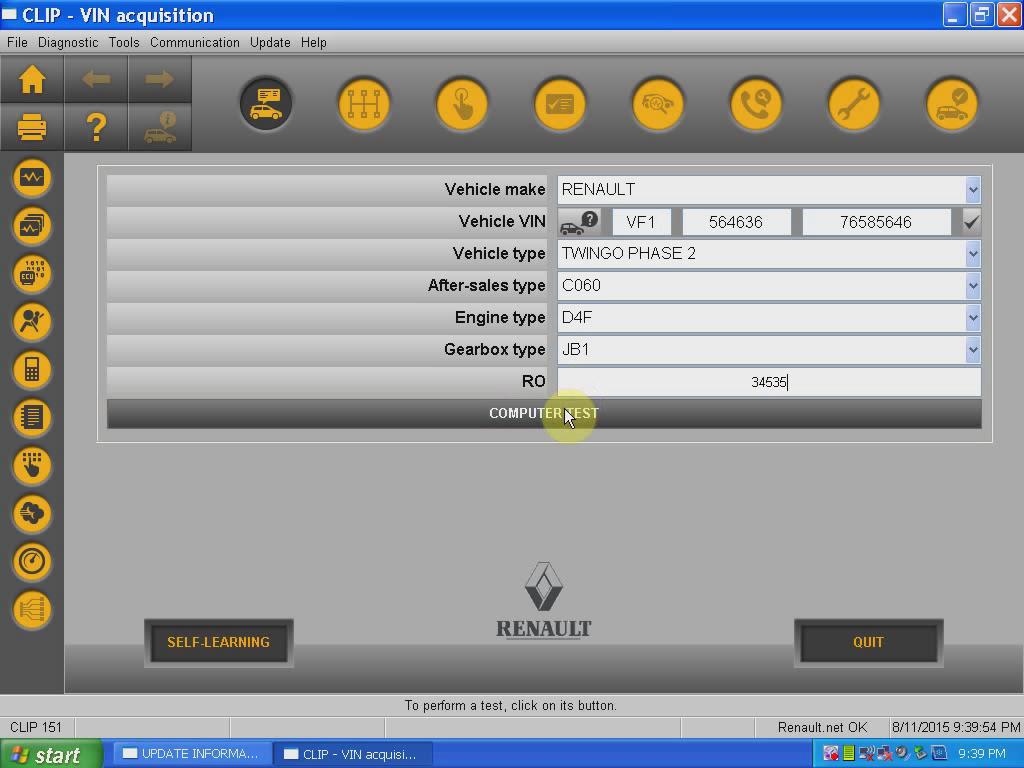
Open CLIP software on desktop
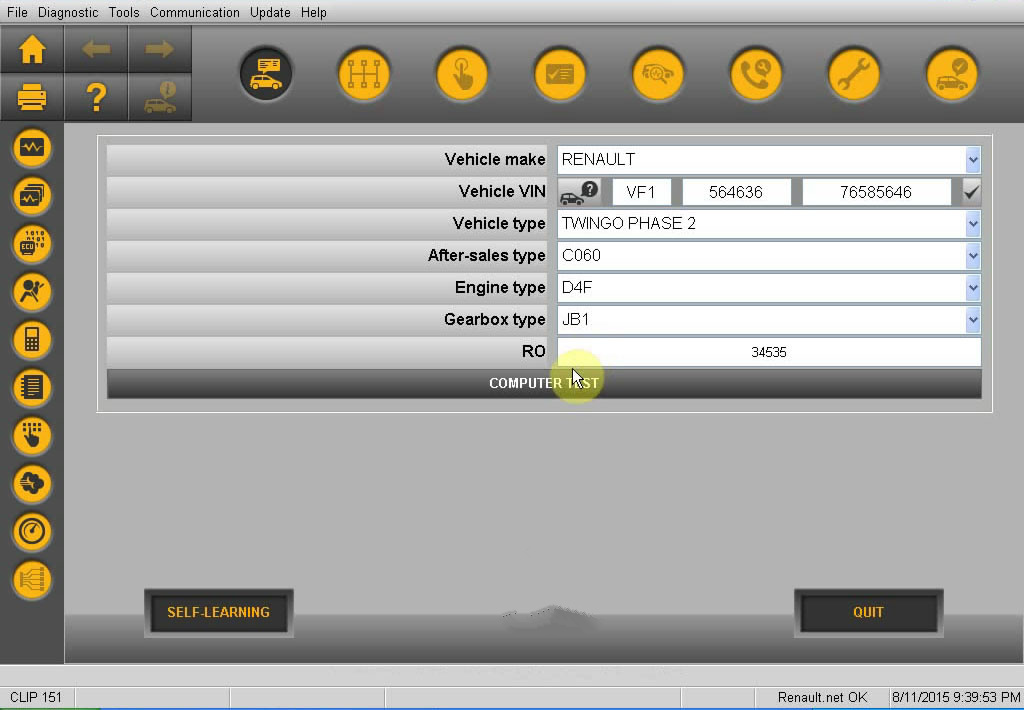
Complete vehicle information, VIN, vehicle type, Engine type etc, then click “COMPUTER TEST” button.
v151-renault-can-clip-20

Unblock the windows security alert
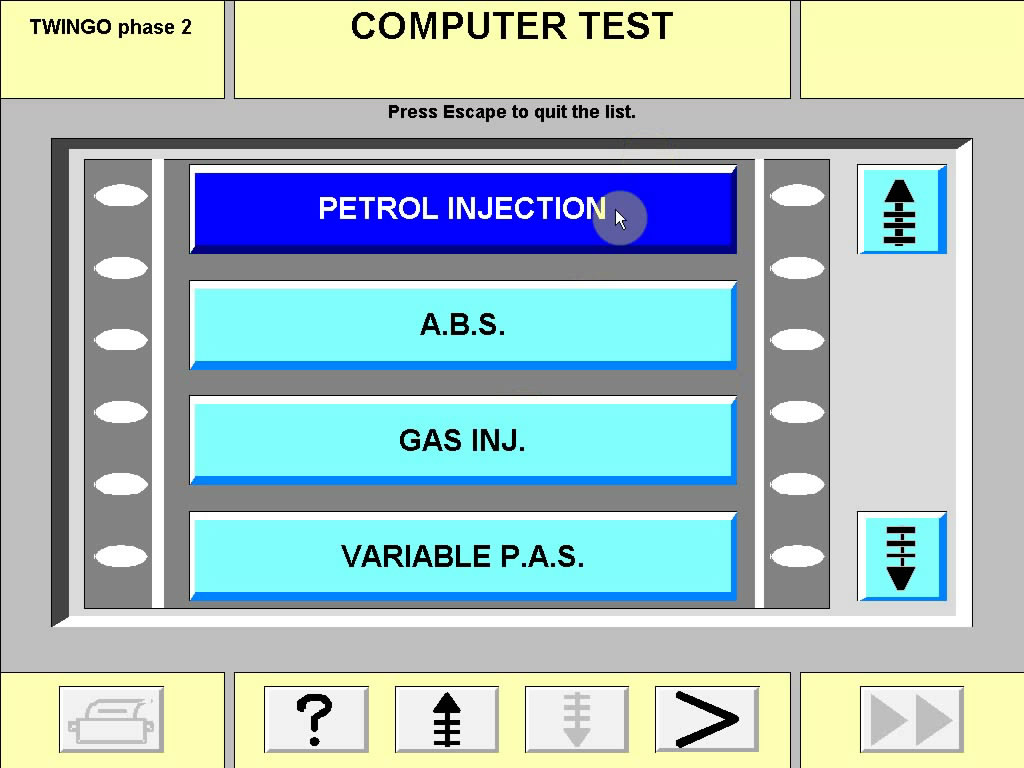
Select PETROL INJECTION
Select FAULTS TEST
Check software information etc
Exit CLIP V151 software

5) Diagnose vehicles with Renault CLIP
Open CLIP software on desktop
Complete vehicle information
Click OK when system prompts “COMFIGURATION PROBLEM” windows
Select “Information” tab
Select valid systems, press Continue
Read & erase fault codes, continue perform other functions.
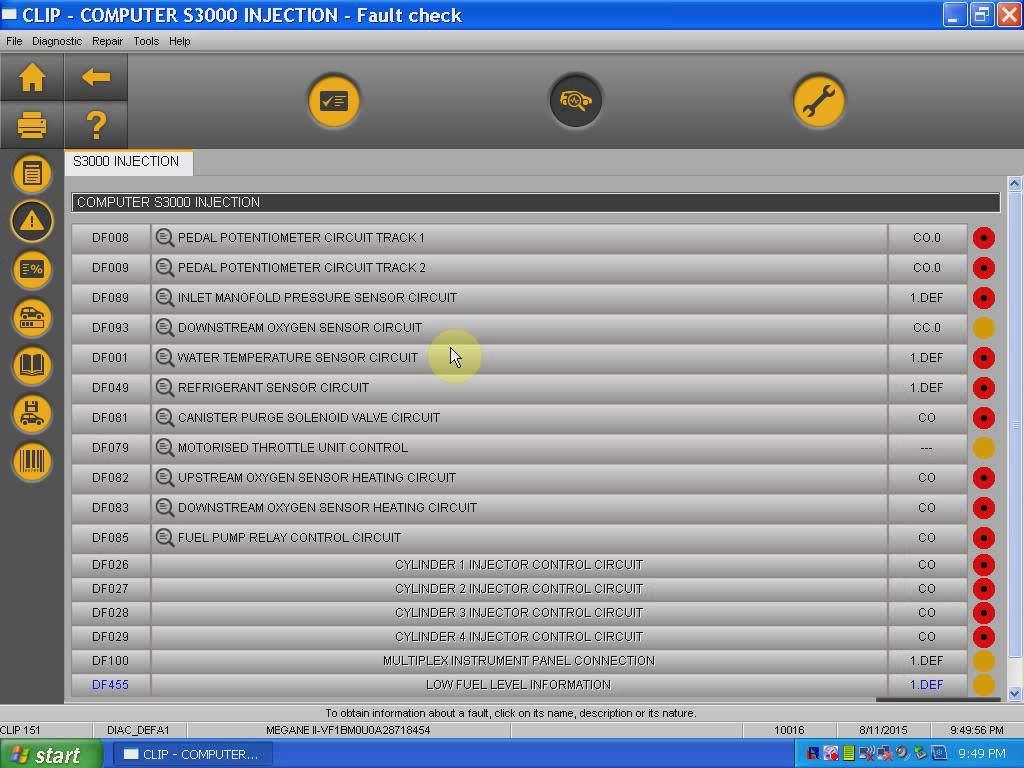
v151-renault-can-clip-21

For the V151 Renault Can Clip, check: http://www.eobdii.fr/wholesale/renault-can-clip-latest-diagnostic-tool.html.

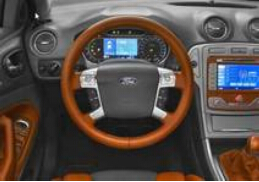
OBDSTAR X-100 PRO Auto Key Programmer Pin Code Needed For Programming

OBDSTAR X-100 PRO Auto Key Programmer Pin Code Needed For Programming

X-100 PRO Auto Key Programmer is a kind of handheld device for programming keys in immobilizer units on vehicles. This scan tool has a simple and robust design, to make your vehicle service experience much easier!

Q: I need the pin code for key programming my Ford cars. How can I get it? Can you give me the factory phone number for me to check?
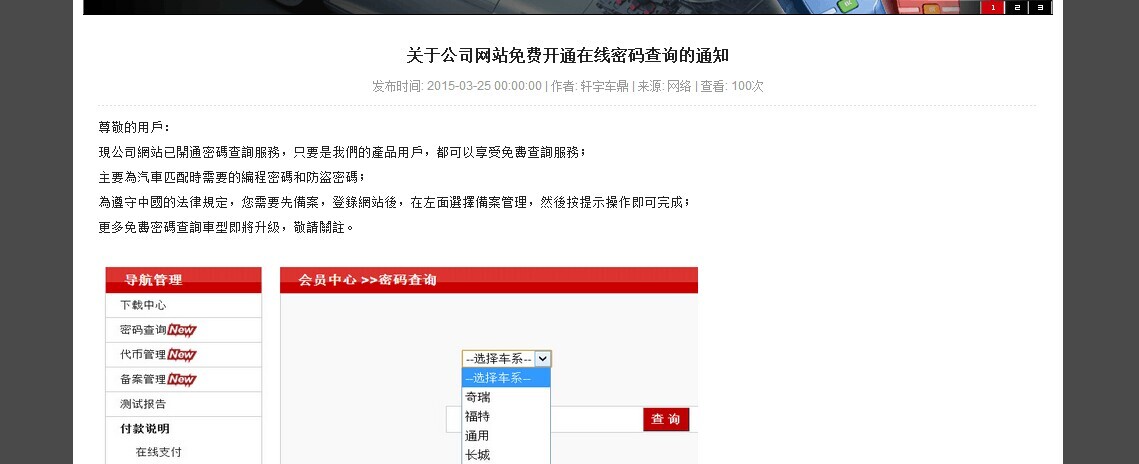
A: You do not need to call. You can register an account on the obdstar official website. Then log in. You can check the pin code in the member center.

obdstar-member-center

For the OBDSTAR X-100 PRO Auto Key Programmer official website, check from: http://www.eobdii.fr/wholesale/x-100-pro-auto-key-programmer.html.

How to solve V2.11 KTAG K-TAG Master ECU Programming Tool Version 0?

How to solve V2.11 KTAG K-TAG Master ECU Programming Tool Version 0?

V2.11 KTAG K-TAG ECU Programming Tool Master with Hardware V6.070 is latest V2.11. It supports BDM function well and has no tokens limitation.  Available Protocols for K-TAG: BDM MOTOROLA MPC5xx.

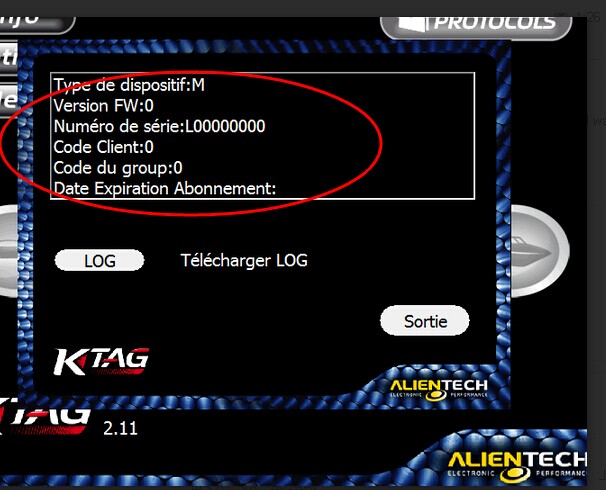
Customer Question: I used the KTAG K-TAG Master ECU Programming Tool for 3 weeks. But yesterday when I connected the ktag interface with my car, it prompted the Version FW:0. How can I do?

ktag-error

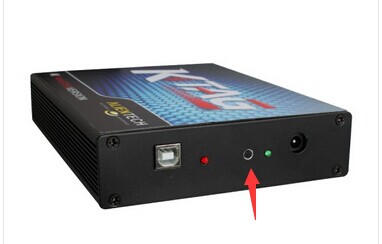
Answer: Please try to press the Ktag renew button. After pressing, connect the power supply cable. The light will turn to red. Then follow the unlock video in the software CD.

ktag-renew-button

MB SD Connect Compact 4 Star Diagnosis Tool FAQ

MB SD Connect Compact 4 Star Diagnosis Tool FAQ

Q1: Does this MB SD Connect Compact 4 software HDD has requirement for computer or computer system? Can i use win7 system to install this software? Do you have SATA HDD?
A1: Please install the software on XP system. XP system is best for this software. More steady for software running. Do not advice you use win7 system.
There are different hdd to choose: Dell d630 hdd and external hdd. If you have D630 computer, then choose D630 HDD, if you do not have this computer, then choose External HDD. Attention: For D630 hdd, make sure your computer is integrated video card and with 1GB memory, because the D630 of discrete video card is easy to have blue screen or shutdown and restart, restart and shutdown. …..For SATA HDD, based on the HDD type you choose.

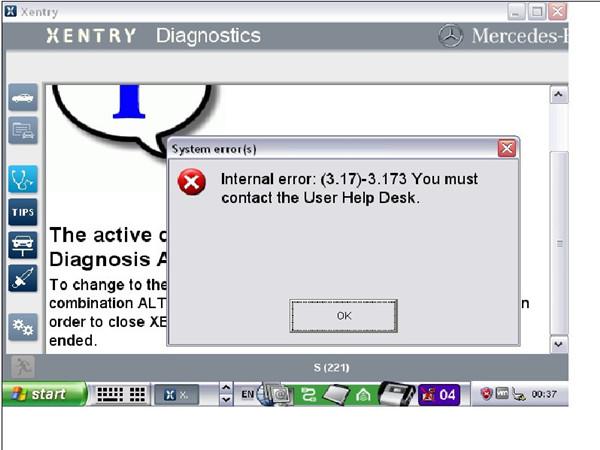
Q2: After I find Fingerprint ID, I click “Diagnostic”, it do not show me the Fingerprint ID, but the following error prompt: “Internal error (3.17)- 3.89 You must contact the user help Desk “, why?

mb-sd-c4-software

A2: Your computer is not compatible with this star software, change another computer to install the software. This is the lowest configuration for computer: CPU 2.0GHZ or above, 2GB memory or more, Windows XP professional. If your computer is D630, then needs integrated video card and 1GB memory or above.

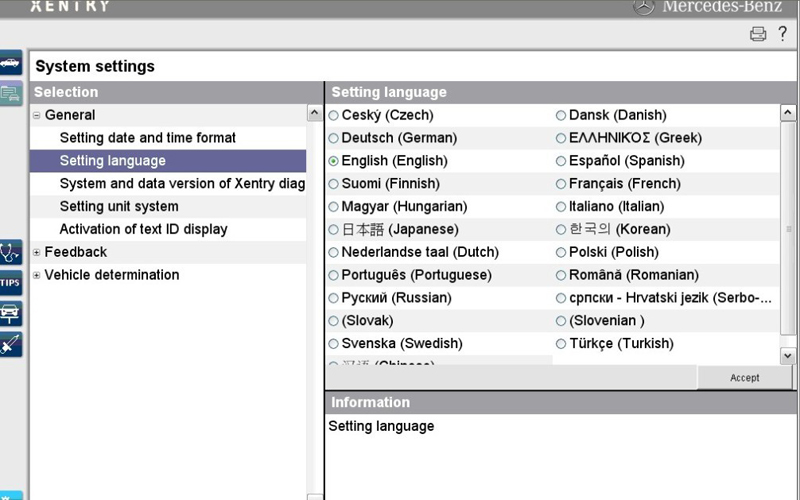
Q3: Can i change the MB SD Connect Compact 4 DAS language? How to change?

mb-sd-c4-language
A3: No matter what car you want to diagnose with this MB SD Connect Compact 4, when you open the software, enter Xentry first. After you enter Xentry, setup the language you want. When you use Xentry to work on your car, you need to enter DAS to diagnose and program, then software will switch from Xentry to DAS automatically. What language you setup for the Xentry, you will get the same language in DAS. So Xentry has 21 kind languages, DAS has 21 kind languages too.

Q4: EPC needs activation or not? Where to enter EPC?
A4: EPC needs activation. Make sure you enter EPC from “EPC NET EXPLORER”, this is the right way. Then you will find LAN ID, then go on to activate the software.

Q5: After I insert the D630 software HDD to my computer, it ask the “administrator code” for me, can you tell me the code?
A5: The administrator code is: User$star2004.

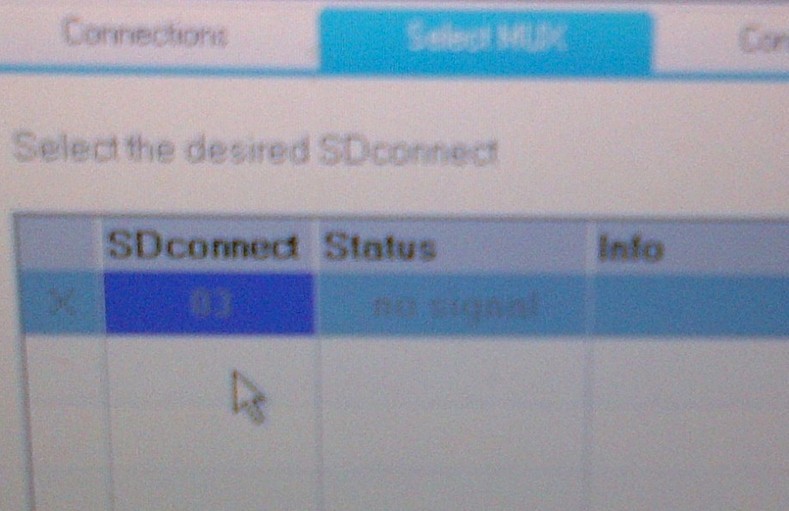
Q6: After I click “Select MUX”, it gives me the error code like this photo, Status “No Signal”. How to solve this problem?

mb-sd-c4-software-1
A6: You need to reset the IP address. Please connect to “Local area connection”, and set IP address: 172.29.127.114, Subnet mask: 255.255.0.0. for the detailed steps, please watch the video tutorial by clicking column “Video”.

Q7: I use USB cable to connect the external hdd with my computer, what to do next? Which software i need to install first?
A7: Install “setup.exe” file first.

Q8: Does software hdd includes WAS and DAS open program?
A8: Yes. It includes this two.

Q9: I want to use MB SD Compact C4 to connect with ECU to read Chassis No. for my smart 1998. Is it OK?
A9: For SMART car, it needs login password. You can buy our DAS SMART Calculator to calculate login password.

Q10: I want to diagnose ML 270 2005 and A class W169 2007, which tool do you recommend for me?
A10: You can use MB SD C4.

AUTEL MaxiSYS Pro MS908P Firmware Update

AUTEL MaxiSYS Pro MS908P Firmware Update

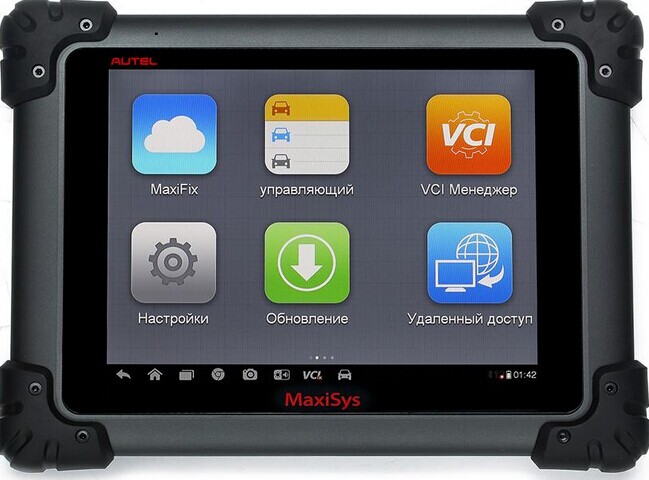
Autel Maxisys Pro MS908P can do online programming. At the same time it’s compatiable for diagnosis and online programming for part of the original software. MS908P Firmware updates increase the Maxisys applications’ capabilities, typically by adding new tests, new models, or enhances applications to the database.

autel-maxisys-pro-ms908p-1

MaxiSYS Pro MS908P Firmware Update Tips

1. Power up the MaxiSys Display Tablet and ensure that it is connected to a power scource and with steady internet connection.
2. Tap the Update application button from MaxiSys Job Menu: Or tap the update notification message when received one. The Update application screen displays.
3. Check all available updates:

a: If you decide to update all the items, tap the Update All button.
b: If you only want to update some individual items, tap the Update button on the right column of the specific item.
4. Tap the Pause button to suspend the updating process. When you tap Continue to renew the update, the updating process will resume from the break point.
5. When the updating process is completed, the firmware will be installed automatically. The new version will replace the original version if there is one.

All the JLR Diagnostic Cables Differences List on EOBDII.FR

All the JLR Diagnostic Cables Differences List on EOBDII.FR

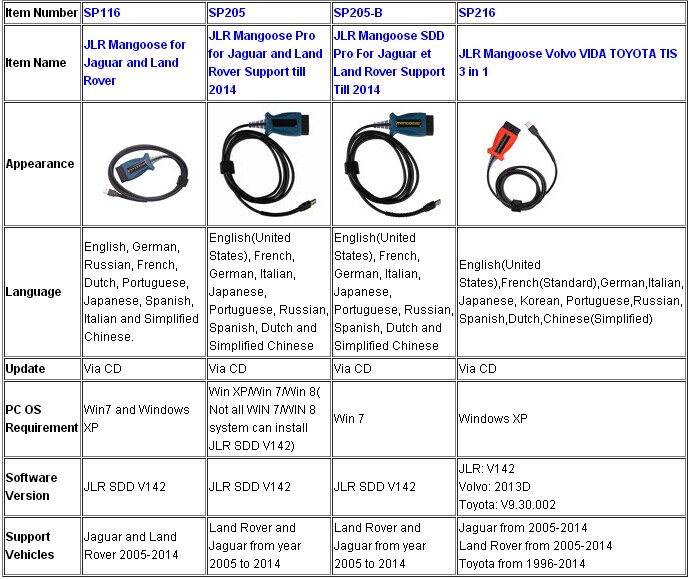
JLR mangoose SDD for Jaguar and Land Rover are now fully supported for dealer level diagnostics with the new Mangoose JLR. Mangoose JLR interface cable with OEM level diagnostic for Jaguar & Land Rover.

jlr-mangoose

See the JLR mangoose cable from:

JLR Mangoose for Jaguar and Land Rover
JLR Mangoose Pro for Jaguar and Land Rover Support till 2014
JLR Mangoose SDD Pro For Jaguar et Land Rover Support Till 2014
JLR Mangoose Volvo VIDA TOYOTA TIS 3 in 1

2015 Renault CAN Clip V151 New Update!

2015 Renault CAN Clip V151 New Update!

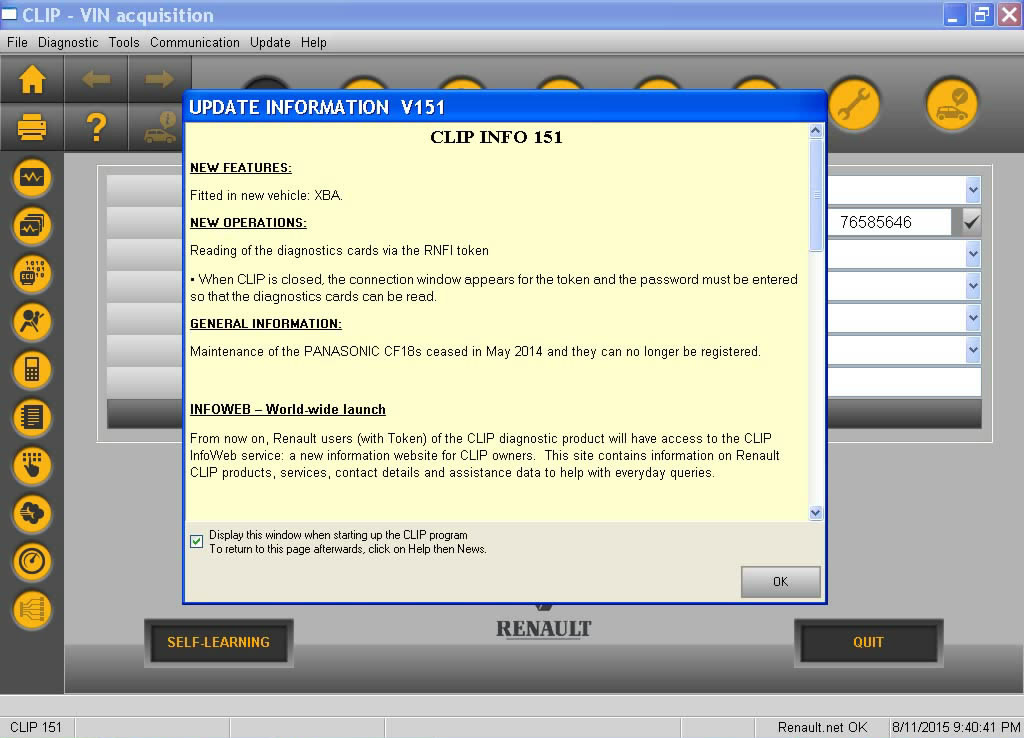
New Features: Fitted in new vehicle: XBA
New Operations: Reading of the diagnostic cards via RNFI token

When Renault can clip is close, the connection window appears for the token and the password must be entered so that the diagnostic cards can be read.

General information:
Maintenance of the Panasonic CF18s ceased in May 2014 and they can no longer be registered.

Renault CAn Clip V151 Software Display:

renault-can-clip-v151-software-1renault-can-clip-v151-software-2renault-can-clip-v151-software-3renault-can-clip-v151-software-4

Find the Renault Can Clip: http://www.eobdii.fr/wholesale/renault-can-clip-latest-diagnostic-tool.html.
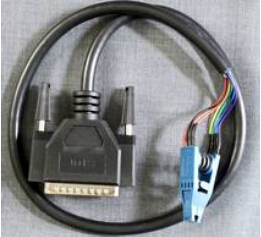
How to update the CK-200 CK200 Auto Key Programmer?

How to update the CK-200 CK200 Auto Key Programmer?

V38.05 CK-200 CK200 Auto Key Programmer is the udated version of CK-100 Key programmer. Now the newest version is V38.05. How to update the 38.03 CK200 Auto Key Programmer to this version? Please follow the procedure.
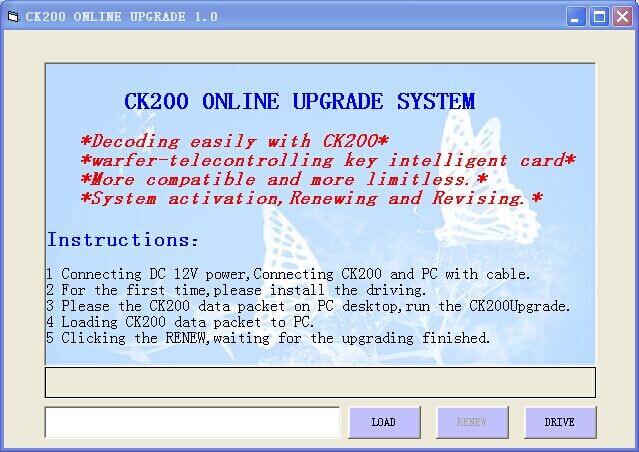
Attention: A connector cable and a 12V/1A power adapter are necessary when you are going to upgrade CK200.
1.Click on the “CK200Upgrade” on the desktop and run the CK200Upgrade.exe program.
You can download the CK200SETUP from: http://www.mediafire.com/download/pnmz9mvw9w46isd/CK200-update+-tool.exe.

ck200-key-programmer-update-1
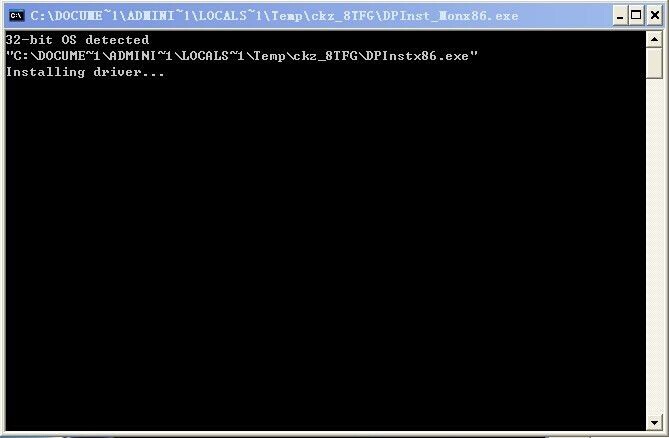
2.For the first time, click on the “DRIVE” button to install the CK200 drive.

ck200-key-programmer-update-2


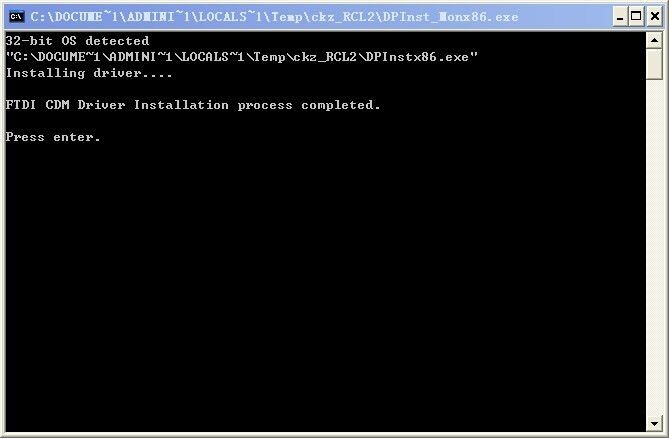
Pop up a window after clicking on the DRIVE button.

ck200-key-programmer-update-3

The install is completed when “Press enter” is on the window,then you can close the window.

ck200-key-programmer-update-4
3.Inserted the 12V power line into the square hole in the side of CK200 at this time, CK200 is the normal state of running. Inserted one end of the upgrade line into the matching socket which is at the bottom of the CK200 inserted another end of the upgrade line into the USB which is on PC. There will be “Found new hardware” prompt display on the lower right corner, when prompted to “New hardware is installed and ready to use” means that the CK200 and the computer has been connected.
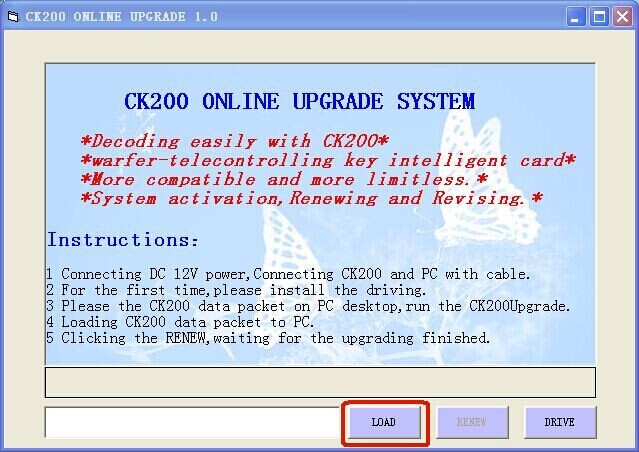
4.Click on “LOAD” button, and install the CK200 upgrading file.

ck200-key-programmer-update-5
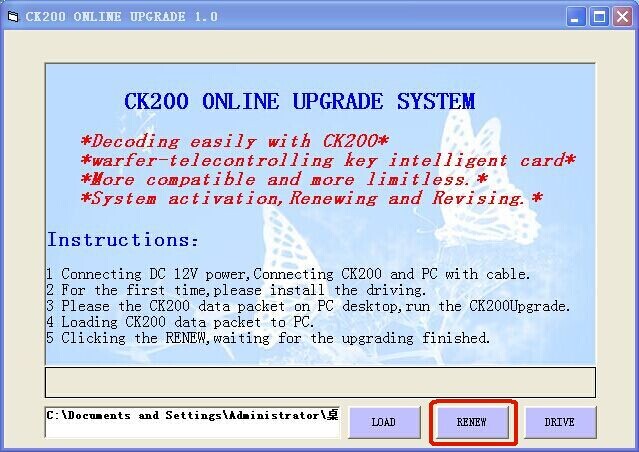
5.After installing it successfully, click on “RENEW”.

ck200-key-programmer-update-6
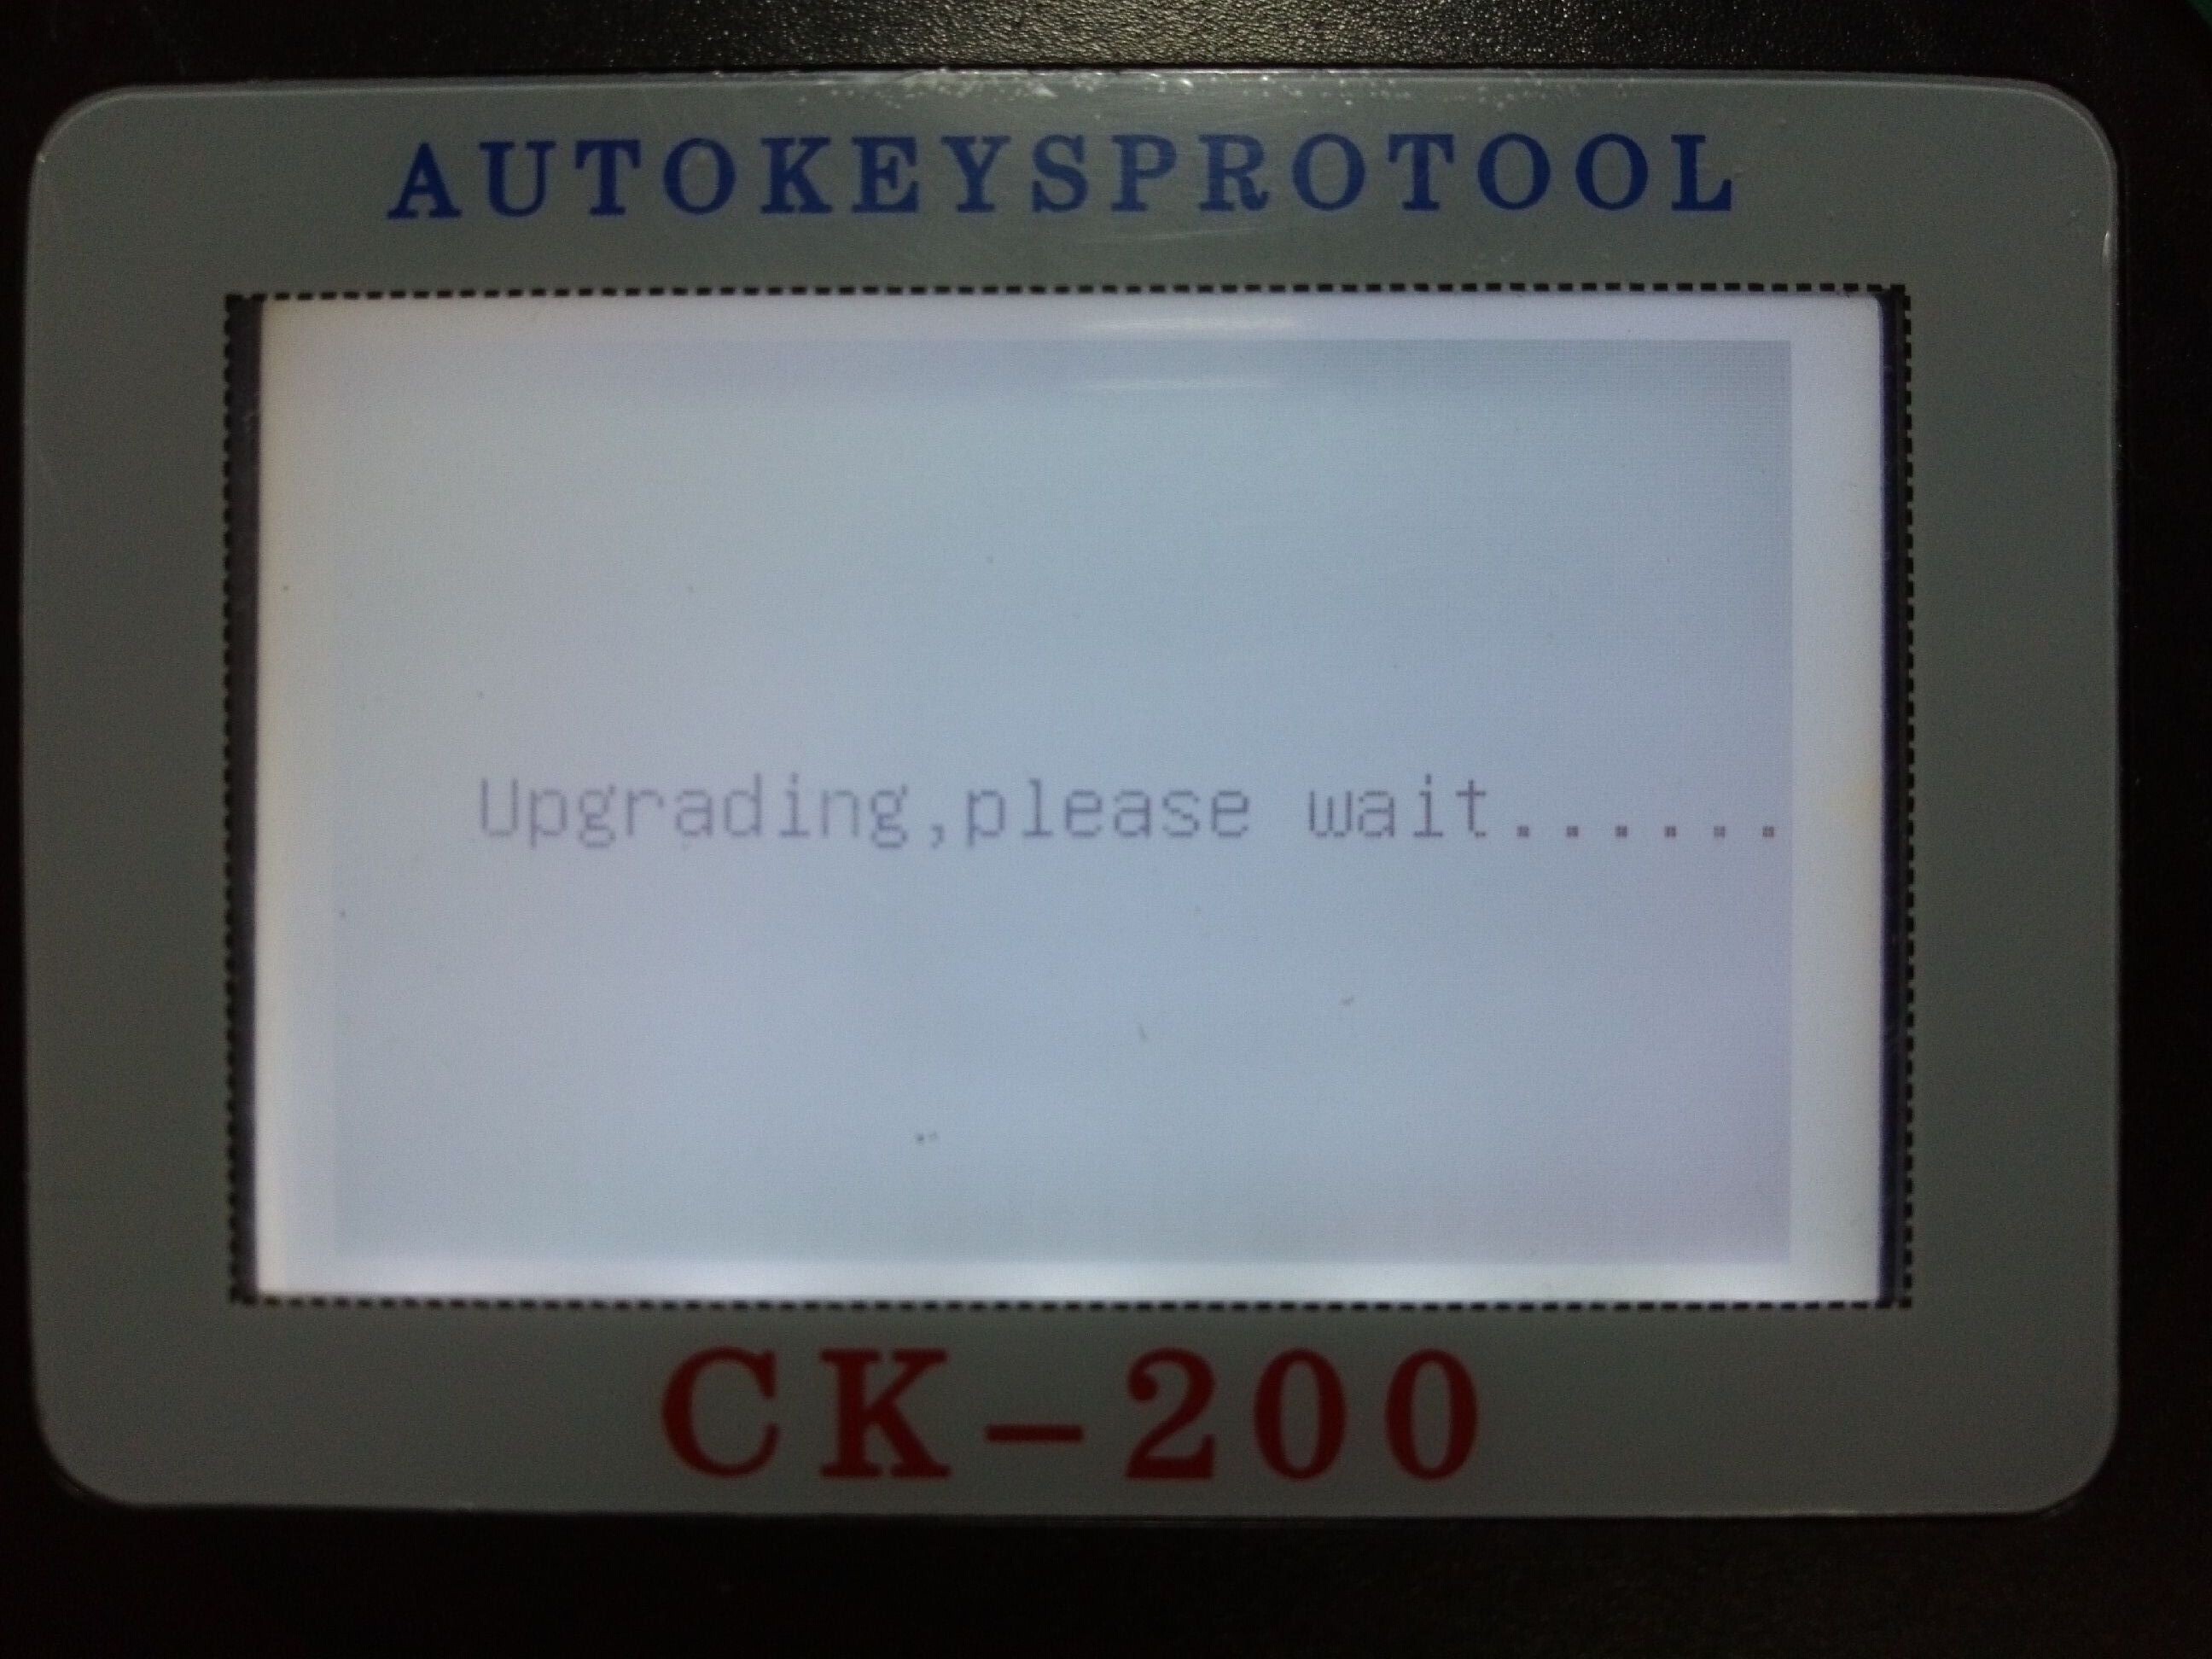
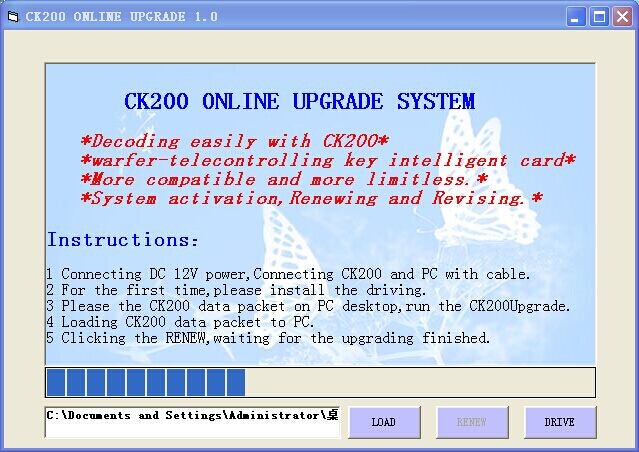
6.After Clicking the RENEW button “Upgrading,please wait……” will be showing on the CK200 screen. At the same time,a progressbar will be showing on the interface of CK200 client programe.

ck200-key-programmer-update-7

ck200-key-programmer-update-8
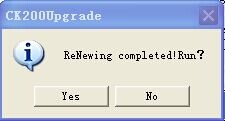
7.When the “ReNewing completed! Run?” dialog box appears, Click “Yes” to complete the upgrade.At the same time,The CK200 is in normal operationState. Then, you can remove the upgrade cable and the power adapter.

ck200-key-programmer-update-9