Quick Reference Guide for Autel MaxiPro MP808K

Quick Reference Guide for Autel MaxiPro MP808K

There are four steps to show how to use Autel MaxiPro MP808K

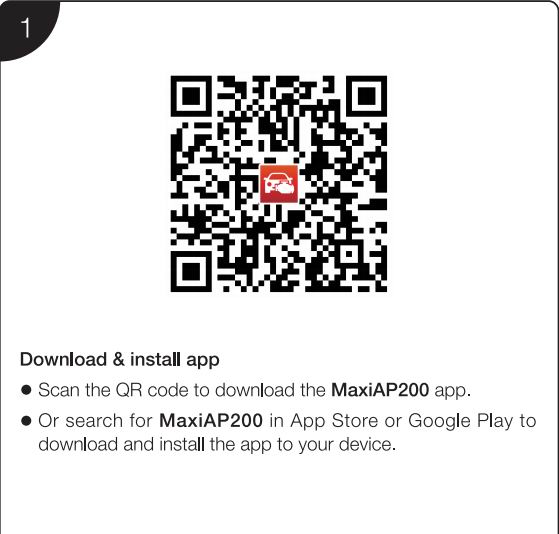
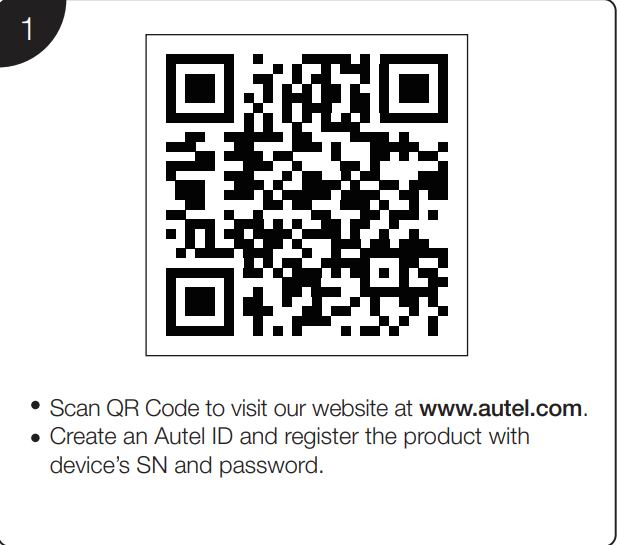
Firstly, Scan QR Code to visit our website at www.autel.com.
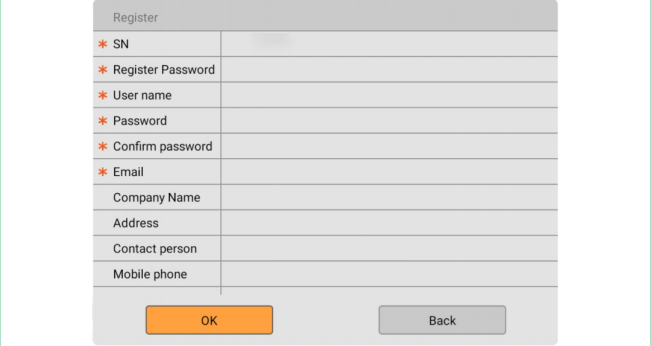
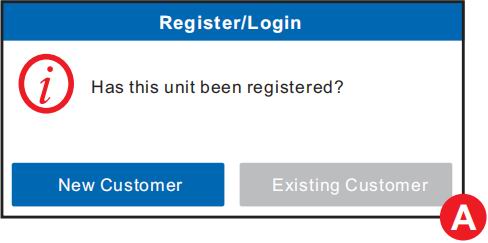
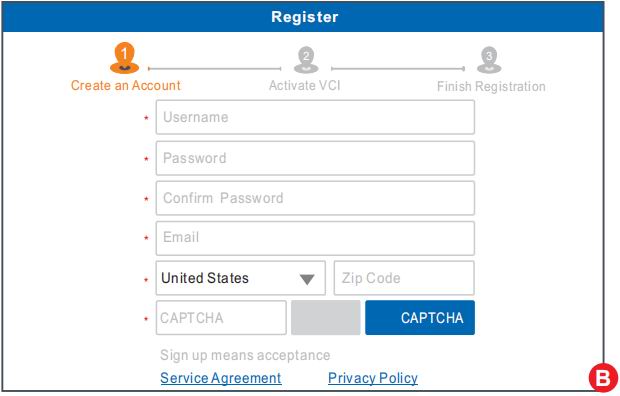
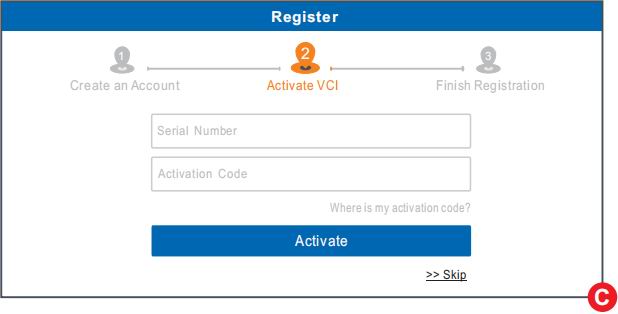
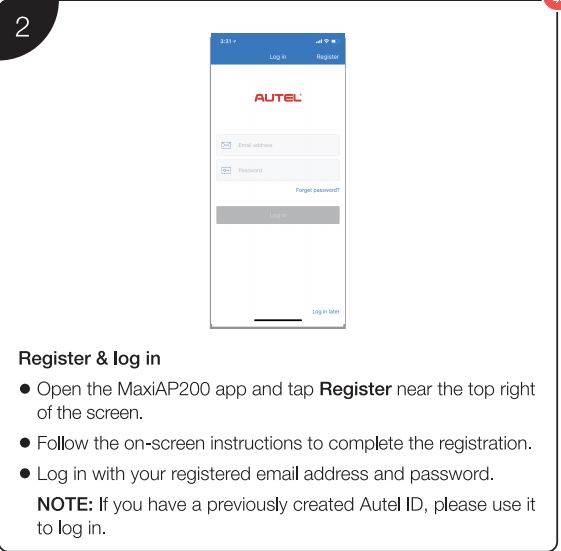
Create an Autel ID and register the product with device’s SN and password.

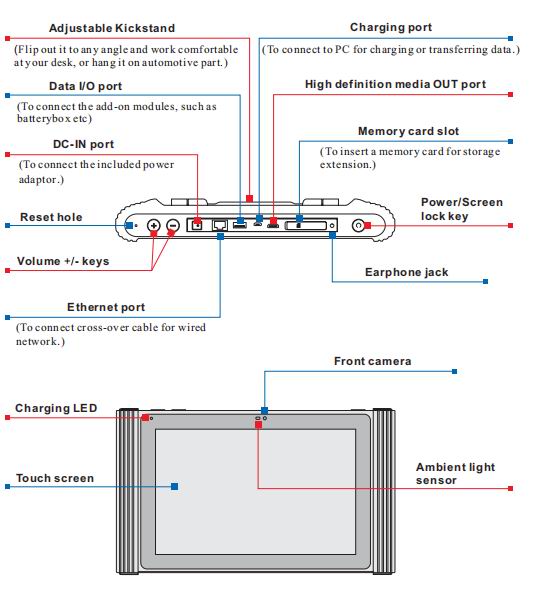
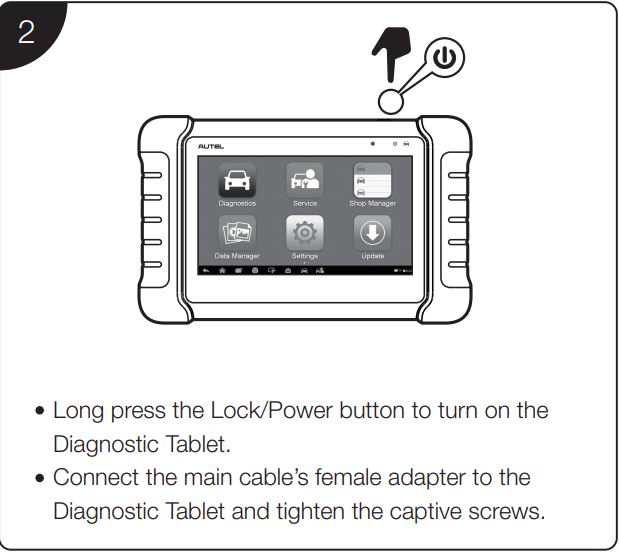
Second,Long press the Lock/Power button to turn on the Diagnostic Tablet.
Connect the main cable’s female adapter to the Diagnostic Tablet and tighten the captive screws.

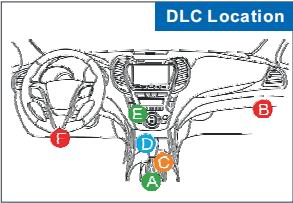
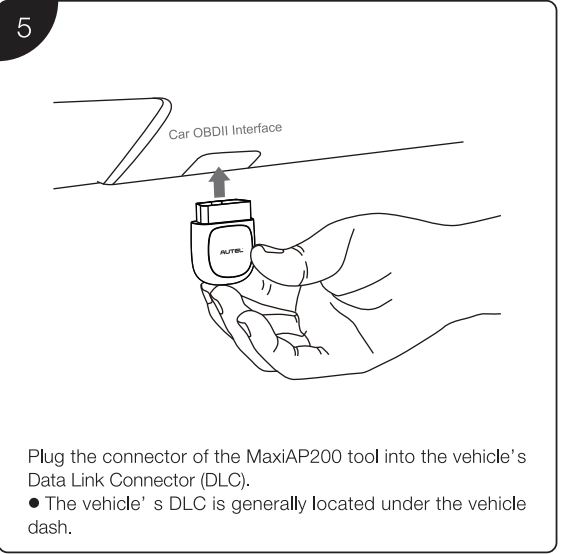
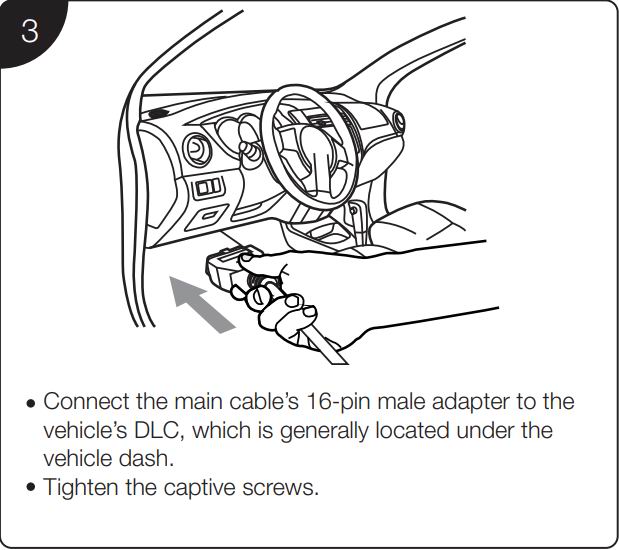
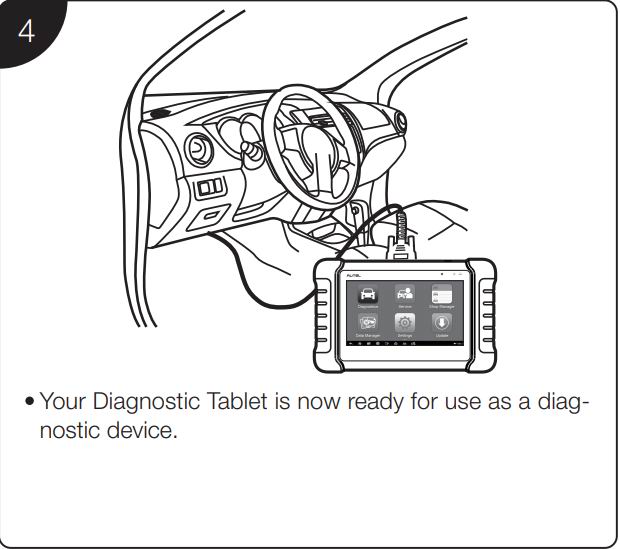
Third,Connect the main cable’s 16-pin male adapter to the vehicle’s DLC, which is generally located under the vehicle dash.
Tighten the captive screws.

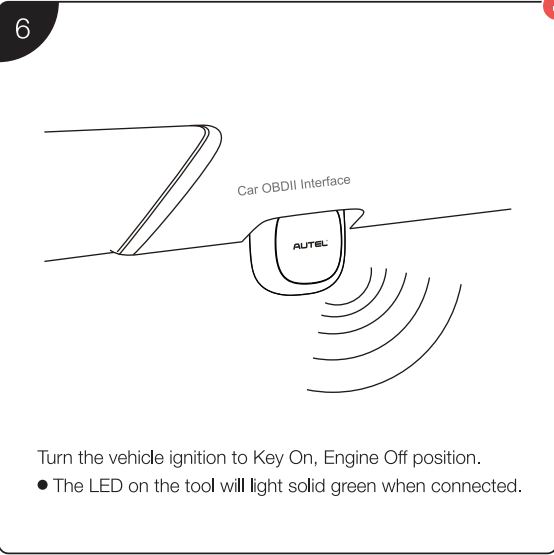
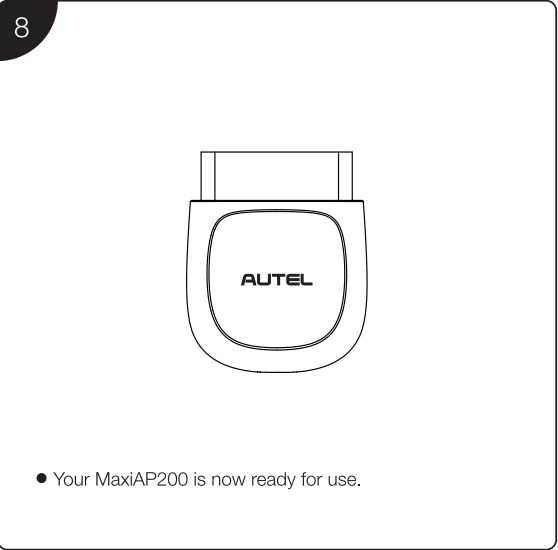
Forth,Your Diagnostic Tablet is now ready for use as a diagnostic device.
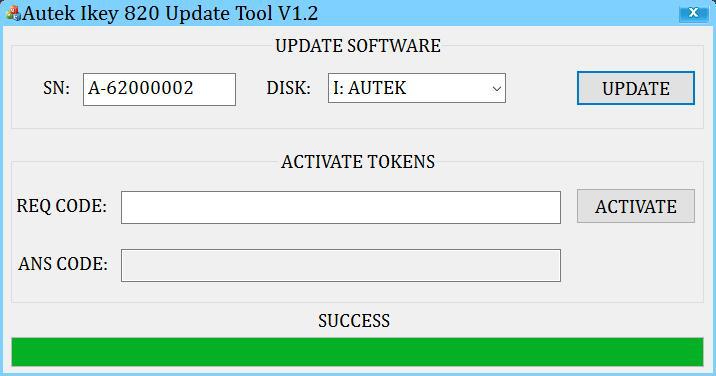
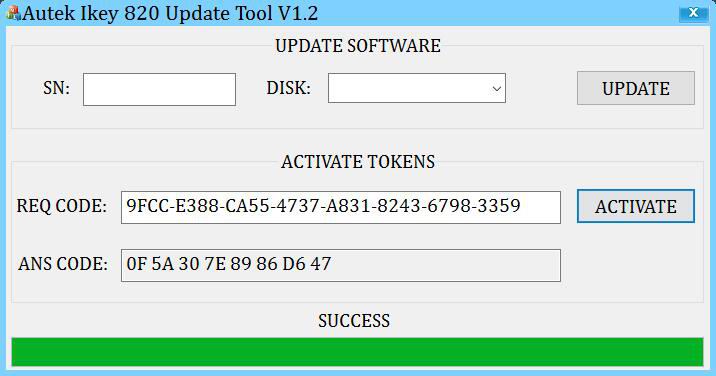
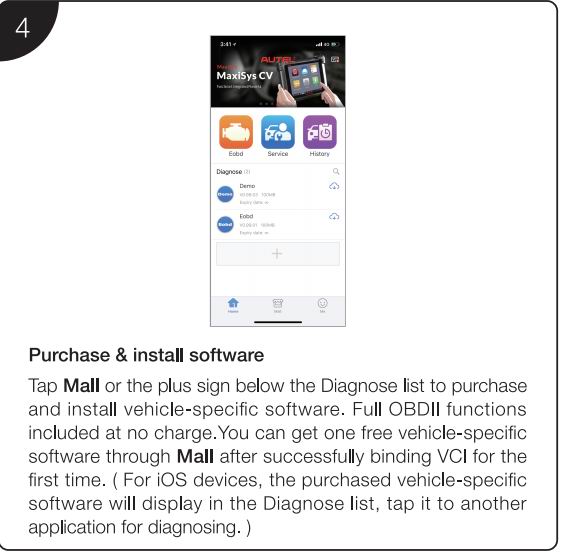
Software Update

Tap the Update application button from the Diagnostics Job Menu and the Update screen displays.

Check all available updates: a) if you want to update all the items, tap the Update All button; b) if you want to update one
or some of the items, tap the Update button on the right column of the specific item(s).

Tap Pause to suspend the updating process. Tap Continue to resume.

When the updating process is completed, the software will be installed automatically. The previous version will be replaced.

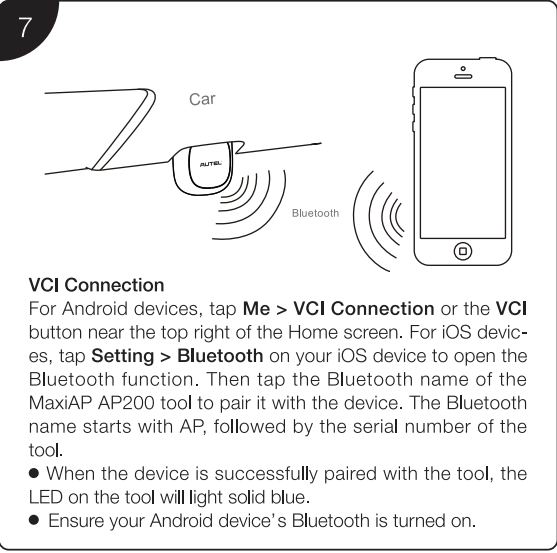
Wireless Data Printing

Print via PC

Run the MaxiSys Printer on the computer which is installed after the installation of Maxi PC Suite.

Click Test Print to make sure the printer is working successfully.

Tap Print on the toolbar of the Diagnotisc Tablet. A temporary document will be created and sent to the computer.

If the Auto Print option in the MaxiSys Printer is selected, the MaxiSys Printer will print the received document automatically.

If the Auto Print option is not selected, click Open PDF File to view all the temporary files. Select the file(s) you want to
print and click Print.

Print via APP


If a Wi-Fi printer is available, please purchase a Wi-Fi printer APP and install it onto your Diagnostic Tablet. By a simple click
on the Print button of a saved file on the Diagnostic Tablet, the file will be printed automatically

AUTEK IKEY820 Guide for Update and Active

1 What you need
1)Autek Ikey 820 device
2)PC with Win10/Win8/Win7/XP
3)USB cable
2 Install update tool on your PC
If the update tool “Autek Ikey 820 Update Tool V1.2” is already installed on your PC before, just skip this chapter. If not, you need to install it. If you do not have the setup file, please ask your distributor for it.

The Update Tool short icon
setup file of the update tool

Double click the setup file to start installing the update tool

update tool setup start window

Click ‘Next’ until the finish window, and click finish button to end the install program. There will be a shortcut icon on the desktop
Autek Ikey 820 Update Tool contains three parts including UPDATE, ACTIVATE and MESSAGE from top to bottom.

update tool setup finish window
Autek Ikey 820 Update Tool window

3 Update
Take the following steps to update Autek Ikey 820 device:
1)Connect device to PC through USB cable;
2)Open Autek Ikey 820 Update Tool in your PC that needs to be on internet;
3)Select the device in list and input the SN (usually completed automatically);
4)Click UPDATE button to start updating, wait until the updating completed.
There is something you need to notice in each step.
1)The device should display “USB SD DISK MODE” when connected to PC through USB cable, if not, please unplug the USB cable and plug again. Do not unplug the USB cable or exit from USB SD DISK MODE.
2)If Autek Ikey 820 Update Tool is not installed, please install it first, see detail in chapter 2.
3)The DISK and SN should display automatically if the device is connected to PC. If the DISK has no device to select, please unplug the USB cable and plug again. If the DISK has been selected, but SN is empty, please unplug the USB cable and plug again. If it’s still the same, please input SN yourself. The SN should start with “A-”.
4)It may take several minutes to update, it depends on the speed of your internet.
If there is any problem, it will display on message area, check according to the message and try again.
Here are the pages for updating. The SN is just an example, you should use your own SN.

wait until update successfully
Update successfully

4 Activate
Activation means add tokens to your device. If your device runs out of tokens or you want to increase the number of tokens in your device, you can use Autek Ikey 820 Update Tool to increase tokens.
Take the following steps to activate Autek Ikey 820 device:
1)Supply power to the Autek Ikey 820 device through USB/12V DC adapter/OBD.
2)Go to the ACTIVATE menu, you will see a page with steps to activate your device and the REQ CODE which is need in Autek Ikey 820 Update Tool to get the ANS CODE.
3)Open Autek Ikey 820 Update Tool in your PC.
4)Input the REQ CODE to the Autek Ikey 820 Update Tool and click ACTIVATE button, then you will get the ANS CODE
5)Press OK button on the device and there display the page to input ANS CODE.
6)Input the ANS CODE you get in the Autek Ikey 820 Update Tool. There are two different
7)Press OK button and the page will show the result, SUCCESS or FAILED.
8)You can check your tokens in the ABOUT menu if you activate your device successfully.
Here are the pictures to activate the device. All the SN、REQ CODE and ANS CODE are examples, just ignore them.

Select the ACTIVATE menu
The ACTIVATE page
Open Autek Ikey 820 Update Tool and input the REQ CODE
Get the ANS CODE
Input the ANS CODE
Confirm the ANS CODE you input
The result page, SUCCEED means activate successfully
Check the tokens in ABOUT page

OBDSTAR ODOMASTER VS.OBDSTAR X300M

Odo Master is a new Android based 5” tablet, specialized for cluster calibration. The device inherits the latest cluster calibration technology from OBDSTAR with various advantages of easy-to-use, wide model
coverage, fast operation and durable features which can meet the actual needs of different users such as automobile repair plants and fast repair shops.

① POWER/LOCK
② Main Cable Port
③ Charging Port
④ TYPE-C Interface
⑤ USB Interface
⑥ TF Card Slot
⑦ Touchscreen/Display Screen
⑧ Speaker
⑨ Serial Number Sticker

But what’s the difference with OBDSTAR ODOMASTER and OBDSTAR X300M ?

Here we list the hardware comparison and software comparison

First of all, hardware comparison

The operation system is different, ODOMASTER is support Android5.1.1 but X300M support Linux.

LCD is also different, odomaster is bigger than x300M

After all, odomaster is better than X300M

Second is software comparison

Quick Start about ODOMASTER

Why buy OBDSTAR X300 PRO 4 ?

OBDSTAR company newly released product X300 PRO 4 is mainly for immo locksmith workshop and personal use

It is same as OBDSTAR X300 DP PLus, but why should we buy X300 Pro 4 ?

X300 Pro4 is an all-purpose immobiliser programming device meticulously designed by OBDSTAR for locksmith. 
The device inherits the automobile immobiliser programming technology from OBDSTAR with a lot of advantages of early start, wide model coverage, fast programming speed and special features. 
All-in-one machine structure,more convenient to use full optimization hardware, running more stable,faster and smoother.

Top Reasons to Get X300 Pro 4

1.Short Update Cycle, Faster Update Speed
2.One Year Free Update, after that the cost is 300USD Per Year.
3.Add “Help” function in some part of vehicle.
4.Top 1 in IMMO Market
5.Support latest models to year 2018 and 2019

About the Help Function, we show some images to inform

OBDSTAR X300 Pro4 vs.X300 DP Plus:X300 PRO4 is IMMO version Key Programmer

OBDSTAR X300 PRO4,will be released in mid-October,is a IMMO version key programmer for all makes except super luxury car makes incl.Lamborghini,Maseratti,Ferrari,Bentley,Alfa Romeo,Abarth.

OBDSTAR X300 PRO4 will be a top choice of Locksmith comparing to X300 DP PLUS

This is OBDSTAR X300 PRO4

obdstar x300 pro4 vs.obdstar x300 dp plus in the aspects of immo function

Sum Up:
obdstar x300 pro4 is only for locksmith,it can do :
-Program keys for all makes
-Erase keys
-Read Key Number
-Read Pincode
-Read EEPROM

Besides,from the outlook/specification,obdstar x300 pro4 is the lite version of obdstar DP plus
obdstar x300 pro4 comes with smaller LCD,owns the same Android 5.1.1 operation system and wifi function etc.

In one word,obdstar x300 pro4 is a immo version key programmer, it must be cheaper than DP Plus

How to Set Launch X431 PAD III ?

Launch X-431 X431 PAD III is a brand-new high-end car fault diagnostic device developed by Launch based on Android system. X431 PAD III is the only device in the X431 family which supports 140 car brands and more than 2000 car models. LAUNCH X431 PAD3 is the only car scanner in the world which is built to IP65 water proof specifications, with dust proof design and which has passed droop test.

Customer usually said that it is difficult to set or use the device

Here we share how to set language,bluetooth and connection.

1.Launch X431 PAD3 V2.0 Handset
The handset acts as the central processing system, which is used to receive and analyze the
live vehicle data from the VCI connector and then output the test result.

2.VCI(Vehicle Communication Interface)
The VCI connector works as a vehicle communication interface device, which is used to
connect to the vehicle’s DLC (Data Link Connector) socket directly or via OBD II extension
cable to read the vehicle data and then send it to the handset via wireless (BT)
communication only works with the vehicle with 12V battery voltage.

Install the VCI Connector

1.Locate vehicle’s DLC socket:DLC Location The DLC (Data Link
Connector) is typically a 16-pin connector where
diagnostic code readers interface with the
vehicle’s on-board computer.
It is usually located on driver’s side, about 12 inches away from the
center of dashboard. See Figure .
In case no DLC is found, please refer to Automobile Repair Manual.

  1. Plug the VCI connector into the vehicle’s DLC (It is suggested to use the OBD II extension cable to connect the DLC and the VCI). Normally the power indicator of the VCI will light
    up.

How to Change Language for X431 PAD III ?

X-431 PAD III supports multiple languages. To change the language of the tool, please do the following:

  1. On the home screen, tap on .Settings>Language&Input>Languages
  2. Tap on “ Add a Language”, and then choose the desired language from the list.
  3. Tap and hold the desired language and drag it to the top of the screen and then release it,
    the system will change into the target language.

How to Register&Update Launch X431 PAD III ?

1.Launch APP: On the home screen, tap the application icon to launch it,a diaglog box similar to the following will pop up on the screen .

A. if you are a new user, top on” New Customer”.A to start your sign-up.
B. if you have registered to be a member, tap on “Existing Customer” to log in the system directly.

2.Create and APP Account: Tap on “New Registratin” in Figure A,input the information(items with* must be filled) and then tap on “Register”.Refer to Figure B.

3.Activate VCI Connector: Input the Product S/N and Activation Code(can be obtained from the password envelope),and then tap on”Activate”Refer to Figure C

4.Finish Registration: To download the diagnostic software,tap on”Yes” to navigate to the download page.Tap on” No” to download and install it later.
On the download page,tap on “Update” to start downloading until it is complete.

for more informations about X431 PAD III,please check following link

http://www.eobdii.fr/launch-x431-padiii-diagnostic-tool.html

CAN CLIP V183 CANNOT INDENTIFY ON WIN 7 32BIT (64BIT) Solved!!!

Problem:

I have installed can clip v183 software on windows 7 32bit and 64bit, but the system cannot identify the device. The indicator light flashed normally on the can clip for Renault. I also installed the driver manually, but only one light flashed. What’s wrong?

Eobdii.fr Solution:

If there’s only one indicator light flashing on your can clip v183 diagnostic interface, it indicated that you didn’t connect the device to your car well. Please connect again.

It’s normal when all 4 lights are flashing.

The red indicator light means “power on”.

The green light means “the signal is on”.

2 red lights and 2 green lights mean “the USB cable power supply & communication are normal, and the car EPC power supply & communication are normal”.

Customer feedback:

I connected can clip v183 to my car again, it worked, all the indicator lights flashed. I diagnosed my Renault car. Everything works great!

CAN Clip V183 for Renault Diagnostic Interface source:

http://www.eobdii.fr/v165-can-clip-pour-renault-avec-puce-complte-an2135sc-an2136sc.html

Hope it is a useless solution for you.

How to Use Autel AP200 on IOS and Android System via OBD ?

Autel MaxiAP AP200 is new released product from Autel company

It is the simplified version of MK808.

It is easy to take and operate.

But how to use it ? Here we share the steps.

I,Download & Install APP
Scann the QR Code to download the MaxiAP200 app.
Or serch for MaxiAP200 in APP Store or Google Paly to download
and install the app to your device.

II,Register&Log in

Open the MaxiAP200 app and tap Register near the top right of the screen

Follow the on-screen instructions to complete the registeration.

Log in with your registered email address and password.

Note:if you have a previously created Autel ID,please use it to log in no need to register.

III,Bind VCI

Tap Me>VCI Management. Scan the QR code on the MaxiAP AP200 Bluetooth dongle to put in the serial number.

Check if the email information is correct.Tap Bind to bind VCI

IV,Purchase & Install Software

Tap Mall or the plus sign below the Diagnose list to purchase and install vehicle-specific software.Full OBDII functions included at no charge.You can get one free vehicle-specific software through Mall after successfully binding VCI for the first time.(For IOS devices,the purchased vehicle-specific software will display in the Diagnose list,tap it to another applicationo for diagnosing.

V,Plug the connector of the MaxiAP200 tool into the vehicle’s Data Link Connector(DLC)

The vehicle’s DLC is generally located under the vehicle dash.

VI,Turn on the vehicle ignition to Key On,Engine Off postion

The LED on the tool will light sold green when connected.

VII,VCI Connection

For Android devices,tap Me>VCI Connection or the VCI button near the top right of the Home screen.For IOS devices,tap Setting>Bluetooth on your IOS device to open the Bluetooth function. Then tap the Bluetooth name of the MaxiAP AP200 tool to pair it with the device.The bluetooth name starts with AP. followed by the serial number of the tool.

When the device is successfully paired with the tool,the LED on the tool will light solid blue.

Ensure your android device’s bluetooth is turned on.

VIII,Your MaxiAP200 is now ready for use.

UPDATE

  1. The installed vehicle-specific software can be seen on the Home Screen.
    When a new version is available ,an update button will display.
    Tap the button to update the software.
  2. Tap Me>VCI Managementd>Detect firmware to update the firware if a new version is available.

Print
1.For IOS devices, the saved report can be printed via the Print function on the device.
2.For Android devices,download and isntall a third-party print app to print the saved report.

Note: the device needs to be connected with a printer to print

CGDI PROG MB TEST REPORT: GOOD FOR MERCEDES-BENZ GLK300 2011, C260 2013, AMG G63

CGDI Prog MB is the fastest Mercedes Benz key programming tool to calculate the password at present, support fastest Benz car key add and MB all key lost including 211,209,204,207,212,166,246,197,172,164 +, 216. Here have collected test reports on GLK300 (W207), C260 (W204) and AMG G63.

Purpose:

To check if CGDI Prog MB Mercedes-Benz key programmer can add new key or not

Test:

CGDI Prog MB add new key to 2011 Mercedes-Benz GLK300 (W207)

CGDI Prog MB program new key to 2013 Benz C260 (W204)

CGDI Prog MB write Mercedes- AMG G63 smart key

Steps:

Step 1: Calculate password of original Benz car key by CGDI Prog MB

Step 2: Save EIS Data when calculate password is completed

Step 3: Generate Key File with the EIS data saved

Step 4: Plug the new key into CGDI MB device to read and write

Result: All success!

CGDI MB Benz key programmer can add new key to Mercedes-Benz GLK300 2011/ C260 2013/ AMG G63.