Category Archives: Key Programming

This category covers all key programming solutions for BMW, VAG, Mercedes, Toyota and other vehicles.

You will find step-by-step guides, tested tools, key learning procedures and professional locksmith solutions.

Includes OBD key programming, all keys lost (AKL), EEPROM and advanced IMMO solutions.

MQB48 Toutes Clés Perdues – Guide Complet Programmation (All Keys Lost / AKL)

🚗 Qu’est-ce que le système MQB48 ?

https://i.ebayimg.com/images/g/TRMAAOSwhnNfNWUk/s-l1200.jpg
https://i.ebayimg.com/images/g/qzEAAOSw2vBi~-aM/s-l1200.png
https://www.golfmk7.com/forums/index.php?attachments%2F20191230_125306-jpg.162302%2F=
4

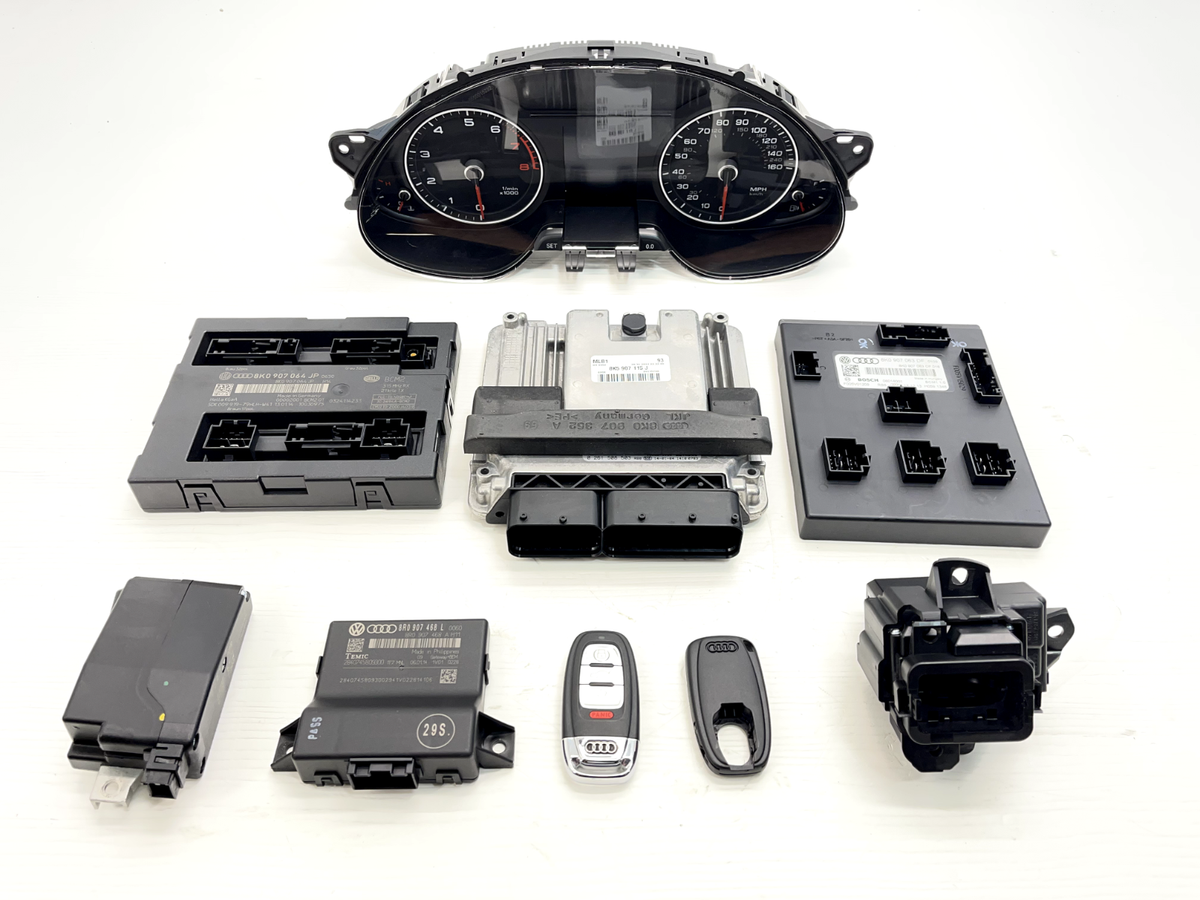
Le système MQB48 est la nouvelle génération d’antidémarrage (IMMO) utilisée sur les véhicules du groupe VAG :

  • Volkswagen (Golf 7, Passat B8, Tiguan)
  • Audi (A3, TT)
  • Skoda / Seat

👉 Ce système est hautement sécurisé et crypté, ce qui rend la programmation de clés plus complexe.


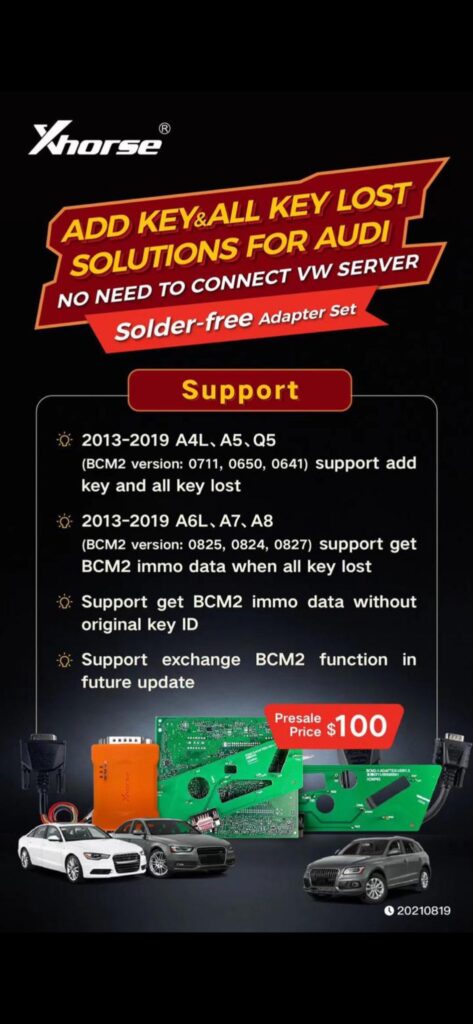
❓ MQB48 Toutes Clés Perdues (AKL) : Est-ce possible ?

👉 Oui, mais pas en OBD dans la plupart des cas.

Le mode All Keys Lost (AKL) signifie que toutes les clés sont perdues, ce qui nécessite :

✔ Lecture des données IMMO (EEPROM / BCM)
✔ Outils professionnels avec autorisation MQB48
✔ Procédure avancée (Bench ou démontage)


⚠️ Problèmes fréquents rencontrés

Les clients posent souvent ces questions :

  • Peut-on programmer MQB48 en OBD ?
  • Faut-il démonter le tableau de bord ou le BCM ?
  • VVDI Key Tool Plus supporte-t-il MQB48 AKL ?
  • Pourquoi une autorisation MQB48 est demandée ?

👉 Réponse claire : MQB48 est un système sécurisé → méthode classique OBD limitée.


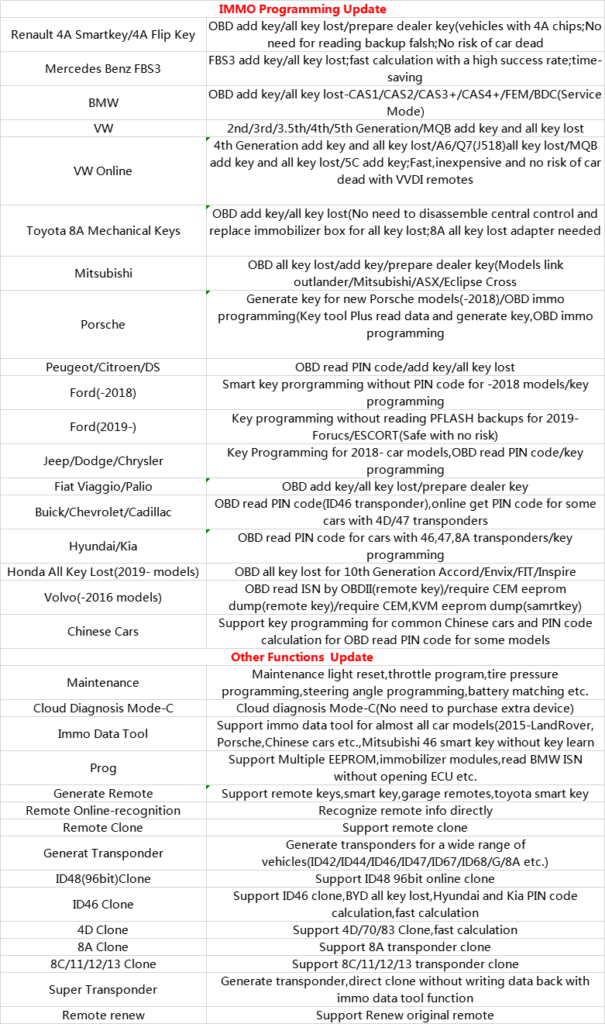
🛠️ Outils recommandés pour MQB48

https://www.bestkeysupply.com/cdn/shop/files/MQB48full_580x.png?v=1755721992
https://www.auteleshop.com/upload/pro/21101916346247979306.jpg
https://www.obdii365.com/upload/pro/24050817151562498911.jpg

🔹 VVDI Key Tool Plus (Xhorse)

✔ Support MQB48 avec autorisation
✔ Fonctionne avec adaptateurs MQB48
✔ Solution professionnelle locksmith

👉 Idéal pour usage avancé


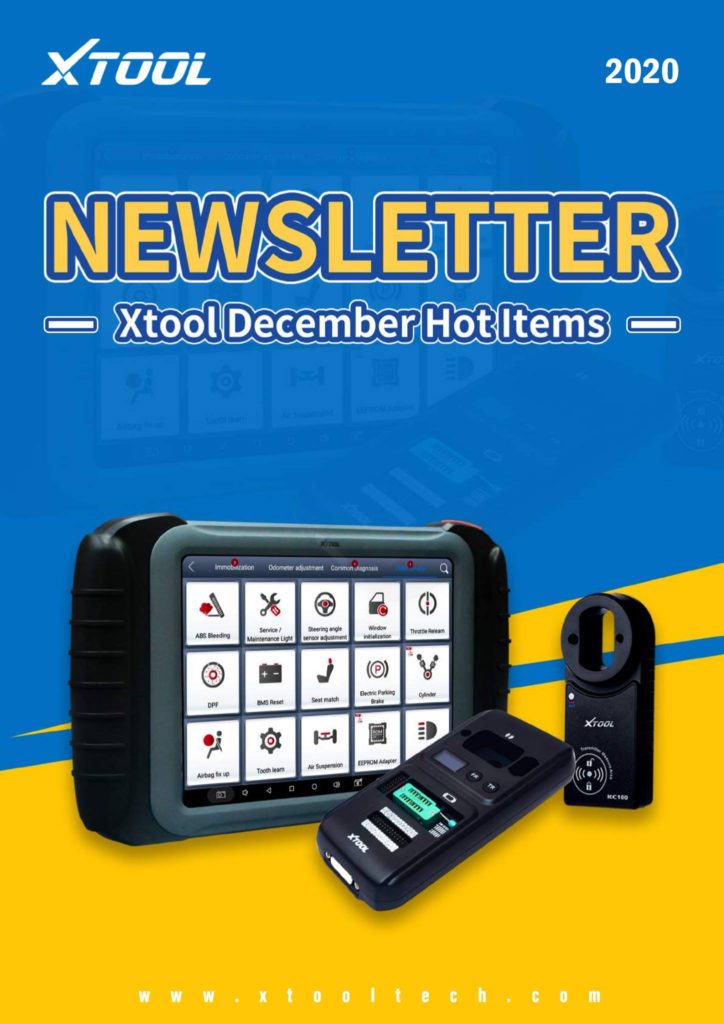
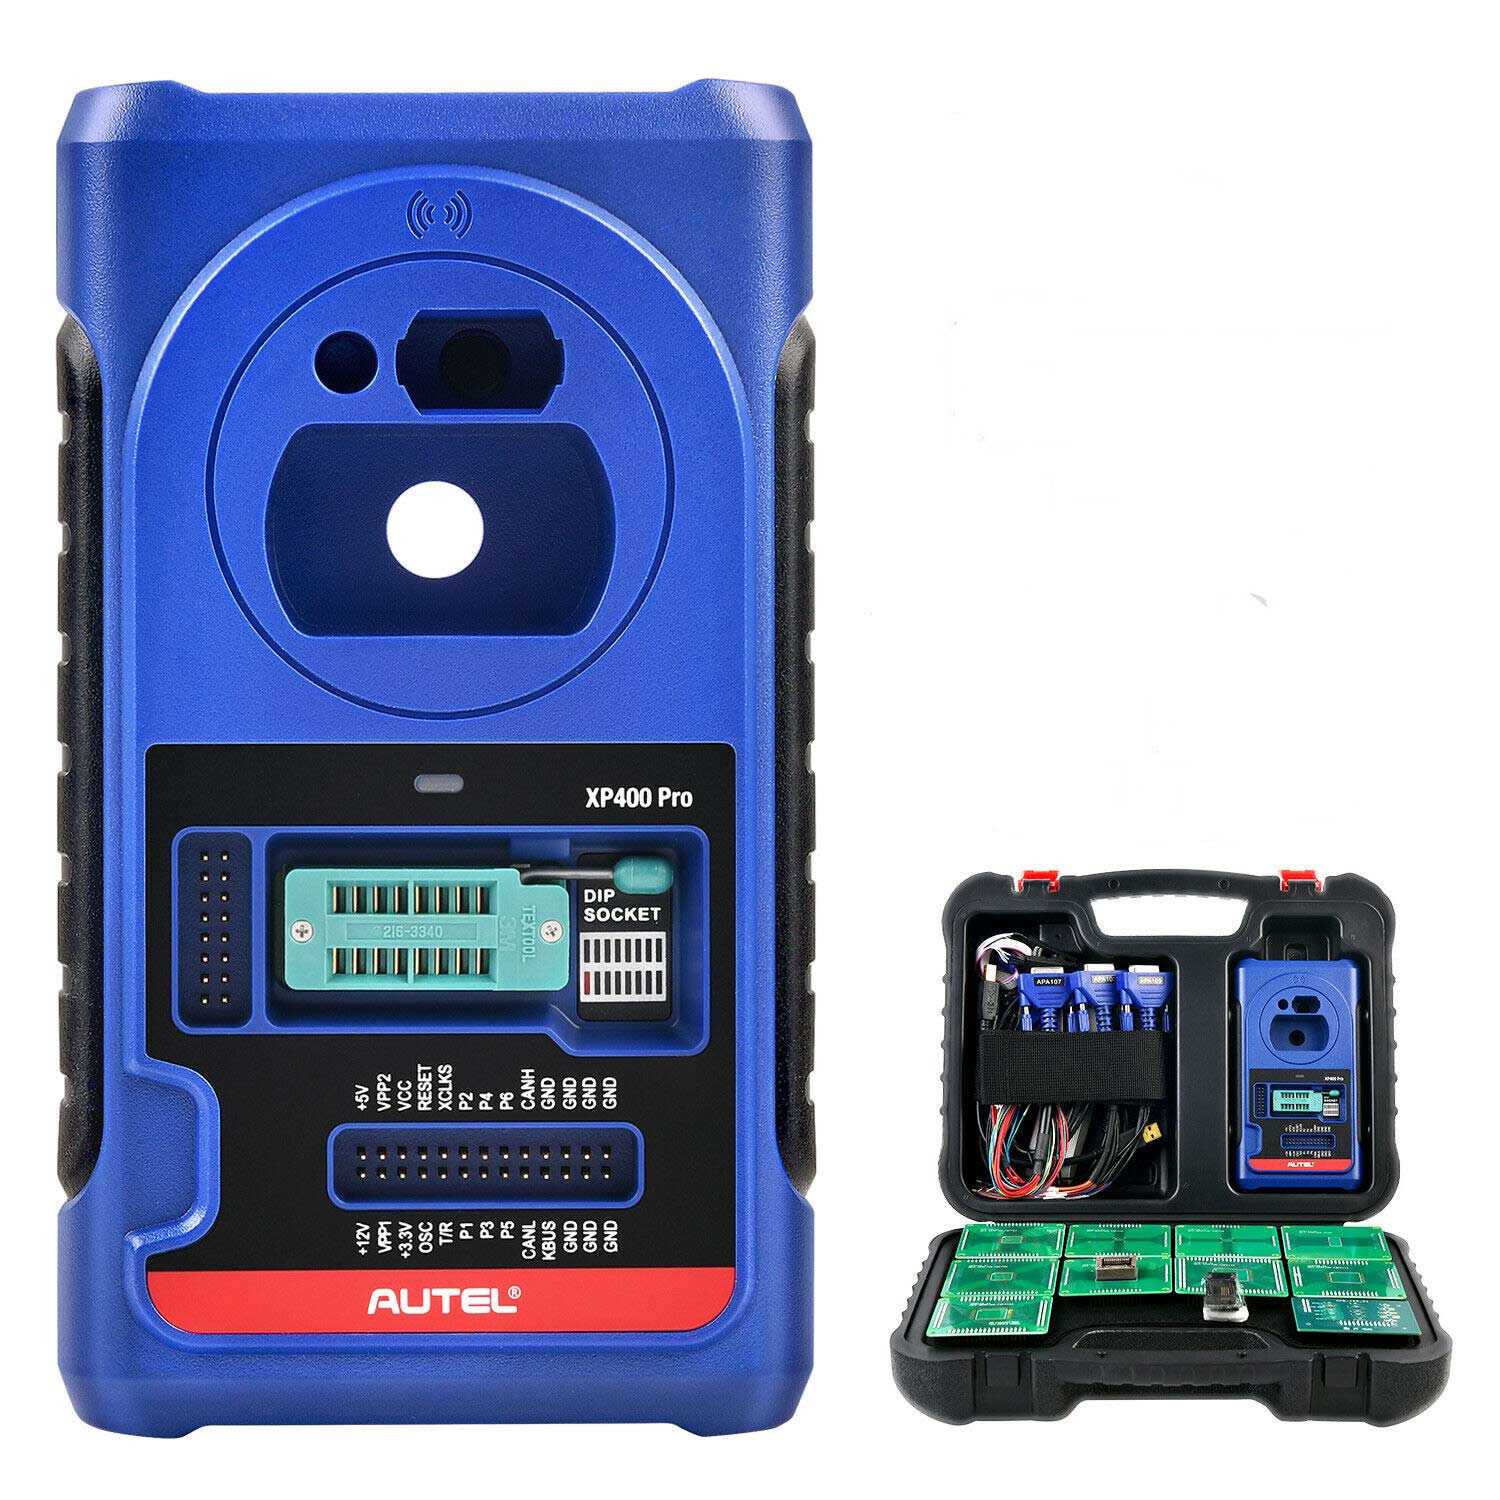
🔹 Autel IM608 II / IM508S + XP400 Pro

✔ Diagnostic + IMMO complet
✔ Compatible MQB avec accessoires
✔ Solution stable et fiable


🔹 OBDSTAR X300 DP Plus / G3

✔ Support EEPROM MQB48
✔ Budget plus accessible
✔ Nécessite adaptateurs spécifiques


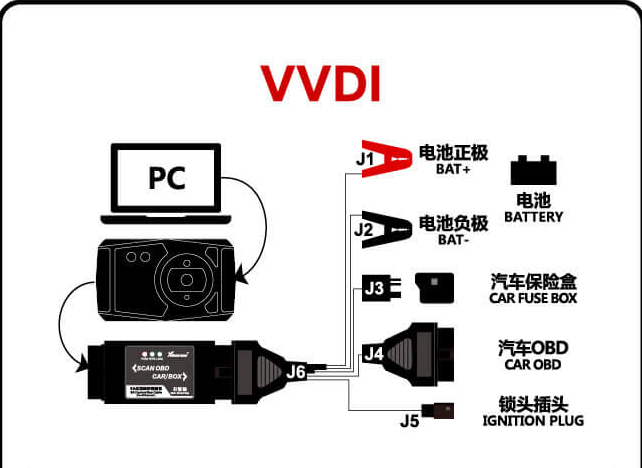
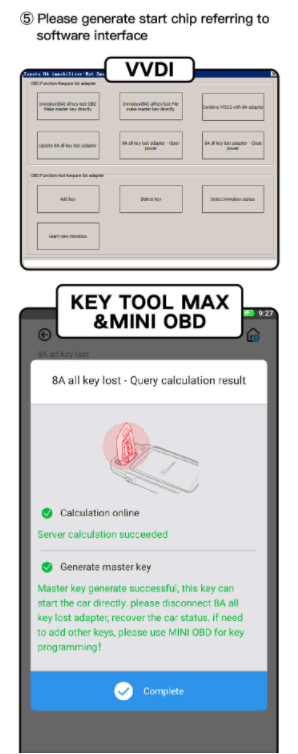
🔧 Méthodes de programmation MQB48


✅ Méthode 1 : EEPROM / Bench (Recommandé)

https://www.obdii365.com/upload/pro/25011017365589712194.jpg
https://ssl.images-ssl-jupiter.com/91049/2023/06/14/b/8/b83437da786abb87.jpg
https://www.xhorsevvdi.com/upload/service/23030816782600312615.jpg

Étapes :

  1. Démonter le tableau de bord ou BCM
  2. Lire les données EEPROM / MCU
  3. Générer la clé dealer
  4. Écrire les données
  5. Programmer la nouvelle clé

👉 ✔ Méthode la plus fiable


⚡ Méthode 2 : Adaptateur sans soudure

✔ Pas besoin de souder
✔ Utilisation plus rapide
✔ Compatible selon outil

👉 Solution avancée


❌ Méthode 3 : OBD

✔ Possible seulement avec clé existante
❌ Non recommandé en AKL


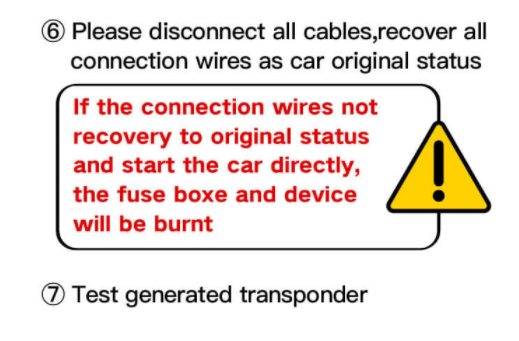
⚠️ Points importants à connaître

  • MQB48 ≠ ancien MQB
  • Autorisation (tokens) nécessaire
  • Risque de blocage BCM si erreur
  • Toujours utiliser une alimentation stable (12V)

👉 ⚠️ Non recommandé pour débutants

Vous ne connaissez pas la différence entre MQB et MQB48 ?
👉 Consultez notre guide comparatif ici


💡 Configuration recommandée (Pro)

👉 VVDI Key Tool Plus + adaptateur MQB48
👉 ou Autel IM608 II + XP400 Pro

✔ Taux de réussite élevé
✔ Compatible avec la majorité des cas
✔ Investissement rentable pour professionnel


🛒 Produits recommandés

👉 VVDI Key Tool Plus (MQB48 support)
👉 Autel IM608 II Full Kit
👉 OBDSTAR X300 DP Plus
👉 Adaptateurs MQB48


✅ Conclusion

La programmation MQB48 Toutes Clés Perdues (AKL) est :

✔ Possible
✔ Mais technique
✔ Nécessite outils professionnels

👉 La méthode EEPROM / Bench reste la solution la plus fiable.

How to Read and Write M35080 EEPROM Safely

How to Read and Write M35080 EEPROM Safely

XHORSE XDNP24GL D80/35080 适配器,用于连接 XHORSE KEY TOOL PLUS 和 XHORSE MINI PROG

🔧 Customer Problem

Many users ask:

Can Multi Prog read and write M35080 EEPROM?
Why can’t I erase the data completely?
Which adapter should I use?


🧠 What is M35080 EEPROM?

M35080 is a special EEPROM chip widely used in BMW dashboards for mileage storage.

Unlike standard EEPROMs, M35080 contains an incremental area, which means:

  • Data cannot be overwritten directly
  • You cannot simply write “0000” to reset mileage
  • Special tools or adapters are required

⚠️ Why It Is Difficult

Working with M35080 has several challenges:

  • Incremental memory cannot be erased normally
  • Wrong operation may damage data
  • Standard EEPROM programmers may fail

✅ Solution (Tested Method)

To properly read and write M35080, you need:

✔ Step-by-step:

  1. Use a dedicated M35080 adapter
  2. Connect to your programmer (Multi Prog or VVDI Prog)
  3. Read original EEPROM data
  4. Modify mileage data safely
  5. Write back using correct mode

🛠️ Recommended Tools

👉 Based on real usage, we recommend:

Xhorse Multi Prog + MQB48 玩具 13 件套 + 专用玩具 13 件套 + MQB-RH850 + GV ECU 玩具 + ECU GPT Boot AD 玩具玩具套件


💡 Pro Tips

  • Always backup original data before writing
  • Do NOT use standard erase functions
  • Use only supported adapter for 35080/D80

💰 Conclusion

For professional use:

  • Best choice → Multi Prog + M35080 adapter
  • Alternative → VVDI Prog

📲 Need Help?

👉 We provide:

  • Wiring diagram
  • Adapter selection
  • Remote support

👉 Contact us on WhatsApp before purchase

Introduction to the MQB48 Key Adapter and Chip Replacement

MQB48 Adapter includes:
MLB main unit replacement chip
Key information collector
Connecting cables

MLB Main Unit Upgrade Chip:
This chip is used to replace the original chip in the MLB main unit. After replacement, it will work with the information collector. Discard the original chip; no need to retain it.

Steps:
1.Disassemble the MLB main unit by removing the four case screws.

2.Remove the two screws on the circuit board.

3.Replace the chip on the circuit board.

4.Reassemble the device.

2.Usage Instructions
Key Information Collector:
Must be used with the MLB main unit; it cannot operate independently.

Connecting Cable:
Connect the adapter to the key. Follow the software instructions to remove the capacitor from the key and solder the connecting cable to the key.

Correct Connection Method for MLB Main Unit and MQB48 Key Collector:
Diagrams:


Important Notes:
The MQB48 adapter has strict power supply requirements during data collection. Use two separate USB cables to power the MLB main unit and the MQB48 collector. Do not use charging adapters.
The MLB main unit does not require 12V power.
Data Collection Time:
Good power supply: ~15 minutes for data collection, ~1 minute for immobilizer data calculation.
Average power supply: ~30–60 minutes for data collection, ~1 minute for calculation.
Connecting to a PC:
Use two USB cables.

Connecting to a Tablet:

Label 1: Use a Type-C splitter cable.
Label 2: Tablet power quality is insufficient. For better results, connect the OBD to the vehicle or supply external power to the OBD to maintain tablet battery.
Note: Tablets with a single Type-C port have poor power stability, leading to longer collection times and lower success rates. Strongly recommend using a PC.
After Successful Data Collection:
The MQB48 IMMO data will be generated. Load this data into the MQB35XX option to create and program keys.

VVDI-MLB Tool software: http://dl.xhorse.net.cn/product/vvdimlb/VVDI-MLB.exe

Powerful New Lonsdor FT08 PH0440B 312/314MHz Toyota Smart Key PCB Can Match the New 8A Key Car Models

Veuillez noter: nous avons mis à jour la version dans notre entrepôt, juste l’image du produit n’a pas été mise à jour

1..Mettre à jour la version de l’ancien “FT11-H0410C 433.58/434.42 “
2.Clé puissante
3.Peut prendre en charge le changement de MHZ en véhicule “MHZ”
4.Les anciens modèles de voitures clés 8A peuvent être appariés dès maintenant

for more informations,please click:https://www.eobdii.fr/lonsdor-ft08-ph0440b-3mhz-toyota-smart-key-pcb.html

Comment résoudre l’erreur « Fichier de configuration non existant » de VVDI Key Tool Max ?

Un de mes clients a récemment rencontré un problème avec le VVDI Key Tool Max
Il a informé qu’avant de se connecter à l’appareil, il devrait obtenir un code de vérification de Xhorse Serve
Mais lorsque vous avez terminé le numéro de téléphone et sélectionné “Envoyer”, il a reçu un message d’erreur “Fichier de configuration non existant”
Voici les photos qu’il a partagées

1.Ceci est le nouveau scanner VVDI Key Tool Max

2.Sélectionnez « Accepter d’entrer »

3.Sélectionnez “Commencer à définir”

4.Sélectionnez un wifi en bon état dans “Connexion Internet”

5.Changez le district en votre propre code de pays

6.Entrez le numéro de téléphone

7.Cliquez sur “Envoyer”

Voici le message d’erreur
Mais comment résoudre ce problème ?
C’est le problème du service Xhorse, lors de la réparation par l’usine Xhorse, tout ira bien à nouveau
Donc besoin que le client nous contacte à temps et nous vous aiderons à demander
Ou le client peut demander en ligne à Xhorse APPhttps://www.eobdii.fr/xhorse-vvdi-key-tool-max-remote-key-programmer.html

[Pre-order] Xhorse BCM2 Audi Solder-Free Full Adapters For Mini PROG/Key Tool PLUS/VVDI Prog/VVDI2

Xhorse BCM2 Audi Solder-Free Full Adapters For Mini PROG/Key Tool PLUS/VVDI Prog/VVDI2

Pre-order price 100USD to August 22th, if you need, order now
(After the price will be more than 100USD)
Shipping time is about September

BCM2 Solder-Free Full Adapters Support
2013-2019 A4L, A5, Q5
BCM2 version: 0711, 0650, 0641, support add key and all keys lost

2013-2019 A6L, A7, A8
BCM2 version: 0825, 0824, 0827, support get BCM2 immo data when all keys lost

Support get BCM2 immo data without original key ID
Support exchange BCM2 function in future updates.

How to Update Dolphin XP005 Key Cutting Machine?

How to Update Dolphin XP005 Key Cutting Machine?

Download windows driver if your system can not recognize device


Need only if upgrate kit can not do Frimware update / not recognize device
Also, can be download and install directly from Upgrate Kit


1, Turn on the Dolphin machine and connect it with the computer via USB cable, it will show the BIOS on the screen of Dolphin as below,


2, Run the upgrade kit and choose “Find Device”, it will be show a small window , choose “Yes” and will guide to install the driver


3, Choose the correct driver according to the machine as below, make sure you are shut down all protection before you install the driver, especially for windows 10 system

4.Install Windows driver for Dolphin


5.After the driver has been installed, run the “Upgrade kit” and choose “Find Device” again, to see if you can see the device serial number and firmware version, do not chose “Update” until it you can see that , because if you can’t find device ,which means the driver is not been installed, and the machine will be blocked if you update it without driver